• Please be sure to read the rules and adhere to them. Some banned members have complained that they are not spammers. But they spammed us. Some even tried to redirect our members to other forums. Duh. Be smart. Read the rules and adhere to them and we will all get along just fine. Cheers. :beer: Link to the rules: https://www.forumsforums.com/threads/forum-rules-info.2974/

Astro van cat conversion

Snowy Rivers

Well-known member
That combination should be workable.....Ponies can be a handful....A stud pony is certainly one....

Will be interesting to see who rules the roost......

I will not have a stud in the barn....We had a Saddlebred stud in for a while....and 11 mares.....OMG
That poor stud would go nuts any time there was a mare in heat....ALL THE TIME IT SEEMED.....
We have cut way back....We only have 2 boarded animals at present...

The daughters 34 year old paint mare is still around and she has a 30+ something Arab mare (Rescue horse) she had foundered some years ago.....Laminitis flare ups are a constant issue with her.....We keep her comfortable and she is just every bodies little buddy....

We have a early 30's Fjord mare too.....

I had two Shire mares but sold them after my stroke.....Love the big horses......My ride was a 17/3 hand beauty ...Black with 4 whites....Lottssa heavy feather.....She was a joy to ride.....Like a Cadillac....

Just a geriatric barn now.....Youngest horse is 19 now.....

Even the old barn cat is about done in...

The Daughter did drill team for several years.....Ahh yessss....Memory lane...
 

m1west

Well-known member
GOLD Site Supporter
That combination should be workable.....Ponies can be a handful....A stud pony is certainly one....

Will be interesting to see who rules the roost......

I will not have a stud in the barn....We had a Saddlebred stud in for a while....and 11 mares.....OMG
That poor stud would go nuts any time there was a mare in heat....ALL THE TIME IT SEEMED.....
We have cut way back....We only have 2 boarded animals at present...

The daughters 34 year old paint mare is still around and she has a 30+ something Arab mare (Rescue horse) she had foundered some years ago.....Laminitis flare ups are a constant issue with her.....We keep her comfortable and she is just every bodies little buddy....

We have a early 30's Fjord mare too.....

I had two Shire mares but sold them after my stroke.....Love the big horses......My ride was a 17/3 hand beauty ...Black with 4 whites....Lottssa heavy feather.....She was a joy to ride.....Like a Cadillac....

Just a geriatric barn now.....Youngest horse is 19 now.....

Even the old barn cat is about done in...

The Daughter did drill team for several years.....Ahh yessss....Memory lane...
My horse days were in the passed to, until the granddaughter, and now it got me interested in riding again. Trail riding at the cabin will be great. A horse is about the best ATV available. My sister has never stopped riding and just got a 2 year old Arabian mare that she is training to ride, she turned 60 yesterday.
 

Snowy Rivers

Well-known member
Yes indeed....."The outside of a horse is good for the inside of a man"

I really enjoyed riding my big mare.....We went on a trail ride one time with friends and I ended up taking my mare into the river for a swim.

That was great fun....other than getting soaked....and all my tack wet.....Missy Briar was a just a true Gentle Giant.....

My daughter used to take her to shows from time to time.....Big Azz giant always drew a crowd......

I have not been on horseback for several years......I also had a Paso Fino mare.....Goofy little critter with the funny gate.

Memories.....Good ones
 

Snowy Rivers

Well-known member
IQ.....WASSSSSAT...../ :lmao:

Today we are in the wrapping up stages on the front bulkhead.

All sealed all the way around..All the 22 bolts are in...

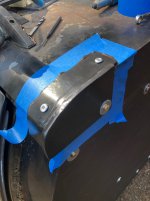
Both top corner caps are finished and painted.
The final step is to lay the caps in place....tape up the area to mask off the seal goop....Then goop the parts and get them on..

1 bolt and 2 pop rivets each side.....

This should pretty well wrap up the S-Wagon passenger pod for this juncture.....The mounts will be very straight forward and easy to do....

Sitting there this afternoon looking at the front of the cat.....Went over and grabbed the S-10 BLAZER far shroud.....

The factory shroud is almost a perfect fit in the tub.

I am thinking that it is time to get the radiator I have picked and get this area wrapped up.

The radiator needs to get it's mounting brackets built and the shroud set up so it lines up with the fan.

We have the 4.3 reverse rotation water pump (Serp drive)

This pump can fit right onto our 305 mock up engine and allow the fan to bolt up and the shroud to be set where it needs to go.

The front nose frame is the next on the hit list AND the mounting for the tilt front end.

Since the front cab is in place we can bolt the fenders back on as well as the original core support....

The tilt mounts need to weld to the core support and to the nose framing.....

I think this is a good place to move to as soon as the rear cabin wraps up......

As long as the weather holds we can move along with the radiator mounting and that stuff....

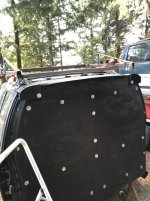
A few pics of the rear cabin and the top corner caps....
 

Attachments

  • Final tid bits3.jpg
    Final tid bits3.jpg
    470 KB · Views: 57
  • Final tid bits2.jpg
    Final tid bits2.jpg
    426.8 KB · Views: 65
  • Final tid bits1.jpg
    Final tid bits1.jpg
    451.4 KB · Views: 58

Snowy Rivers

Well-known member
Wrapped it up a bit ago....
Things went pretty much as planned.
Dug out the "Big Daddy" Rivet tool.....This bad boy will do 5/16 steel pop rivets......Ya gotta lay into them handles....The 1/4" aluminum rivets were no sweat....

Drill the holes, taped off the area, gooped thing good with VULKEM sealer and slapped it together.....

We will know how good it is after it rains.....
 

Attachments

  • Bulkhead finished4.jpg
    Bulkhead finished4.jpg
    359.9 KB · Views: 53
  • Bulkhead finished3.jpg
    Bulkhead finished3.jpg
    290.1 KB · Views: 53
  • Bulkhead finished2.jpg
    Bulkhead finished2.jpg
    366 KB · Views: 53
  • Bulkhead finished1.jpg
    Bulkhead finished1.jpg
    232.8 KB · Views: 53

m1west

Well-known member
GOLD Site Supporter
Wrapped it up a bit ago....
Things went pretty much as planned.
Dug out the "Big Daddy" Rivet tool.....This bad boy will do 5/16 steel pop rivets......Ya gotta lay into them handles....The 1/4" aluminum rivets were no sweat....

Drill the holes, taped off the area, gooped thing good with VULKEM sealer and slapped it together.....

We will know how good it is after it rains.....
coming along, that is the most aggressive pop rivet gun I have ever seen
 

Snowy Rivers

Well-known member
POP RIVET GUN ON STEROIDS.....
I did a bus conversion back in the mid 1980's So many places I needed to fasten walls into the structure and there was no way to use nuts and bolts as the area was all blind..........

I had a couple smaller ones and broke them on the heavy duty rivets.....Bought that big daddy and have had it ever since

They make air operated ones too....At the time the air guns were SPENDY....I opted for the big manual one....

The rivets I used on the roof corner caps were from a "Window regulator" install kit....1/4" heavy wall aluminum.
Nobody had a box of rivets.....At least not any 1/4" ones.....The parts guy had an idea and grabbed this kit and tossed at me...

Perfect....Had about a dozen assorted lengths, some bolts and nuts and SWEEEEEEEEEEET...About $8 ....

I needed 4 rivets to get the top caps handled....

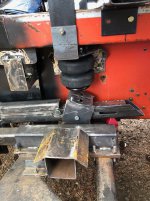
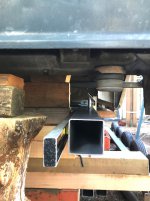
Looking at the rear end of the cat to get an idea of where the mounts are going to go.
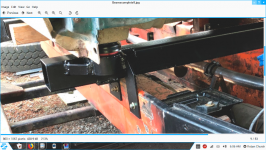
I need to add on an extension to the frame to pick up the rear most mounts on the S-Wagon....

A couple pieces of 4" channel angled up and to the rear and a piece of 4" box tube across the channels.....I want to level the cat up really well so we get a perfect setup on things.....The front mounts I just built off the cat tube and called it good....

Definitely going to have to rework the rear most exhaust pipes a bit....The current incarnation are tad short....
The pipes are not welded to the 2-1/2" main pipes at present.....Just need to lengthen the 4" tubes......

That can wait until the rear cabin and mounts are sorted out......

I was planning on doing overhead stacks to get the noise up and out away from the passenger area....I may still do that
We shall see......I really don't want all the exhaust below the cabs.....

Maybe some huge azz chrome stacks.......Too much bling
 

Snowy Rivers

Well-known member
Weather has gotten a bit nicer for a dew days.
Started cleaning out the S-Wagon of all the plastic trim, seat belts and other parts....Going to store this stuff for the winter....

With the rear gate/hatch opened up I really got to noticing the poor condition of the rear end rubber seals.

These are easy to change and now is a great time to get things all done before the weather goes sour....

Started snooping the usual haunts online and came up with ZERO....ZIP...NADA......After an exhaustive search I find that these two rubber seals are peculiar to the GEN 1 S10 Blazer/S15/Bravada .....The aftermarket has not picked these up.....

Found the original GM part ###### and searched the NOS parts outfits.....NOPE...

Ebay yielded a single hit....NOS still in the factory box $575.00 I DON'T THINK SO.......

Checked the stock at the local PICKNPULL.....They had a couple 1993 S Blazers.....We are only 10 miles away...
Grab tools and off we go on a damned fool crusade....AGAIN.....

Actually it was a very fruitful day.....NOT WITHOUT ISSUES....BUT REWARDING.

First rig is a four door and the hatch is stuck down.....Lift cylinders rusted....manage to get the thing open enough to pop the retainers off the cylinders and then prop the hatch up using a dash panel from some clunk close by.

Luckily the gate was not locked.....

BINGO.....Both seals are in very good shape..

I did not pack a lot of tools ....so things did get interesting....Our rear gate has phillips screws holding the trim panel on...
Sure enough the rig at the yard has torx head screws.....~!@#$ managed to pop the panel off the screws with brute force....

Get the seals all off......Great shape.


Sitting there looking at the prizes we have found and up the line a ways farther is another rig...SAME YEAR
This one not only has the seals that are pristine.....BUT IT HAS THE SWINGOUT SPARE TIRE CARRIER TOO.....

We scarfed up the seals ....I am drooling all over the tire carrier.....BUT DO NOT HAVE THE NEEDED TOOLS WITH US.

Our wagon had been equipped with a tire carrier....The bolts are in the body, but not the tail gate.

Our gate has been replaced (No bolt holes and inner brackets in the gate) Also the rear hatch window was replaced too....Ours had been a heated one....Replaced with a non heated.

A hinky story here that we will never know WHY......

So we head up to the office to pay for the rubber goods and then plan to run home to get more tools and come back to grab the tire carrier......The carrier can be easily modified to carry two of the cat tires/wheels


Get to the check out and am a bit curious as to what sort of $$$$ for the rubber goods.....

WOW.....For both sets of rear seals...$11.86 (Two main seals and two lower glass seals on the top of the gate)


While we are at the counter I asked the checkout clerk what that tire carrier would cost.....$21 was the reply.....OMG I am pumped now....

A quick trip to the ranch and back to the yard.....

Getting the tire carrier off was not all that bad.....Would have been a walk in the park if I had my entire tool box.

I had guessed poorly and forgot a couple needed tools....But we improvised and borrowed a wrench from a guy close by....

Sadly the mount in the tailgate for the latch bracket is spot welded in......We got all the hardware for the carrier.
Going to need the tail gate.....

Going to try and get back Weds and get the tail gate.....Gate is excellent shape....Judging by the paint and lack of dirt....I think it has been replaced not that long ago.....
The gate at the yard is far nicer than the one on our Wagon........Ours has a really nasty CHEVY full width emblem that has been rattle canned flat black.....

The yard part is plain with no badges...

So what was going to be a simple quicky grab some rubber and run turned into an afternoon adventure.......

I am not in any hurry on the tire carrier.....Not even...........But Just could not say no .......

Having a couple spare tire/wheels on board is a plus.....

And so it goes.......
 
Last edited:

Snowy Rivers

Well-known member
Taking a break from the cat for a couple days to get some stuff done around here before the weather turns nasty...

The Suburban needed a heater blower motor and a resistor replaced.
The Avalanche has a couple things that need to get fixed so it will pass the smog test...
The S-Wagon cabin is weather tight now I HOPE so I can tend to other responsibilities .....
 

Snowy Rivers

Well-known member
Burb all fixed....Got pressure washed today and I think she is ready for prime time.....

That old MULE is our go getum rig...

We haul hazelnut shells with the beast... (Drag a car trailer with a big dumpster on it) Grind the shells up and burn them in the pellet stoves....
So NO BURB...NO SHELLS... NO HEAT IN THE SHACK....Bad JU JU.

We should be good now...Heater all works fine now...

AVY needs the canister vent valve solenoid replaced and the throttle valve is popping PENDING codes.....I have the parts.

Daughter borrowed the rig a couple weeks ago....Their VW Jetta TDI took a puke.....So....when I get the Avy back...will fix it.

Did some measuring for the rear mount for the S-Wagon cabin to mount on the rear of the cat.

Really easy.....Just need to get these other fires put out....Well at least one is done.....

Still a few parts that need to come out of the S-10 Front cab section

The bucket seat inside forward mounts are spot welded to the floor...

This little project may be tomorrows task.....
Still a few other pieces that may be usable off the old front end body section......

The rear cabin mount will consist of a 1/8" x 4" x 4" tube and a couple pieces of 4" channel

The channel will weld to the rear frame extension where the OC-12 bolts in.....Can't do too much until we can get the body set up on the cat.....

Gonna see just what shakes out.....May be able to grab some timbers and set the body up on there soon....

I am getting real itchy ...wanting to see that bad boy sitting up on the cat......

All for now.....
 
Last edited:

chowderman

Well-known member
wow. that's a lot more exciting that me , , , waiting for my cake pan so I can soak the pitch/tar/gum/gook off my table saw blades.
got some serious ripping on the slate - sticky blade do not a easy rip make....
 

Snowy Rivers

Well-known member
That sounds like a mess.

Have you tried Brakleen on the blades......

That stuff will cut through most anything....

As far as exciting goes..?????/ I had not planned on being where we are at this time.....Having to fall back 30 and punt on the cab issues (S10 BLAZER TOO HEAVY) added a lot of work I had not planned on....

But....On the bright side, it has made handling the cab/s much easier and safer than it would have been otherwise....

Bottom line...We have a lovely rear cabin for the cat now .....
 

Snowy Rivers

Well-known member
Grabbed some time yesterday and got a bit of work done on the cat (Little bit)
Removed the large rear exhaust pipes to get them out of the way so the rear cabin can be sat up on the chassis. (With this now becoming "The family model" the rear most exhaust is going to get a slight modification.

The large 4" tubes (Last 3 feet) are not going to stay....The pipes just ahead of the 4" will get shortened about a foot and a new 2-1/2" section will get added that angles the pipes out the rear corners of the back cabin.....
Pics show the sections of the exhaust..... The 2-1/2" go inside the 4" and have adapter rings....THE RINGS were not welded in yet....Because of stuff like what we are doing now A MAYBE THIS MIGHT NEED TO CHANGE........

Getting the plan hatched as to how the mounts are going to set in and anchor to the 2100 chassis....

We have quite a bit of latitude on this one....Pretty much just fab shop 101......

Getting some serious timbers scared up and stuff ready to block the cabin up so it can sit securely and be nudged around a bit to get things all in line with the front cab...

I was going to do a lift yesterday, but somebody in the barn had not advised me that the Skid steer was nearly out of fuel....
With evening chores just ahead I decided to go grab fuel and get the Scat fueled up .....Sunday will be fine to lift the cabin.....

Another issue that MUST be considered is the location for the air tanks...(Air over oil for the steering) We have 3 nice air tanks that have to go someplace ....Under the cabs is perfect....Quite a bit of space in the tub and just below the cabs....But it all has to fit and be accessible to plumb things..

I have 3 air tanks off of a semi truck that will do nicely........

The fuel tanks get into the act as well....The tanks are going to mount in the rear wheelhouse area....one on each side......There is also a cab mount just inside of the front end of this area.....So that package needs to be eyeballed well to be sure the mount does not get in the way of the where the tanks go......

So for now...I want to get the rear cabin sitting CLOSE to it's final location and stable to it can remain for a period of time.

Once the elevation is figured out......the front and rear mounts and go in.....The center mount on the rear cabin is currently being used as the rear lifting rig location....Going to need to be able to get the lift rig out, build the center mounts then be able to get the lift rig back in to remove the cabin.......

The rear most cabin mounts go just a little bit aft of the current rear most ends of the large exhaust tubes.....Hence the need to move things

The rear mounts look like they can be a simple box tube sitting on a pair of channels that weld to the lowest portion of the frame.....Just outside of the area the OC12 bolts in......Channels about 18" long....cut on an angle to allow the box tube to sit parallel to the body and the mounts to snuggle up in that area such that human hands can get tools on them....Plenty of room back there.....So these mounts should be a piece of cake.

Still not 100% on actual configuration....May add a deep channel stand off similar to the rear mounts on the front cabin (Piccy has good view)

This design looks good....But took way too much time to machine out the access hole and get it together...
I want the rear mounts to be a simple fabrication......

Possibly a piece of the same size tube but with a pair of angles welded on as the legs to support the mount.

We shall see....... The front cab mounts (A pillar) are an integral part of several components.....The rear ones were just GET THE HEIGHT RIGHT AND CALL IT GOOD....Also...Lets use whats laying around mentality probably got into the mix as well


The front cab A PILLAR mount is also tied into part of the air bag brackets .....Just all came together.

Everything always seems to be involved with something else.....I am trying hard to keep from making more issues down the road on the mounting of the rear cabin.


Later troops
 

Attachments

  • REarcabmount2.jpg
    REarcabmount2.jpg
    280.2 KB · Views: 51
  • LH BAG PERCH2.jpg
    LH BAG PERCH2.jpg
    461.3 KB · Views: 58
  • RH ASSEMBLY NEARING COMPLETION6.jpg
    RH ASSEMBLY NEARING COMPLETION6.jpg
    353.5 KB · Views: 53
  • Frontmount3.jpg
    Frontmount3.jpg
    282.4 KB · Views: 52
  • EXHAUSTDONE4.jpg
    EXHAUSTDONE4.jpg
    333.3 KB · Views: 57
  • EXHAUSTDONE3.jpg
    EXHAUSTDONE3.jpg
    445.7 KB · Views: 60

Snowy Rivers

Well-known member
Hit the depot and grabbed a couple 4 x 6 fir beams to cut up for blocking the rear cabin up off the cat frame.
Headed over to Harbor freight and got a slinky hose to connect my air hoist so I did not have to crawl up on the ladder to connect and disconnect the main air hose while moving the body onto the cat.

I think we are pretty close to ready to get that bad boy onto the kitty cat.....

Gonna take a little fiddling about to get it spot on....The 4 x 6 timbers will give us plenty of room and be real steady while things are being lined up.

The little 1/2 ton air hoist is very nice for very slow motion....either up or down.....

The skid steer hydraulics are OK for some stuff, but for delicate work they are like using a sledgehammer to install cabinet trim.

Just not enough fine control.

I have used the air hoist to remove and replace many engines.....Just a sweet tool...

Just use the bucket on the Scat Trak as an anchor.....Better than a Tree....It moves around :thumbup:
 

Attachments

  • Blocking3.jpg
    Blocking3.jpg
    575.7 KB · Views: 63
  • Blocking2.jpg
    Blocking2.jpg
    468.8 KB · Views: 60
  • Blocking1.jpg
    Blocking1.jpg
    490.6 KB · Views: 62

Snowy Rivers

Well-known member
OK
The CATTIN DAY STARTED EARLY TODAY

Got the skid steer all ready and we hooked up the lift rig and gave it a go......

Got the S-Wagon sitting up on the cat....

Had breakfast....then spent the rest of the day wiggling and tweaking the cabin into position.

All the locations are within a 1/16" where possible.....As good as it is gonna get.

Now the next thing is to get the mounts built and installed.....


Some pics

Gonna hit the rack....more info in the morning....
 

Attachments

  • S MOUNTED1.jpg
    S MOUNTED1.jpg
    483.6 KB · Views: 68
  • S MOUNTED2.jpg
    S MOUNTED2.jpg
    419 KB · Views: 66
  • S MOUNTED3.jpg
    S MOUNTED3.jpg
    494.6 KB · Views: 63
  • S MOUNTED5.jpg
    S MOUNTED5.jpg
    495 KB · Views: 65
  • S MOUNTED6.jpg
    S MOUNTED6.jpg
    1 MB · Views: 68
  • S MOUNTED4.jpg
    S MOUNTED4.jpg
    256.3 KB · Views: 65

Snowy Rivers

Well-known member
AHHHHH....

A good night sleep does wonders.

The mounts for the rear cabin are pretty straight forward....EXCEPT FOR THE REAR MOST MOUNT.
There are some good things and some bad things back there......

The overhang off the back of the cat frame is enough that getting a bracket arrangement is going to be an interesting layout.

What we end up with MUST be removable to allow the cabin to come off without having to raise the cabin more than about 6-8 inches above the nominal position it is in when it is mounted.

The elevation of the rear mount pads in the body are quite a bit higher than the front mount.......I spent a couple hours late yesterday sizing up a plan......Several ideas came up.....but keeping things simple and light weight were the main focus.

Looking like the easy way is going to be to add a pair of square tube extensions off the rear of the cat chassis and then bolt on a pair of risers for the mount cushions to sit in......

The middle pair of mounts are much more straight forward.....Two simple stands that bolt to the upper flange of the cat tub and carry the rubber mounts........

The very front mount as I mentioned before will be very similar to the mountings on the front cab.........

A 4" X 4" X 1/8" box tube across the upper edge of the cat chassis (62" long) with an angle mounting flange and then risers to place the rubber mounts where they need to be......

Piccy shows the rear beam and riser under the front cab.....

There are no two mount locations on the cabs of either the S10 BLAZER or the PICKUP that are at the same elevation....So everything has its own set of interesting complications to mount it.......

The factory frame shape of the S-Wagon being full of humps and valley's to fit the axles and such placed all the body mounts at far different elevations from one another.....So the "IMAGINEERING" gets very interesting.


My original plan of a few weeks ago was to mount the rear cabin up to a foot higher than the front.....Well.....In reality this would make the mountings a bigger challenge....and the thing would look like a big spider on stilts......
Doable ????? YES....But would require a lot more steel to build the structure strong enough to hold things.....

So at present things are looking like we will keep the body lines matching the way they did from the factory.......
This thing is starting to get up into TUCKER ELEVATION....:thumbup: And we are not done yet....

As mentioned....The front mount is a piece of cake.....Front there on back things get interesting....

Another issue that has surfaced is all the blocking required to get things set up to mount it..

During any mount/dismount of the rear cabin there will need to be the need to have the ability to HOLD the body stable while the rear most mounts are fastened in.

The Skid steer does not have a positive lock on the bucket curl/tilt action and will start to bleed off when the engine is off.

This make it necessary to be able to sit the body on the cat and be able to remove the lift rig and have things secure....

Some positive Locating pins are on the negotiating table....(Urethane parts that are used on big rig hoods to align them come to mind)

After the S-WAGON cabin is mounted this time I am thinking that at the least the front area (Not sure exactly where yet) will get a pair of alignment pins to locate the cabin exactly.......This will make future on/off cycles far easier without the need to fool around with straps and tape measures to get things located.....

Positive location devices at the front on both sides will make things a walk in the park........This operation will still require two people to do.....The operator in the Skid steer simply can't see what is needed to safely sit the body on.

But being able to line up a couple of tapered urethane bumpers will do it...

More when I have something....


OH YEAH.....With the elevation and weight on the rear cabin....We were not able to use the air hoist.....It eats up too much height

We would need to use the extension in the bucket and this places the leverage too far out for the weight...

So we used the chain off the front edge of the bucket ......IT WORKS.....Just not as easy to get fine adjustments up and down...
 

Attachments

  • REarcabmount2.jpg
    REarcabmount2.jpg
    280.2 KB · Views: 48
Last edited:

m1west

Well-known member
GOLD Site Supporter
AHHHHH....

A good night sleep does wonders.

The mounts for the rear cabin are pretty straight forward....EXCEPT FOR THE REAR MOST MOUNT.
There are some good things and some bad things back there......

The overhang off the back of the cat frame is enough that getting a bracket arrangement is going to be an interesting layout.

What we end up with MUST be removable to allow the cabin to come off without having to raise the cabin more than about 6-8 inches above the nominal position it is in when it is mounted.

The elevation of the rear mount pads in the body are quite a bit higher than the front mount.......I spent a couple hours late yesterday sizing up a plan......Several ideas came up.....but keeping things simple and light weight were the main focus.

Looking like the easy way is going to be to add a pair of square tube extensions off the rear of the cat chassis and then bolt on a pair of risers for the mount cushions to sit in......

The middle pair of mounts are much more straight forward.....Two simple stands that bolt to the upper flange of the cat tub and carry the rubber mounts........

The very front mount as I mentioned before will be very similar to the mountings on the front cab.........

A 4" X 4" X 1/8" box tube across the upper edge of the cat chassis (62" long) with an angle mounting flange and then risers to place the rubber mounts where they need to be......

Piccy shows the rear beam and riser under the front cab.....

There are no two mount locations on the cabs of either the S10 BLAZER or the PICKUP that are at the same elevation....So everything has its own set of interesting complications to mount it.......

The factory frame shape of the S-Wagon being full of humps and valley's to fit the axles and such placed all the body mounts at far different elevations from one another.....So the "IMAGINEERING" gets very interesting.


My original plan of a few weeks ago was to mount the rear cabin up to a foot higher than the front.....Well.....In reality this would make the mountings a bigger challenge....and the thing would look like a big spider on stilts......
Doable ????? YES....But would require a lot more steel to build the structure strong enough to hold things.....

So at present things are looking like we will keep the body lines matching the way they did from the factory.......
This thing is starting to get up into TUCKER ELEVATION....:thumbup: And we are not done yet....

As mentioned....The front mount is a piece of cake.....Front there on back things get interesting....

Another issue that has surfaced is all the blocking required to get things set up to mount it..

During any mount/dismount of the rear cabin there will need to be the need to have the ability to HOLD the body stable while the rear most mounts are fastened in.

The Skid steer does not have a positive lock on the bucket curl/tilt action and will start to bleed off when the engine is off.

This make it necessary to be able to sit the body on the cat and be able to remove the lift rig and have things secure....

Some positive Locating pins are on the negotiating table....(Urethane parts that are used on big rig hoods to align them come to mind)

After the S-WAGON cabin is mounted this time I am thinking that at the least the front area (Not sure exactly where yet) will get a pair of alignment pins to locate the cabin exactly.......This will make future on/off cycles far easier without the need to fool around with straps and tape measures to get things located.....

Positive location devices at the front on both sides will make things a walk in the park........This operation will still require two people to do.....The operator in the Skid steer simply can't see what is needed to safely sit the body on.

But being able to line up a couple of tapered urethane bumpers will do it...

More when I have something....


OH YEAH.....With the elevation and weight on the rear cabin....We were not able to use the air hoist.....It eats up too much height

We would need to use the extension in the bucket and this places the leverage too far out for the weight...

So we used the chain off the front edge of the bucket ......IT WORKS.....Just not as easy to get fine adjustments up and down...
And Snowy finally gets mounted. Engine sounds in the near future
 

Snowy Rivers

Well-known member
Spent time sitting under the back of the Kitty looking and thinking about how to pic up a good mounting for the rear two sets of mounts....

I decided on building a tubular "Bridge" assembly that will fasten to the cat tub just forward of the center mounts (Near center of wheel house) and be nearly level with the lower edge of the forward part of the cabin.......Then extend rearward to a point just aft of the rear most mount.....

I can weld a box tube onto the exterior of the lower portion of the cat frame where the OC-12 mounts.....This will provide a good span across the area and have a minimal amount of tube cantilevered beyond the back of the cat to support the rear body mounts....

Each mount will have a separate stool that the rubber mount goes through and it will bolt to the bridge assembly.....

Likely weld the bridge assemblies to the cat frame and call it a day.......

This design will allow the rear most mounts to support the cabin while the middle mounts are removed and the lifting rig is installed for removal/mounting..

Looks like 3/16" X 2" X 4" tube 42" long.....The tube bridges will sit on a slight angle as the factory mounts are just that....slight skew to the locations......


The rear of these tubes can be anchor points for the veranda......

Without a Veranda ....Getting the tailgate / hatch open will be a tough call...

The veranda can be light tube with expanded metal welded to it......A safety railing will be needed with the ability to open a portion in the center to allow loading items in the cat......Sounds good.....

With the cabin sitting spot on....Best shot is to build the bridge assemblies on site to fit....

Get some good heavy tack welds to hold.....then finish it after we yank the cabin back off for further work....

Gonna be the weekend before I can get the materials and start building these items.....

WEATHER GONNA GET WET THE NEXT COUPLE DAYS......Then more good weather for a while.....The good weather is going to go away soon.....I would like to get the mounts wrapped up before we get shut down for the long cold dark....

This design is about as simple, yet rugged as I can see possible without going to great lengths and added weight.....This will also allow easy removal of the cabin.....All the mounts will be easily accessible with tools and the rear ones are A SIT IN THE CHAIR AND JUST DO IT THING....

This set up will allow bolting the lift rig back on and not having to get out bunched of blocks to hold up the rear cabin while preparing the lift rig..

The stools that actually fit the mounts will fasten to the bridge assemblies and come off easily at the last moment once the lift is holding the cabin.....

I really do not like all the bunches of timbers and tree parts that I have stacked up holding this thing....

It is solid enough.....But Once the job it done all the blocking will likely get used elsewhere....And be unavailable if needed.....

So if we don't need all that material...."More Gooder"

So that's it for today.....
 
  • Like
Reactions: PJL

Snowy Rivers

Well-known member
Going to grab the materials tomorrow to build the rear cab mounts....

Decided to stick with the same materials we used up front...1/8" x 3-1/2" x 3-1/2" box tube....This will keep symmetry in things....

The local yard wanted waaaaaaaaaaaaaaay more $$$$ than I wanted to cough up....

Shop across town has the same material for about 1/3 less.....Well worth the drive ..
 

Snowy Rivers

Well-known member
Got a good shot of rain last night....Checked out the S-Wagon for leaks around the new front bulkhead....

With the carpet out and the floor bare, the interior trim removed its easy to see anything wet..

RH side had two puddles on the floor.....COULD NOT SEE WHERE THEY CAME FROM....

TURNED THE HOSE ON IT GOOD....Then the drips showed up.....

After looking things over it looks like a cracked seam at the upper pinch weld area right at the B Pillar......

The original Rubber gutter fit all along hat area and now that the entire front is gone....so is the gutter.

The seam has a good sized crack that would have been covered by the rubber gutter ......

This all seems like an existing issue that is 30 plus years in the making.....

The carpets were wet on that side too when I took things apart..

Some dry weather coming up.

Will use soap solution and an air nozzle inside to check this out......

Should be an easy fix.....Since the LH side is fine.....Good bet the carck is the culprit
 

Snowy Rivers

Well-known member
Weather is improving....I got pretty much all of the tube steel to construct the supports for the rear cabin.

Over the next couple days we should be able to get some action going on this stuff......

Still some imagineering to get the final design fully on paper and ready to start putting it together......

Been a long day...(Started at 3 am....DON'T ASK WHY)

This cat is heading for the rack.......
 

Snowy Rivers

Well-known member
Got after the rear cabin mounting bridges.

Was interrupted many times .....but did get some parts cut and moving ahead.

The bridge assembly is going to be a bolt in assembly just to make sure we do not screw up and make life tough later....

Looking like the air tanks can mount across the two bridges.....We shall see how this works out......

The rear most upright bolts onto the lower portion of the frame just behind the OC12....

Going to have to jack the body up a tad and remove the timbers and shorten them up to allow the lower brackets and uprights to fit.....

Once the bridges are in....then we can fab up the "STOOLS" that the actual rubber mounts fit into....
 

Attachments

  • Rearmounting bridge4.jpg
    Rearmounting bridge4.jpg
    377.6 KB · Views: 42
  • Rearmounting bridge3.jpg
    Rearmounting bridge3.jpg
    345.4 KB · Views: 43
  • Rearmounting bridge2.jpg
    Rearmounting bridge2.jpg
    331.3 KB · Views: 41
  • Rearmounting bridge1.jpg
    Rearmounting bridge1.jpg
    437.6 KB · Views: 42

Snowy Rivers

Well-known member
Weather is holding for now......Lovely working weather..
Getting materials cut, machined and welding started on the rear mounts.

The plan is actually starting to look better as it comes together.
Ya never quite know just how a lot of this stuff will end up when ya get a good look at whats needed Vs the materials that are available......

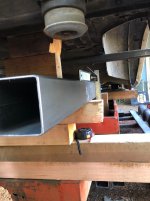
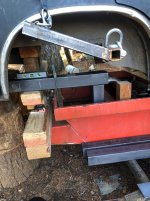
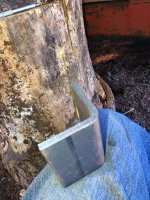
I had a chunk of heavy wall tube.....This makes nice pockets for the rubber mounts..........Needed some supports to hold the pockets that will allow the rubber parts to be assembled......Found a couple pieces of Formed angle at the steel shop ....Somebody goofed on a blue print and the parts were made backwards......So these long pieces were in the low cost stock rack...

Nice rounded corner and a perfect size to support the pocket.

The rear mount on the S-Wagon is offset outboard from the middle mount....Decided to keep the bridge assembly straight and just add an extension pad to allow things to be supported where needed..

A nice piece of the formed angle can weld onto the tube and support the outside of the pad..

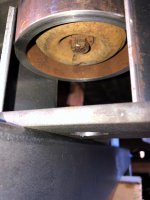
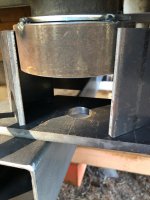
Had to drill a 1-1/8" hole in the pad to get the mount bolt in and out......

Trying to keep the height of the stools as low as possible and still allow things to fit well.....Also this plan has allowed the top of the two cabs to stay flush instead of the step up I had considered......

Also this design will make adding steps to get up off the tracks and into the cabs much easier to build.......

The one mount I had thought would be the easiest.....THE FRONT ONE ON THE REAR CABIN....Has turned out looking like it will be the toughest one.

The B PILLAR mount has the center bolt on the mount directly over the top rail of the 2100 tub.....

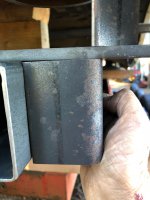
While not a deal breaker.....this little item has changed how that mount will be built......In order to be able to get the bolt in/out the mounting will need to be cantilevered off the side of the cross tube to get elevation needed and still have access to the lower mount rubber, the heavy retainer washer and the bolt...

The other option is to weld the pocket for the mount directly to the cross tube.....This will require cutting an access hole in the tube on it's upper face to allow getting the lower rubber part of the mount installed and getting the bolt in/out

Damned Chinese puzzle on this one....

The location side to side is the same as the rear mount on the front cab.....But that mount required a much taller stool....So their was not an issue with the bolt hitting the top of the cat tub.....

I had originally planned to make the stools for the rear mount bridges removable to allow the cabin to be removed without needing a lot of lift to get over the rear mounts......But now it looks like the entire bridge assemblies can be unbolted and removed easy enough......

IT IS POSSIBLE....That there will be enough lift available to get up and over the rear mounts without removing them.....But we will have the option of removing the bridges if need be......

Slow process.....But building this stuff on location will assure a perfect fit......

I am finding that things are not always the same side to side on the S-Wagon.....Close....but sometimes little discrepancies show up......That is why ya find shims from time to time under the mounts...AND WE DID DURING THE TEAR DOWN.....

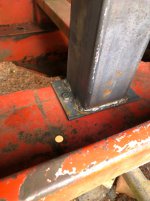
In the one piccy the lower rubber and the heavy washer are sitting between the angle supports.....Just to make sure there was enough room to get things in before welding stuff......

Some pics
 

Attachments

  • Rear mounts4.jpg
    Rear mounts4.jpg
    432.8 KB · Views: 50
  • Rear mounts1.jpg
    Rear mounts1.jpg
    513.3 KB · Views: 47
  • Rear mounts3.jpg
    Rear mounts3.jpg
    463.6 KB · Views: 47
  • Rear mounts5.jpg
    Rear mounts5.jpg
    506.9 KB · Views: 43
  • Rear mounts6.jpg
    Rear mounts6.jpg
    907.2 KB · Views: 44
  • Rear mounts7.jpg
    Rear mounts7.jpg
    599.1 KB · Views: 44
  • Rear mounts8.jpg
    Rear mounts8.jpg
    916.3 KB · Views: 49
  • Like
Reactions: PJL

Snowy Rivers

Well-known member
Got some welding done on the Bridge assemblies.....A slow process of getting some of the blocking moved to allow access to the structures...

Tedious place to work while trying hard to maintain the location of the body to cat frame in alignment......

Sorted out the issues with the front mounts on the S-Wagon .....The plan finally came together yesterday.......

A similar type of cantilevered mount not much different than what is up on the front of the forward cab....
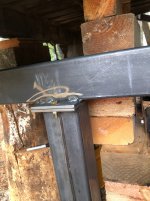
The biggest issue is the fact that the mount bolt center line is directly over the top of the Cat tub top side rail......But the elevation gives enough room to get the bolt into the mount AND GET A WRENCH ON IT....

Piccy is the RH side front cab mount.

The front mount on the rear cabin is at a slightly higher elevation.......But the idea allows gaining access to get the rubber biscuits in place and the bolt in.....

I am not a particular fan of the cantilevered mount......But a brace bolted to the upper part of the cat frame will stop any twisting moment......
Piccy shows the "Anti rotation arm" as it is on the front cab mount .....

All sorts of fun things.....
 

Attachments

  • Cabmountbeam7.jpg
    Cabmountbeam7.jpg
    313 KB · Views: 52
  • Screenshot from 2022-10-03 06:06:16.png
    Screenshot from 2022-10-03 06:06:16.png
    479.5 KB · Views: 46
Last edited:
  • Like
Reactions: PJL

Snowy Rivers

Well-known member
As we all know....Our snow cat endeavors are a hobby.....at least to most...Some are a business.
Well mine is just a hobby...
So at times my hobby has to take a back seat to reality and the daily chores of life....

Friday evening about 7pm I get an email from my tenant, who for the last 8 years has rented the apartment that is in the lower level of the house you see in the pictures of my cat build......

This apartment had been my parents place quite a few years ago....Now it is a nice rental.....
The email informs me that the tenant is giving us the required 30 day notice that she is leaving..

Her mom showed up back in June with no place to stay after the loss of her husband.....

The apartment is a single BR and this was not working...

Anyway.....long story short...We needed to get the place a bit spiffy outside to show to prospective tenants....

The current gal has been in failing health due to a car wreck and other issues and can't do much physical labor..

So we have been cleaning up potted plants and other crap, washing windows and generally policing up the area.
Parts and junk from somebodies snowcat had to be picked up as well. :lmao:
So the last few days of lovely weather have been consumed doing disgustingly boring domestics..

With an ad running on Craig's list and my phone getting blown up near constantly and people wanting to see the place ....my cat time has been pretty skimpy.....

After about a dozen calls and 6 showings since Saturday we got a taker last night.....
Most of those who inquired wanted FIOS internet to work from home.....Not happening here.....At least not in the near future...

Ahhhh..yessss....It was nice to shut down the ad copy and get a good nights sleep and not be needing to drop what I want to be doing to meet with folks.......

So.....Back to Cat stuff

Did manage to get a little bit of work done on the Cat.
Cutting, fitting and getting the rear most support ready to weld to the cat chassis.

I decided to add an angle to the rear frame behind the OC12.....The upright sits in the angle and welds in 100%
This will put the loading in nearly direct shear...DOWN....Should carry the load well.....

Decided to add 2 plates on top of the upright to allow bolting the Bridge assembly into place easily.....

Still thinking about adding a diagonal brace to the upright to handle any lateral forces.....Given the height of the body off the chassis....seems like a good plan..

Hopefully with the domestic things in check for now.....I can get a bit more work done......
 

Attachments

  • Rear upright support tube1.jpg
    Rear upright support tube1.jpg
    356.8 KB · Views: 47

Snowy Rivers

Well-known member
To day was a great day.....Laid back and got work done....
The RH Bridge beam and rear support are nearing completion.

The center mount stool still needs to be fabricated and set up.....
I need to remove the lifting rig so the center mounts can be done.....But this can wait a bit......

Tomorrow we head over the the LH side and start building there......

Some pics of things..

I am still thinking about adding a diagonal brace to the rear upright to transfer any lateral stress back into the main frame.....
 

Attachments

  • RH BRIDGE BEAM NEAR DONE6.jpg
    RH BRIDGE BEAM NEAR DONE6.jpg
    253.7 KB · Views: 48
  • RH BRIDGE BEAM NEAR DONE5.jpg
    RH BRIDGE BEAM NEAR DONE5.jpg
    315.8 KB · Views: 48
  • RH BRIDGE BEAM NEAR DONE4.jpg
    RH BRIDGE BEAM NEAR DONE4.jpg
    320.2 KB · Views: 47
  • RH BRIDGE BEAM NEAR DONE3.jpg
    RH BRIDGE BEAM NEAR DONE3.jpg
    378.7 KB · Views: 43
  • RH BRIDGE BEAM NEAR DONE2.jpg
    RH BRIDGE BEAM NEAR DONE2.jpg
    462.6 KB · Views: 43
  • RH BRIDGE BEAM NEAR DONE1.jpg
    RH BRIDGE BEAM NEAR DONE1.jpg
    279.8 KB · Views: 48

Snowy Rivers

Well-known member
I got off on a bit of a Skew here and was thinking about the engine for the cat.....MAINLY the cylinder heads...

I had salvaged the heads off a 1998 L31 VORTEC 5.7 to use on the 406......There are a few issues that needed to be addressed....

(1) The valve lift before interference with the spring retainers is not very much when looking at a performance cam.
This needs to be rectified in one of a couple ways.........The cam I want to use has Int .444" - Exh .466" lift and depending on the particular heads that cam may be pushing things too far in stock trim.

(2) The Vortec heads do not have an exhaust crossover passage to warm the intake (These were fuel injected and the manifold only sees air......Using a carbureted setup in cold damp weather can see carb icing ...This can be a problem

An intake air heater can be built to keep the incoming air above the icing zone.......But this is just another little bit of work that needs to be dealt with........

(3) Drilling the head decks for the steam holes required on the 400 sbc ......While not a big issue, it is a needed item.

So the idea of using a set of heads from the pre vortec sbc engines that also had the 4 center bolt valve covers and all the proper accessory bolt hole up front came to mind.......

This engine is not going to be a 7000 RPM screamer.....Likely not see more than 4500 RPM .......So max performance and all the trick stuff is not really needed...

Sooooo

Off to investigate what is available and what will and won't work.

87-95 SBC truck heads are a direct bolt on to the 400 sbc but must have steam holes drilled ( Only the 882 heads for the 400 have the holes)

The 87-95 heads (191 heads) are small valves with Swirl port intakes (Swirlies) and would be OK accept the chambers are 76cc.....Will give us about 8:1 compression.....For this build I want 9:1 - 9.5:1 compression

I owned a 1979 GMC with the 400 sbc...Good reliable truck....But when asked to really give it's all...It was a turd...

Low compression ratio just does not give much to work with.......

The 191 Heads from the early 90's trucks have limited valve lift and would require machining....

All the down sides to these heads just left a bad taste in my mouth.....A deal breaker for sure.

There are other heads that would do the job....But finding a set......TOUGH.
New performance stuff is just out of reach of the budget and really not needed.

So after thrashing about I headed out to visit the auto machine shop I use and see what he had....I tossed the Vortec heads in the van and off to the shop....

Basically .....Back to the VORTEC heads we go....

They are 64cc chambers which will give us 9:1 Comp ratio ...Possibly a bit more maybe up to 9.5:1
A good number when dealing with unleaded fuel.......

The day ended with leaving the heads at the shop .... valve grind, Cut the valve guide bosses to allow more lift, cut the spring pockets for earlier springs and drill the steam holes.......

These bad boys will work well with the chosen cam and the 406 should make enough power to BREAK STUFF :lmao:

The only caveat is the need for the hot air box....

With this mess finally put to bed....Back to fabricating the body mounts for the rear cabin

I cut the materials for the rear LH bridge assembly yesterday.....Then got sidetracked with the grand kids rig
So today maybe things can resume......
 

m1west

Well-known member
GOLD Site Supporter
I got off on a bit of a Skew here and was thinking about the engine for the cat.....MAINLY the cylinder heads...

I had salvaged the heads off a 1998 L31 VORTEC 5.7 to use on the 406......There are a few issues that needed to be addressed....

(1) The valve lift before interference with the spring retainers is not very much when looking at a performance cam.
This needs to be rectified in one of a couple ways.........The cam I want to use has Int .444" - Exh .466" lift and depending on the particular heads that cam may be pushing things too far in stock trim.

(2) The Vortec heads do not have an exhaust crossover passage to warm the intake (These were fuel injected and the manifold only sees air......Using a carbureted setup in cold damp weather can see carb icing ...This can be a problem

An intake air heater can be built to keep the incoming air above the icing zone.......But this is just another little bit of work that needs to be dealt with........

(3) Drilling the head decks for the steam holes required on the 400 sbc ......While not a big issue, it is a needed item.

So the idea of using a set of heads from the pre vortec sbc engines that also had the 4 center bolt valve covers and all the proper accessory bolt hole up front came to mind.......

This engine is not going to be a 7000 RPM screamer.....Likely not see more than 4500 RPM .......So max performance and all the trick stuff is not really needed...

Sooooo

Off to investigate what is available and what will and won't work.

87-95 SBC truck heads are a direct bolt on to the 400 sbc but must have steam holes drilled ( Only the 882 heads for the 400 have the holes)

The 87-95 heads (191 heads) are small valves with Swirl port intakes (Swirlies) and would be OK accept the chambers are 76cc.....Will give us about 8:1 compression.....For this build I want 9:1 - 9.5:1 compression

I owned a 1979 GMC with the 400 sbc...Good reliable truck....But when asked to really give it's all...It was a turd...

Low compression ratio just does not give much to work with.......

The 191 Heads from the early 90's trucks have limited valve lift and would require machining....

All the down sides to these heads just left a bad taste in my mouth.....A deal breaker for sure.

There are other heads that would do the job....But finding a set......TOUGH.
New performance stuff is just out of reach of the budget and really not needed.

So after thrashing about I headed out to visit the auto machine shop I use and see what he had....I tossed the Vortec heads in the van and off to the shop....

Basically .....Back to the VORTEC heads we go....

They are 64cc chambers which will give us 9:1 Comp ratio ...Possibly a bit more maybe up to 9.5:1
A good number when dealing with unleaded fuel.......

The day ended with leaving the heads at the shop .... valve grind, Cut the valve guide bosses to allow more lift, cut the spring pockets for earlier springs and drill the steam holes.......

These bad boys will work well with the chosen cam and the 406 should make enough power to BREAK STUFF :lmao:

The only caveat is the need for the hot air box....

With this mess finally put to bed....Back to fabricating the body mounts for the rear cabin

I cut the materials for the rear LH bridge assembly yesterday.....Then got sidetracked with the grand kids rig
So today maybe things can resume......
sometimes you can change the rocker ratio to decrease lift, or do a little research for some longer valves/springs. I went through that on a 5.9 Magnum build with a custom cam. Not to difficult to engineer around it, just watch the pushrod length.
 
Top