• Please be sure to read the rules and adhere to them. Some banned members have complained that they are not spammers. But they spammed us. Some even tried to redirect our members to other forums. Duh. Be smart. Read the rules and adhere to them and we will all get along just fine. Cheers. :beer: Link to the rules: https://www.forumsforums.com/threads/forum-rules-info.2974/

SW-48 Restoration...

:coolshadeThis week is hot!!!

It's also a week that lots of things get done.

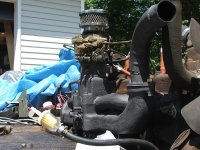
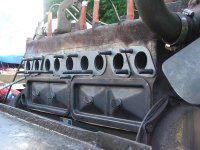
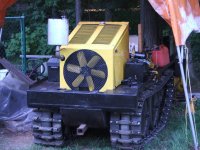
Pic #1, new cork style gaskets on the valve covers and exhaust/intake gaskets from NAPA on the block.

Pic #2, manifold installed with straight pipe:w00t2:. Notice first bolt on block, had to burr it down a bit so the nut would turn...DOH!:pat:
Also notice first of two new fuel filters.

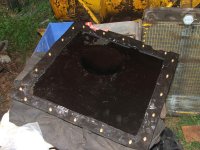
Pic #3, went to a gasket specialist and got a 20X20 piece of rubber to make the diff cover gasket. Cut it myself with scisors and Olfa knife. Put in brand new bolts (got grade 8 bolts for the price of 5 because they were out today).

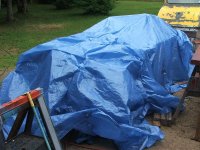
Pic #4, it's cooled down a lot, but with the cold front came the rain. 3 layers of plastic protection for my baby. Hopefully, tomorrow will be drier and I'll be able to do more work.

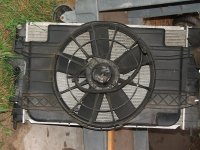
Pic #5, Pixie, 10$ :w00t2:Hope it works....
 

Attachments

  • DSCF2906.jpg
    DSCF2906.jpg
    94.3 KB · Views: 886
  • DSCF2909.jpg
    DSCF2909.jpg
    91.2 KB · Views: 880
  • DSCF2911.jpg
    DSCF2911.jpg
    92.8 KB · Views: 898
  • DSCF2910.jpg
    DSCF2910.jpg
    96.7 KB · Views: 902
  • DSCF2905.jpg
    DSCF2905.jpg
    82.5 KB · Views: 897
Pixie and anyone else,
I also used your (Pixie) trick and cleaned out the pinion compartment with diesel and a small hose (used a home made Bernoulli machine for vaccum). Now before I seal it up tomorrow, is there anything else I should be looking for in the diff compartment. I've cleaned every corner where there was crap visible/reachable and flushed the rest with the rest of the diesel. Cleaned the contact surface all around ready to receive gasket/cover. Let me know, I'd love to slap that puppy on this weekend and let it bathe in oil for the rest of the summer....:wink:
 
Safety wires on the ring gear bolts all intact/secure?
Use a good thread sealant on the diff cover bolts.
Check the cover plate mating surfaces for burrs, weld spatter, etc.


When and if you go for a set of left-hand drill bits, buy them in 'screw machine' length. Less flex and improved access in tight quarters.
 
It's coming right along !

You might want to make sure the pinion gear bearings seem tight.

If the 'wings' on your new fan cover much of the radiator; drill some holes in it.

I've had it with the heat. I'm out of parts at the moment and out of things to paint. It's a dangerous situation: I might take something else apart :yum:
 
I agree with you for the heat. I took my telebars and tins (foot rests and drive shaft cover) into the garage early yesterday. Used a wire brush to remove the rust and painted 3 coats, like everything else... Dangerous times indeed.
I'm not sure about the pinion bearings (there must be two). I did clean and grease both U-joints and with the drive shaft off, there is no LR/UD movement but there is a small slack when you turn CCW to CW like on an old lathe when you have to turn the handle a full turn before the cutter starts to move back. This seems to be more the sum of all the free play in the diff gears and unless you say otherwise, seems normal.

125 - check everything mentionned --> OK Any suggestions on the thread sealer? The nitrile gasket is pretty tight on the bolts but I understand the need for a sealant in the threads since any seapage would go directly into the diff oil. I've been using "super black" gasket maker in the past but I don't think this is it's application. Maybe I'll ask the girl at the bolt store:wub:.
 
Last edited:
I use Permatex "high tack", comes in a can, with a brush.
I tend to paint most gasketed surfaces with this stuff, as it seals without permanently bonding the gasket to the metal. E.G., permits future re-use of float bowl gaskets.

What was the original application for your radiator?
 
125a - I used the "ultra black" gasket maker with a Q-tip in each bolt hole. The nitrile gasket was so warm, it was sticky (JK). So far so good. I think I'll do a test with water to see if it leaks into the bottom of the case before I put the gaz tank back. That way, if it does leak, I'll try your method for sure. As for the radiator, it was in a friend/farmer's barn and had been there for a while. He wanted 20, I said 10 and it was settled. I have no idea what it came off of, but it works on 12VDC and should fit nicely under my rad (or maybe on top, haven't quite figured that one out yet. Guess I'll decide once the engine cowling is back on the SW).
 
on your bolts use a product called leak lock works as low strength thread locker and a sealer also can be used as a gasket sealer .
 
It's been a quiet week on FF in the snow cat area! I guess it's been hot all over, like really hot! You don't really want to work or take pictures when it's that hot. But tonite, I forced myself to take pics of the work I did this week (so little, but every baby step forward is one step closer to a running SW-48).

Pic #1 -- reinstalled engine covers and rad for mock up. Notice the interior color, called pistachio. I like it, kinda looks like the interior of the M113.

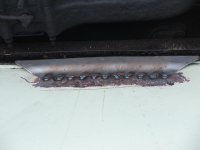
Pic #2 -- to get better seal on the engine covers, welded some brackets to fit over the lip on the hull. Works OK, but if I had to redo, would make the offset bigger, like 1/2" instead of 1/4".

Pic #3 -- with some scrap stainless steel, went to the airport machine shop (got a free pass this week) and used the shear and the brake to bend the plate to replace the rusted and messed up drive shaft cover. Notice also fresh coat of paint inside the drivers habitacle. Also, just because I could, made a new clutch pedal with checker plate aluminum. Think I'll do the same for the accelerator. Still have to make the new foot rest on the accelerator side, when I sand blasted it, it just fell off :unsure:.

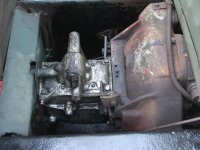
Pic #4 -- cleaned the transmission, flushed it, and refilled it. You can see how either it's not the original tranny or someone broke the supports for it and welded some on the bell housing. I also cleaned all the swamp crap from the bottom pan.

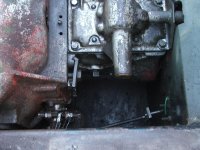
Pic #5 -- doesn't look like much, but I couldn't adjust the clutch last year so while everything is open, tried again (much easier without gloves and parka). Couldn't get a good clutch adjustment (was testing it with tranny in gear and trying to turn the drive shaft while the pedal was pushed down). Finally remove the connecting rod to find it was used and a bit too long. Solution, cut it, thread it and reconnect with 1/4' plate steel. Now I have an adjustment if ever it starts to not disengage the motor again.

Pic #6 -- a good shot showing the gasket (nitrile 1/8") used to seal the cover of the differential. I liked the stuff so much, went a bought more to do the two sprocket "flower pots". Dude is selling me his scraps at 1/2 price so I guess it ain't too bad. For those in the Ottawa area, it's Hydro Silica Gasket Cutting at the corner of Innes and Bantree but on Newmarket. Great place for all gasket materials. Just down the road, Ottawa clutch and brake, great place for reshoeing anything.

I hope this puts everyone in a posting mood, even in this intense heat. I can't complain, at least we're having a summer this year. The last three have been just rain, rain, and more rain.

Oh, and I didn't take pics, but I punched two more length of conveyor belting (I'm not rich enough to buy it already punched) to get ready for track #2. I'm so glad my wife is busy with work in the evenings and the kids are playing with their friends, leaves me all the "cool" time to work on my baby. I already have two contracts for plowing next winter. This has to work, otherwise, I'll be doing it with the snow blower...ouch.
 

Attachments

  • DSCF2912.jpg
    DSCF2912.jpg
    81.7 KB · Views: 778
  • DSCF2913.jpg
    DSCF2913.jpg
    34.9 KB · Views: 776
  • DSCF2915.jpg
    DSCF2915.jpg
    62.6 KB · Views: 759
  • DSCF2916.jpg
    DSCF2916.jpg
    73 KB · Views: 766
  • DSCF2917.jpg
    DSCF2917.jpg
    78.4 KB · Views: 761
  • DSCF2922.jpg
    DSCF2922.jpg
    52.6 KB · Views: 752
Hmm, a week is a long time not to post anything when you're actively working on your snow machine. I also took apart and cleaned both U-Joints, regreased and also topped up the drive shaft. Doesn't look like an original, but what is on this machine??? Had to replace spacer (were just washers under the protection bar) with 1/4" plate. Works fine for me :brows:. That plate in the shape of an upside down U was also found in the Lynx (Don if you know the designation number I don't remember) like the M113, but with the engine (diesel V6) in the back, drive shaft went through the driver's/crew commander/observer compartment with the diff in the front. If ever one of the u-joint gives, this prevents the drive shaft from making hamburger out of your legs....:doh:
 

Attachments

  • DSCF2921.jpg
    DSCF2921.jpg
    72.5 KB · Views: 751
You've been busy !!

I really like the protector over the drive shaft. Your clutch pedal is cool, too.

Someone has cut slots in your foot rests !
 
Don - Thanks to you, I keep on going. :flowers:

Pixie - Thank you too. If it weren't for you and that thread with your J5 rebuild, I would be lost! The slots cut out of the floor boards was me. I never managed to remove the pedals, they were so rusted that they wouldn't unscrew. I think I'll leave it like that for now...

Hey, tonite is a Molson night! I removed the last 4 grousers from the 2nd track! It is now completely disassembled.:clap:

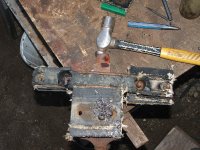
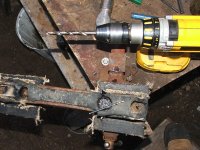
In a previous post, I was asked how to remove the bolts that are under the tire guides (I did 8 of them tonite). I snapped some pics, might help someone down the line...

Pic #1 -- center punch the bolt on the grouser side;

Pic #2 -- drill a pilot hole with a small drill bit deep enough to go past the nut;

Pic #3 -- drill with a drill bit the same size as your bolt (mine is 3/8");

Pic #4 -- that's whats left of the bolt when finished.:shifty:

Lucky for me, I have silent/distant partners this week working on their snow cats posting pics too! Hats off to you, ladies and gentlemen for spending time in the summer so we can have fun in the winter.....

:letitsnow: ...Well maybe not just yet...hahaha
 

Attachments

  • DSCF2927.jpg
    DSCF2927.jpg
    100.7 KB · Views: 702
  • DSCF2933.jpg
    DSCF2933.jpg
    59.7 KB · Views: 701
  • DSCF2929.jpg
    DSCF2929.jpg
    109.2 KB · Views: 705
  • DSCF2928.jpg
    DSCF2928.jpg
    99.3 KB · Views: 697
Wow, last night of a 2 week holiday. Been lurkin' almost everyday and putting in my 2cents in where I could. Decided not to work on the SW during the vacation, but just before leaving, I did a bit of work and snapped some pics. Figured I should share:

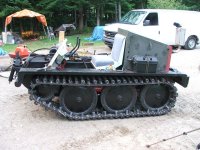
Pic 1: Getting ready to retrack!:w00t2:

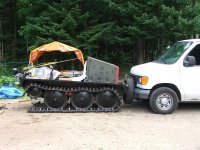
Pic 2: Convenient way to move a trackless track vehicule...notice the snow tire. So that's what they're for...:brows:

I thought I had more pics than that...oops. Well, today, yes Sunday, I jumped on the SW because I did a boo-boo when I reinstalled the manifold. I had coolant fluid filling up my manifold, pissin' from the engine studs, two in particular (see posts above where easy-outs were used). The old guy at NAPA sold me some good blue stuff to put on the studs to seal the hole (fall right into the water jacket on almost all studs). 3 hours later, manifold reinstalled, engine test --> success!
I then proceeded to complete the track reassembly (6 bolts where the rubber is double didn't have nuts). Did a track tension and tightened all bolts on the walking beam.
Although I have no cab (and this is the picture I was hoping to have to show you tonite) I have the dash mounted with wooden 2X4s. Of course I took it for a spin once all this hard work was done. Didn't go too far, but managed to get a couple of "klicks" on my new tracks (yup, without a cab) and took it up to 55 Km/h (roughly 30 MPH) in third gear. It actually sped up in 3rd when I throttled, something it wouldn't do last winter (probably too much friction in the wheel bearing). Everything held together and worked great.
Side note, I added some SSteel plates to cover some of the holes in the wall that separates the transmission and the driver (under the seat). This helped a lot with the engine cooling (or was it the new coolant???) since it never went above 180F and I didn't have the heater connected to the coolant system. Blocking those holes (pretty big and not original for sure) and having the seat down got some good air circulation through the rad!

All in all, I'm a happy camper today and wanted to share. More pics and I'll try a movie too in the following days.
 

Attachments

  • DSCF2939.jpg
    DSCF2939.jpg
    131.2 KB · Views: 655
  • DSCF2941.jpg
    DSCF2941.jpg
    104.7 KB · Views: 639
you should be proud of your self you have put a lot of hard work in to that little thing and she is coming along right nicely.
 
Congratulations on having it mostly back together and running strong !!! :clap:

I know it's been a long road with your tracks.....
 
Well, as promissed, the video is at:
[ame="http://www.youtube.com/watch?v=zFsSe3QxLlo"]YouTube- ‪My SW-48‬‎[/ame]

Wasn't sure how to embed... hope it works. If it doesn't, here are a few pics showing the dash held up by wooden 2X4s and a master switch to cut the batteries (or open the circuit) so the batteries won't drain if ever there was a short somewhere.
 

Attachments

  • DSCF2946.jpg
    DSCF2946.jpg
    100.9 KB · Views: 620
  • DSCF2947.jpg
    DSCF2947.jpg
    74.6 KB · Views: 602
  • DSCF2948.jpg
    DSCF2948.jpg
    79.7 KB · Views: 633
Must be a good week, getting a lot done.

Let's see, yesterday apart from making a video with the little one, fixed the fuel line, added a 2nd filter before the pump, replaced hydraulic filter, repaired leaking fuel pump, tightened both valve covers (guess the gasket shrunk a bit???) and tightened the tracks (looks like I'll have to do it again, book say 1-2 inches above the front wheel).

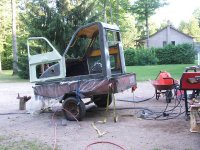
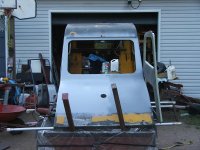
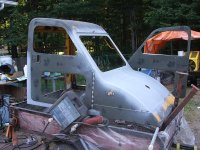
Today, painted all the tins around the engine, then started to sandblast the cab after removing the last two windows (windshield and rear window). I had already started but since I'm doing all this work outside, bare metal just starts to rust with the morning humidity, even under tarps, so I'm priming as I go along. The welder was for plugging all the unnecessary holes (about 12 of them). Will have to add some sheet metal to the top of the cab, it's so thin that I can't plug the holes with the MIG. Unless you're 7ft tall, you'll never look up there, so a patch seems like the right solution.

Pics 1,2,and 3 sandblasting and priming the cab (third pic is a spoiler for the 4th);
Pic 4 did a little bit of what I hate, some paint!:brows: Gotta love that fan...sure looks purrrrty when it's turnin' fast!
 

Attachments

  • DSCF2951.jpg
    DSCF2951.jpg
    123.6 KB · Views: 589
  • DSCF2952.jpg
    DSCF2952.jpg
    78 KB · Views: 600
  • DSCF2953.jpg
    DSCF2953.jpg
    99.8 KB · Views: 594
  • DSCF2954.jpg
    DSCF2954.jpg
    88.1 KB · Views: 584
Looking good Benz9,your on track for this winter. Big improvement from the machine you brought home at the start of this thread ! Did you find any original Bombardier {bondo} when you blasted that cab?
J5 Bombardier
 
looking good don't do like weatherby and get it all fixed up and sell it kind of think i would like some thing like that with a blower head my snow drift's in around here and gets too hard for a plow.
 
J5B - Yes, I'm finding a lot of Bondo under the paint. Lucky for me, the girlfriend is somewhat of a Bondo veteran, and she offered to redo the cab for me.:glare:hmmmm, I wonder what she wants now???

Don - I enjoyed Weatherby's thread and salute him for all the research and original parts to "really" restore the machine to original. I have sent an e-mail to the curator of the Bombardier museum asking about the black stripe on the side of a lot of '70s snow cats. In the e-mail I said that my machine was not museum quality restoration, but even if I use it for work, how can I paint it to match closest to what it was in the era. He's on holidays, so I'll get my answer at the end of August.

Sandblasting / Priming / Painting (Bondo goes in there somewhere after priming) is so far the most boring job of all. I am not cut out to be a bodyworker. I'd rather replace all the bearings on 5 Muskegs than do this again, but it must be done and it's almost done. 80% of the cab exterior is primed on bare metal. Interior is different, nose part was painted with tar paint and there is no rust there, so I'm leaving that as is, 2 doors are primed and painted, so just waiting for the exterior to be done and then I'll flip the cab to finish inside. All that will be left when the paint is done is the hydraulics, there are a few hoses I want to replace before putting the cab on. Then I'll be ready for winter. Yeah!
 
By the way, like the Aktiv Snow Trak/Master stickers files, does anyone have the Bombardier single sprocket logo in a good resolution (like the one at the bottom of my post, but larger and clearer)? I may have someone to do the decals for me but I need a better image. I've asked the curator but he's on holidays...
 
By the way, like the Aktiv Snow Trak/Master stickers files, does anyone have the Bombardier single sprocket logo in a good resolution (like the one at the bottom of my post, but larger and clearer)? I may have someone to do the decals for me but I need a better image. I've asked the curator but he's on holidays...

Benz9, was the original stripe painted on or was it a decal ? Here's a site you might want to look at www.stickers-snowboard.com
J5 Bombardier
 
By the way, like the Aktiv Snow Trak/Master stickers files, does anyone have the Bombardier single sprocket logo in a good resolution (like the one at the bottom of my post, but larger and clearer)? I may have someone to do the decals for me but I need a better image. I've asked the curator but he's on holidays...

If you go to a good place that does the decals, they should be able to do exactly what you want.
 
if you can take a rubbing of the origional decals on a machine tht still has them most sighn shops can duplicate them for you here in alaska i use warning lights of alaska they made up the sticker pakage for my old john deere cyclone 440
 
Benz9 would you or any other member know if the top half of the door on the SW 48 is the same shape as on the B12 ?? If it is, I will pickup 2 at Marcelle Houles. I want to put sliding windows in my b12. Thanks


The Old Trucker
 
OT, that is a question that I must answer with an "I don't know".

As much as I would love to have a B7 or a B12 in my yard to restore and drive around with, appart from the free manual available on this forum, that and youtube and the museum are the closest I've gotten to them. I don't know how far of a trip it is for you to go see M. Houle's scrap yard, but I will be there on Sep. 3-4-5 for the Festival de la Poutine. Maybe I can swing by and check for you??? Let me know.

I'd greatly appreciate that if it's not too much out of your way. Houles is close to 900 miles west of me, plus a $ 400.00 return boat ride.
I could get one of my trucking friends to pick them up for me.
 
Top