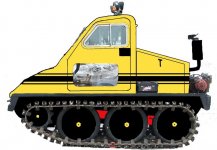
Snowtrac Nome
member formerly known as dds
good idea i'm not familiar with those older sw's i bet a rear seat from a cj would also work.


 So once the tracks are all rebuilt and installed, I'll start looking for the gaskets for that. I think I found them on Vintage Power Wagons but if someone has another source for the manifold gaskets on a Chrysler 251 Industrial 8A engine, please let me know, I'd rather spend my money locally.
 .
.Thanks for the info guys, gals. I just got back last night from a job site in Drummondville where I managed to get some parts for my second track that were broken.
 . Any pics of your project??? How's it moving along? I'm going to St-Raymond next year to see the parade, will you be in it?
 Maybe not this weekend, but the next one for sure.

 .Thanks a million to my father in law for his magic.
I own an easy out set but almost never use it anymore try welding a washer to the studd than weld a bolt to the washer and while evey thing is glowing red slowly back the bolt oout and it should reemove even the most rusted in broken studd125a --> Right on the money on those gaskets! thanks a million.
Old Trucker --> take care of yourself, and best of luck with your project.
Been busy taking the second track apart with the usual problematic bolts that just put me in a "crap I hate this !t" kinda mood. So I pause and try something else, like sandblast backing plates and tire guides, move the SW-48 closer to the garage, ready for engine rebuild & test, etc...
Then the mood returns to normal and I attack the track again. I was really happy to see my manifold return from Montreal all repaired
Dropped by NAPA today and all the engine studs, nuts, gaskets were in! Also found a plastic box for housing the battery. I've been hunting for one of these for a while and found it at your friendly neighborhood NAPA, again. Also hit a hard spot on the track this week, so I took the valve covers off, sandblasted them and painted them. Wish I had engine blue, but High Temp Tremclad was all I had on Canada's 143rd birthday (all the stores were closed). Notice there is one stud left that broke. I have to try an easy out on it before reinstalling the manifold. Also, I think I better get moving on the fuel pump too, much easier access without the manifold on...
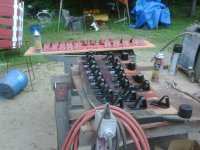
Here are some pics of the progress:
 The big secret, and sorry for posting it in your thread
 , is to cut up the track in small pieces, like 6 grousers so it's manageable, after exhausting all options on the nut, slap the rest of this piece of track on the drill press, center punch the bolt itself and drill until you're thru the nut with a small pilot drill. Then (I use a cobalt bit) drill with a 3/8" (my bolts are 3/8, yours are 1/2) bit and if you drilled center, the nut (or what's left of it) will stay on your drill bit. The rest is easy. I took pictures of this process but figured it was boring... guess I was wrong. I am glad I'll only have to do this once in the life of this SW-48
 .. I have a habit of marking real part numbers in my printed manuals for future reference...helps later down the road.
Instead, I tested dds's trick on the engine block stud. I welded a washer, then welded a bolt and while it was still red hot, broke the stud even further into the block. I had to go the easy-out method and I wasn't impressed. It took a good 2h to get it out.
") .
. You didn't tell me that you were a mind reader too!
 . No pitting on the gears (I know the picture looks like that but it's just a rust stain, nice and smooth). I am so happy that this part is good. Now it's time to pack it in for the night, it's already getting dark here (and cooler, thank god). If I get an early start tomorrow, I may just get her all cleaned up and resealed before the rain (whenever that is...).