• Please be sure to read the rules and adhere to them. Some banned members have complained that they are not spammers. But they spammed us. Some even tried to redirect our members to other forums. Duh. Be smart. Read the rules and adhere to them and we will all get along just fine. Cheers. :beer: Link to the rules: https://www.forumsforums.com/threads/forum-rules-info.2974/

ST4 restoration of Frankie the Frankentrac

Jphoenix

Well-known member
SUPER Site Supporter
Engine mostly ready, waiting on a set of wires, the number 3 & 4 cylinder plug wires burnt through from lying on the exhaust riser. Explains the rough running a bit more. Pulled the wiring harness out, gonna put a Blue Sea fuse box in with all new wiring, plus a tach and an oil pressure gauge.

IMG_6806.jpeg


IMG_6807.jpeg


Frankie has a couple degrees list to the left, due to the left bogie mount being bent up a bit. I’ll get that all apart and rebuild it after I get the Variator back together and the engine back in.

IMG_6836.jpeg


IMG_6833.jpeg


Wiring harness in pretty sad shape, the old fuse box held the crappy VW/Lucas style fuses.

IMG_6827.jpeg
 

Puckle

Well-known member
SUPER Site Supporter
I put two new fuse boxes in mine, one for distribution and one for main power supplies directly off the battery - some of the power lines on the original did not seem to have fuse protection at all. I have attached the wiring diagram in pdf form that is specific to my machine but if you can use DWG files i can let you have it in that form and you can modify it to suit your own.
 

Attachments

  • Wiring Diagram Model (1).pdf
    108.6 KB · Views: 65

Jphoenix

Well-known member
SUPER Site Supporter
Thanks Puckle, you saved me a lot of time with that. I considered buying a Blue Sea dual load path unit, but plan to use just one battery and run everything off the same load bus. One difference is I will remove the non-functioning speedo and replace it with a tachometer which I believe will be more useful. And an oil pressure gauge - there's no oil pressure gauge on this machine, just a low oil light.

Mine does not have the warning plate stating "Do Not Turn Wheel...". Also need a new floorboard, I'll go back in with marine plywood, epoxy edge=sealed and coated. Looks like Triumph TR-6 windscreen wiper mechanisms. The little blue light above the turn indicator switch remains a mystery. Those murderous cross-headed screws with their frozen nuts locked in place with Nature's Loc-Tite are driving me nuts - I'm having to cut them off one by one and no amount penetrant or cussing will get them off. The entire machine is assembled with those infernal fasteners.

IMG_6817.JPG


Transmission coming apart to clean out all the old black oil, it does not have the strong smell of gear oil, looks more like engine oil and there was not much left in it. Gears, bearings and ring&pinion look very good, so I'll clean it up and get it back together with new seals. I plane to use Redline lightweight shockproof gear oil (same as in the Hewland on my race car) because it clings to the internal surface like glue and does not drip off gears or bearings - even after sitting all winter - perfect for an intermittent use application such as the Snow-Trac.

IMG_6815.JPG


More indication of this machine's Mclarty origins is this fire extinguisher I found still mounted under the seat, manufactured by Vanguard in Norwich - and it says on the back I can send it back to them in Norwich after the 1999 expiry date and they would refill the bottle for half the retail price :)


IMG_6826.JPG


Still have not found a serial number anywhere. -still looking.
 

Cidertom

Chionophile
GOLD Site Supporter
Never heard of the shockproof line, looks interesting. And the part of it holding onto the gears is good. I use redline mtl. The question none of the charts covered, what does temperature do to the shockproof line of oils? It looks like they are (pardon the pun) geared for racing, where I presume (our version of) cold is not normally a factor. Does the stickiness change as you get into the minus temperatures?
 

Jphoenix

Well-known member
SUPER Site Supporter
This is what it looks like days after the gearbox was last run, the blue lightweight shockproof sticks like glue to the gears and bearings. the lightweight is around 75w I recall.

IMG_1247.jpeg

The Hewland in the formula fords are lightly loaded, same VW transaxle case as we run, similar R&P. You would be surprised at how hot the gearboxes get. Not sure about very cold weather, but 75w should be fine. Can’t imagine they get stickier with colder temps, and I suspect the gearbox internals heat up pretty fast in the Snow-tracs.

one question I have, in the Lyndon posts he talks about the Variator needs 7 quarts of gear oil - is that correct?
 

Cidertom

Chionophile
GOLD Site Supporter
pretty close. Book value is 6,5 liters . The passages are small to the axles, so it takes time for the level to get there.
 

Jphoenix

Well-known member
SUPER Site Supporter
Cleaned up the threads on the left axle with a thread file, nut threads on fine now, ordered new 7/8-14 nuts from McMaster. Assembled the diff and then put the axle housings on after replacing the bearings and seals. I installed the left bevel gear backwards just to test my memory :rolleyes: and get more practice lining up the keyway.
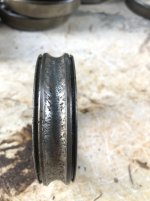
The new axle sprocket end seals are double-lip seals, so shouldn't leak. They fit the sprocket sealing land very nicely. Got the axle housings and towers installed, ready for the rest of the contraption. All of the Variator control levers, arms, etc. were cleaned and treated with metal prep then painted with two coats of POR-15. Still have to clean the sheaves and replace the bearings on them.

IMG_6838.JPG


IMG_6841.JPG


IMG_6845.JPG


IMG_6846.JPG


IMG_6849.JPG


Still need to clean the transaxle exterior and make it all pretty. There's not much wear I can see on any of the internal parts, so, the 208 hours on the Hobbs may be accurate - hard to say, but most of the bearing damage was rust from sitting. All the gears look really good.
 

Sno-Surfer

Active member
Looks great! I remember the three bolts on the upright sections of the variator would loosen up on me. I'd make sure those are firmly loc-tited in there. Nice progress, looks like you're aiming for an outing this winter.
 

Jphoenix

Well-known member
SUPER Site Supporter
Yes,
Looks great! I remember the three bolts on the upright sections of the variator would loosen up on me. I'd make sure those are firmly loc-tited in there. Nice progress, looks like you're aiming for an outing this winter.
not surprisingly, they were a bit loose. Red loctite on those. Getting a bunch of new bolts today, I need to adjust the end-play/bevel gear engagement on the right tower as it binds just a bit when torqued down. Also need to get 7 qts of gear oil so I can pour it in the towers prior to final assembly, then let it set and watch for static leaks. These towers have the small vent holed already drilled.
 

Jphoenix

Well-known member
SUPER Site Supporter
I decided I want to run Redline Super Lightweight Shockproof gear oil, very low viscosity, but good reviews. So have to wait for it to arrive. In the meantime, I picked up some .090” 6061-T6 for new fenders. Gotta weld up some new fender support frames, then I’ll cut the aluminum up and rivet it on.

IMG_6851.jpeg

IMG_6855.jpeg

IMG_6859.jpeg


IMG_6861.jpeg
 

Snowy Rivers

Well-known member
Fabulous pictures.....I love the brass hammers.....
Far too many folks do not understand the finer points of assembling precision machined parts and grab a steel club and go after things.....

Thread files are a godsend.....especially if you don't have a set of dies......

Looking very very good...

I agree.....Sitting for long periods and add condensation.....RUST...
One rust starts to get hold of the working surfaces on the bearings.....Soon the surface degrades and then pitting starts ...followed by shell out and then the degradation really starts to haul azz.....
Soon the ground up metal reaches a point that all the bearings start to get in the fight....Down hill fast from there...

Here is the inner race from the upper gear in one of the drop boxes on the 2100
Pretty sad.....
This was not the worst....One other one had the outer race in 3 pieces......Amazing that the box did not grenade...
 

Attachments

  • Difapartbad bearing.jpg
    Difapartbad bearing.jpg
    193.3 KB · Views: 32
Last edited:

Jphoenix

Well-known member
SUPER Site Supporter
Yes Charles, this old cat has a new home, we rescue shelter reject cats from kill shelters, so this one fits right in and still has a few lives left, it’s really in good mechanical condition with very little rust on the frame, so it’s any easy job to spruce it up a bit and go look for some snow. The cat gathering Joseph looks like an excellent opportunity to give it a good shakedown, so I’m targeting that date.
 

Jphoenix

Well-known member
SUPER Site Supporter
Spent the day salvaging the 2 remaining fender supports to provide some guidance on the curvature and length of the original fenders. Got them straightened and welded up, then made two new ones for the right side. Tomorrow I’ll reassemble the front cowl support and get the fender supports aligned and more supporting structure fabricated.

IMG_6876.jpeg

IMG_6881.jpeg


IMG_6883.jpeg

IMG_6884.jpeg

IMG_6887.jpeg
 

Attachments

  • IMG_6878.jpeg
    IMG_6878.jpeg
    4.3 MB · Views: 29
Last edited:

Snowy Rivers

Well-known member
I love the cut and bend....About the only solution if you don't have a set of rolls .
Looks top shelf.....Great job
 

Sno-Surfer

Active member
Engine mostly ready, waiting on a set of wires, the number 3 & 4 cylinder plug wires burnt through from lying on the exhaust riser. Explains the rough running a bit more. Pulled the wiring harness out, gonna put a Blue Sea fuse box in with all new wiring, plus a tach and an oil pressure gauge.

View attachment 170123

View attachment 170124

Frankie has a couple degrees list to the left, due to the left bogie mount being bent up a bit. I’ll get that all apart and rebuild it after I get the Variator back together and the engine back in.

View attachment 170125

View attachment 170126

Wiring harness in pretty sad shape, the old fuse box held the crappy VW/Lucas style fuses.

View attachment 170127
Quick questions on your heater boxes. It looks like you put new ones on (and they look like good quality ones!). If I remember right, the original ones where modified I think to fit around the variator uprights. I was curious if you were reusing the old ones or what you did to make the new ones work?
 

Jphoenix

Well-known member
SUPER Site Supporter
Yes, the new ones will need some mod work to fit around the variator towers. I'll figure that out after I get the variator reassembled, then attach the engine so I can do some cutting fitting and welding to get them to fit properly.

Meanwhile, I made some light guards out a piece of 1" flat stock I had in the bin.

IMG_6888.JPG


IMG_6889.JPG


IMG_6892.JPG


IMG_6894.JPG
 

Jphoenix

Well-known member
SUPER Site Supporter
Quick questions on your heater boxes. It looks like you put new ones on (and they look like good quality ones!). If I remember right, the original ones where modified I think to fit around the variator uprights. I was curious if you were reusing the old ones or what you did to make the new ones work?

Looking at the old heater boxes - you can see where they were cut and re-welded back on just above the rear exhaust pipe. I suspect they were just swapped left and right and re-welded back on. I can't swap the entire heater box/J-p[ipe assemblies left and right because they won't fit around the staggered cylinders, so will probably do the same as shown here, cut the top off and swap left and right to clear the towers.

IMG_6544.JPG
 

Snowy Rivers

Well-known member

Jphoenix

Well-known member
SUPER Site Supporter
The firewall is aluminum and has suffered some dents and cracks, so I removed it for repair, then the rest of the bits in the engine compartment. I'll clean it up and give it a coat of primer and light grey paint. Starting to investigate the reason for why the leftt side tracks and axle housing have to be 1" further forward than the right. All the frame mountings appear to be straight, I suspect it's a combination of the sprocket being too close to the front big wheel and the chain length. More to come on that front.

IMG_6900.JPG


IMG_6901.JPG
 

Puckle

Well-known member
SUPER Site Supporter
Great work Jim, whilst your there, I would put some RivNuts in the bulkhead so you can remove the scuttle plate easier - its a real pain to get off when the dashboard is in.
 

Jphoenix

Well-known member
SUPER Site Supporter
Great work Jim, whilst your there, I would put some RivNuts in the bulkhead so you can remove the scuttle plate easier - its a real pain to get off when the dashboard is in.
I agree. I have a large assortment of rivnuts I'll be using during re-installation. Especially for those locations one can't easily reach without help.

I was looking at how Western Auto rebuilt his front bumper and I think I'll copy some of his arrangement in front.
 

Jphoenix

Well-known member
SUPER Site Supporter
I put 6 quarts of gear oil in the variator and let it sit overnight - and it found this level. When I open the plug on the side of the transaxle, it flows out, the transaxle is level, so I guess that's enough. When I drained the transaxle prior to disassembly, I only got a quart out of it. The good news is zero leaks after sitting all night :)(y)

IMG_6911.JPG


Next I pushed the engine up to the variator to see how much to modify the heater box outlets, took some photos and if I match the old ones, they will fit around the variator towers - this will take rest of the day at least.

IMG_6904.JPG


IMG_6906.JPG


IMG_6907.JPG


IMG_6910.JPG


New 11 gallon fuel tank arrived - fits perfectly at the rear - trying to keep the weight aft. Might get another one for the other side if I see the fuel consumption needs it - or just carry extra fuel.

IMG_6903.JPG
 

Jphoenix

Well-known member
SUPER Site Supporter
Temporarily assembled the variator steering mechanism to make sure it all works smoothly and I didn't lose any bits. Assembled with boat grease per Lyndon's suggestion. Using clevis pins temporally on the upper arm because the left sheave has to go on first, then the arm goes on top. I used POR-15 on the black steel parts to keep them from rusting, that paint is a pain to use, but it's really tough.

IMG_6916.JPG


Cut the right heater box and welded in an extension piece, made it similar to the old one, I'll install it tomorrow to make sure it clears the variator tower. Then do the left heater box in a similar fashion.

IMG_6918.JPG


IMG_6919.JPG


IMG_6921.JPG
 
Last edited:
Top