If the finals fill passages are like I think make sure you clear all the grease out so you know it is truly full. IIRC when the oil level is up to the top of the fill hole it is full. next time you go to Holt check on price and availability of track rollers, either new or rebuilt. I have a feeling having the old ones built up and turned will be near or more the price of new. There also might be after market rollers available too. Not trying to push you buy them now, just give yourself time to shop around and compare.
-
Please be sure to read the rules and adhere to them. Some banned members have complained that they are not spammers. But they spammed us. Some even tried to redirect our members to other forums. Duh. Be smart. Read the rules and adhere to them and we will all get along just fine. Cheers. :beer: Link to the rules: https://www.forumsforums.com/threads/forum-rules-info.2974/
You are using an out of date browser. It may not display this or other websites correctly.
You should upgrade or use an alternative browser.
You should upgrade or use an alternative browser.
New to me 1936 Caterpillar RD4, get it running project
- Thread starter m1west
- Start date
I agree about getting new track rollers if available and priced right, I have the fab shop and lathe to do it myself, but its going to be a bunch of time I would rather spend doing something else.If the finals fill passages are like I think make sure you clear all the grease out so you know it is truly full. IIRC when the oil level is up to the top of the fill hole it is full. next time you go to Holt check on price and availability of track rollers, either new or rebuilt. I have a feeling having the old ones built up and turned will be near or more the price of new. There also might be after market rollers available too. Not trying to push you buy them now, just give yourself time to shop around and compare.
I don't know if it matters, but the plugs that are there have a flange on them? Might be to keep the crap out of the threads?I'm pretty sure those are pipe thread. Try to find the pipe plug with the recessed square hole to reduce the chance of a big rock breaking out the bottom of the housing. And again, remember the antiseize. As you can tell I'm a firm believer in the stuff especially on iron bolts threading into aluminum which won't be the case with you.
So you're saying they are the ones for the finals?I don't know if it matters, but the plugs that are there have a flange on them? Might be to keep the crap out of the threads?
Yes, the 2- fill plugs and drain plug on the finals have a flanged plug, I don't know if it matters to just use a pipe plug on the drains, as your not filling it so you shouldn't get crap in it, and its better than being open.So you're saying they are the ones for the finals?
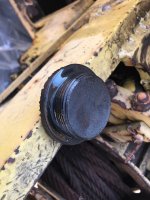
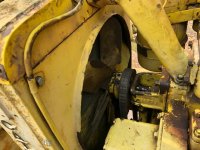
here is a picture of the drain plug taken from the final drive housing and the fill in the rear of the tractor, there is one on each side of the winch.
Also had time to install the new bearings and seal in the water pump, its ready to go back on as soon as I make gaskets for it.
Also had time to install the new bearings and seal in the water pump, its ready to go back on as soon as I make gaskets for it.
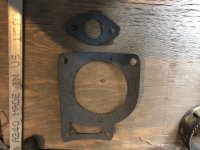
A trick my Dad showed me when I was a kid. Lay the gasket material over the part, then lightly tap the gasket material at the edges of the voids and holes. Marks everything perfectly.They look as good as factory made.
Today I made the rest of the gaskets needed to put the water pump, radiator and water pipes back together, then cleaned all the mating surfaces. Also chased all the threads.
Tomorrow I will stretch a hose over there and clean the radiator in and out. Also take a small screw driver and needle nose pliers and straighten all the cooling fins on the radiator the best I can.
Tomorrow I will stretch a hose over there and clean the radiator in and out. Also take a small screw driver and needle nose pliers and straighten all the cooling fins on the radiator the best I can.
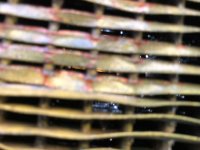
Today, I drug the hose down and thoroughly cleaned the radiator inside and out, Lots of mud and crap. Then I took a small screw driver and needle nose pliers to straighten the cooling fins so air could circulate again. About 20% of the cooling fins were bent over, likely from fan belt changes. Not perfect but didn't want to break the fins loose from the water tubes. Now its ready to put the water pump, belt, pipes and radiator back together again.
NorthernRedneck
Well-known member
Nice progress. Good to see an old dozer coming back to life. I have a lead on an antique cat d7d made in 1959. Looks like it was abandoned in early 80s judging by the tree growth in the area where they were logging. It's sitting about 5 miles from my camp down an old logging road that was previously gated off due to an old landfill site that closed at the beginning of the road. There's also an old slasher nearby sitting abandoned.


Nice progress. Good to see an old dozer coming back to life. I have a lead on an antique cat d7d made in 1959. Looks like it was abandoned in early 80s judging by the tree growth in the area where they were logging. It's sitting about 5 miles from my camp down an old logging road that was previously gated off due to an old landfill site that closed at the beginning of the road. There's also an old slasher nearby sitting abandoned.
Depending nohow well it is sealed up to water, you could get it going
View attachment 139421
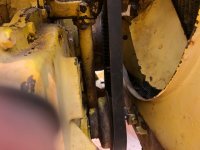
I liked the idea of hanging an extra belt in there but couldn't easily come up with one and they are pretty beefy without much load, so I went ahead and put it all back together. I need to either buy or make a jam bolt that locks the adjustable pulley, it has the threads turned off the last 1/4" and fits into a slot that keeps the bully from turning. That task is checked off now.
Here is one for your memory bank, the radiator cap is missing. I will take a picture of the opening. It doesn't twist on, it bolts on with a center stud that sticks up and it looks like it seals on a flange. What confuses me is there is a overflow tube that is lower in the radiator neck than the sealing surface. The only way for that to work is if its not a pressurized system? You recall anything about that?Lookin' good!!
Never gave much thought to it so let's assume it isn't pressurized. That cap is probably meant to keep coolant from leaking out when descending steep hills. Find a pic of one and with your machining skills I'm sure you can make one. You probably don't want to top it off completely else you'll just lose some coolant thru the overflow tube. As long as the coolant is a couple of inches above the tubes cold it will be OK. See if the manual mentions anything about being sure all air is bled out of both engines and how to do it.
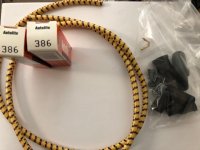
Start up is likely still a week or 2 away, still have to paint the pony gas tank after its de rusting and inspect the bottom of the main then oil everything. Got COVID so I'm moving a little slower.Wish I was closer as I have an old pair of crimping pliers with a section of the jaw for crimping those type of connectors. I'm anxious to hear how the startup goes!!

