I will try to answer your questions in order..
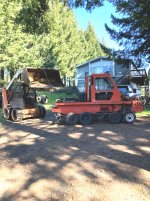
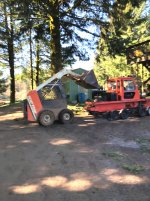
Load and unloading
The plan is to use our BIG TEX TRAILER
Back the van onto the trailer
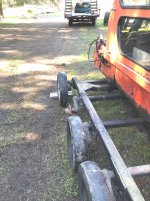
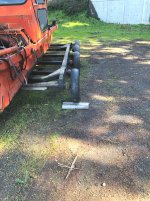
Locate the trailer behind the cat
Insert a pair of short channels to bridge across to the cat from the ramps on the Tex
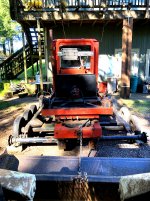
Block the rear frame of the cat with plain old wood cribbing to stop the FULCRUM
Drive the van slowly down the channel rails (Added to the cat frame as a permanent part)
Locate the van fore/aft
Remove the blocking and go park the trailer.
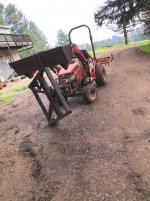
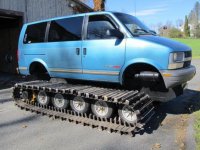
TIRES WHEELS
These need to come off to lower the C/G and to get the van in a position to keep the drive shaft angle in the sweet spot.
I want the van chassis right down so it just clears the top tub rail of the 2100
4 black HDPE (Plastic) covers will fit in the wheel openings to dress things up.
The first time around will take some time I'm sure due to measuring and getting things dialed in..
After things are located and all the bracketry is drilled and such, things should go fairly quick for a load and unload.
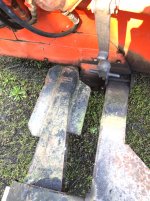
I have the sketches taking shape for the brackets at each wheel hub.
Basically a large angle fabrication 3/16" x 18" x 12" sheet metal (12" foot) with some stiffeners welded in.
The wheel hub bolt circle will be cut in the brackets for the lugs to attache the bracket to the hub/cat
Likely I will weld some locating "keys" on the cat frame pad to allow the brackets to be easily aligned on subsequent mountings.
A note
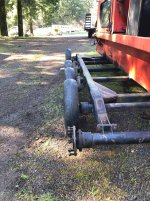
The channels welded to the cat frame will be set so the vans track width/tires will just roll in the channel to put the van in a near perfect side to side location.
I have not decided on what to use...steel channel or aluminum ?????
The only thing these do is allow easy roll on/off of the van.
Just need to be strong enough to hold the van while loading/unloading
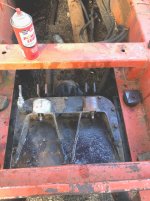
Suspension securing
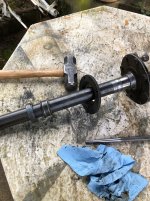
The "Tie links" will consist of a square tube with a round seamless heavy wall tube welded across each end (1-1/2" bore)
4 companion mounts that will weld/bolt to the vans sub frame (Depending on what location is available when we get there)
These will likely end up being rectangle tube cut to form a deep channel and have a 9/16" hole drilled through.
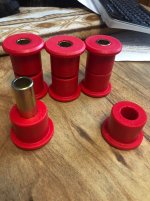
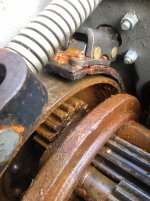
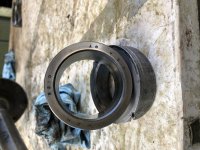
See the piccy of the bushings
Standard GM Square body 4X4 SPRING BUSHINGS (OFF THE SHELF TECH)

The links will be assembled using a jig to make sure all 4 links are identical so any one will fit any corner.
The suspension on the van will be in the neutral position when the links are attached....(Ease of assembly)
All the while I have been waiting for a cat I have explored many ideas and grabbed a few things i WAS PRETTY SURE would be of use......
Found the bushings at a garage sale cheap

Now they will have a job....
I want this thing to go together just like legos....and not take a rocket scientist to make it happen.
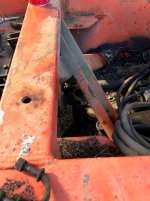
All the air lines are a different color
All fittings will be quick connect type.
The lines in the van will lay along the LH side on the floor...around the drivers seat and up to the operator station and plug in.
In the back of the van along the floor on the LH side there will be corresponding through hull fittings that will receive the matching quick connects both inside and under the van.
Toss in the tubes. plug and play ....pretty much once the assembly has been fabricated the next time it will require very few tools to hook up and go cat'n
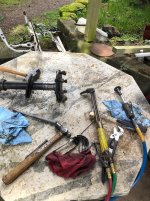
A very small amount of tools.
Literally a handful of wrenches is all...
3/4" socket and ratchet
3/4" end wrench (Fasten the mounting brackets to the cat)
Lug wrench
13/16" socket
13/16" end wrench (Link bolts)
Zip ties and side cutters (Fasten the operator station to the steering wheel)
Fastens at 3 places...located at two points at the lower part of the wheel for stability.
Small crescent wrench and possibly a 1/2 and 7/16 wrench to connect auxiliary battery up front in the tub
PLUG AND PLAY CAT.....
This may seem a daunting task....but is actually very simple.
When you look at it in it's entirety, yes...the scope can seem overwhelming, but break things down into small sections and it gets simple really quick....
Ahhhhhh yesssss
When you can get the ideas on paper and have dimensions to work with
(Real world stuff) a lot can be accomplished without getting dirty.
Then it can be taken out and the steel can be cut, fit and made to do what ya want...
IS THIS ALL GOING TO BE PERFECT??? LIKELY NOT...WILL CHANGES BE MADE....PROBABLY A CERTAINTY THERE....
But the basic plan is looking real viable at this point.
Back before I had a real cat to go touchy feely the ideas were sketchy and had a lot of room left to guessing....
Now when I am sitting here sucking coffee and designing....I can go down and look at something and run a tape across it.....then have real time data as to IF IT WILL WORK....
Pix
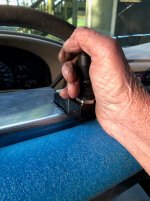
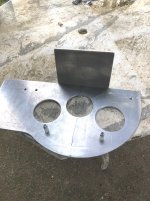
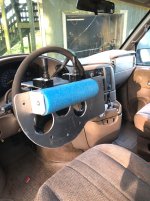
The operator station.
Valves, hand rest (Will end up black)
Station just anchors to wheel with 3 large zip ties (Sort of hinky...but fast and does not damage the wheel) FAST OFF..SNIP SNIP SNIP
This design allowed ME TO NOT TEAR UP THE STEERING CONTROLS OF THE VAN.
All controls stay and are functional.
Wipers, signals, head lamp dimmer, shifter.....
Wheel station mount will end up with a link connected to the drivers seat pedestal to keep the wheel stable at level position (Stop unnecessary stress on the power steering system in the van)
JUST LIKE LEGOS

I have the basic plan done for the operator station but the exact size and layout of the connection manifold that will fasten on to the right of the right joy stick on the open section of panel.
The 3 large holes....lighten the piece and to allow access to the horn pad on the wheel (Works great with left thumb)
This entire assembly gets painted black after its done so it blends into the scenery.....
The operator station took form on paper over the course of a week or so....then after I was happy with the idea it was an afternoons work to cut the aluminum and get it to the point it is now.
I scared up the valves (spring return N/C 3 PORT) AIR SUPPLY....EXHAUST... CONTROL
Again...just like legos
All off the shelf stuff too.....