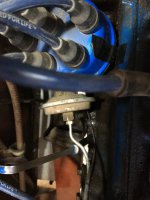
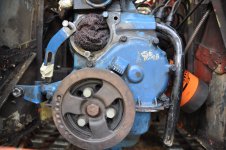
Inspired by your post and having same year and engine cat, I tried to check my timing. Painted the timing marks on the pulley from underside (last year). Warmed engine up. Bolt on distributor is 1/2" - used short 12-pt box wrench. It has an open end on other side and box end is tilted. Tilt is very helpful. Found bolt to be not tight - loosen more. Put a piece of electrical tape running vertical on distributor cap and the engine block aligned with each other so I could track how much I rotated the distributor - se photo. Removed vacuum tube from distributor and carburetor; put electrical tape over hole on carb. Looked at photo of timing mark location on block (photo) and felt engine block to find marks. Hooked up timing light. Grabbed mirror, contorted body and shined flash light into mirror to figure out how to hold the mirror and see timing marks. Without moving hand holding mirror, started engine. Aimed timing light into mirror. As the light makes the radiator hose light up, I could barely see the timing block that has the lines on it. Just need to be in center so reading the numbers is not necessary. I could see the pulley, but the marks on it never really appeared. Moved distributor around to see if timing marks appeared (repeated contortion process) - no luck. Called old school buddies -
With the engine off and all plugs pulled you can rotate the crankshaft with a wrench to align the timing mark on the pulley with the 6 deg mark on the block. From the underside, make a mark on the pulley and block that align with each other at a convenient location. Feed timing light to underside. Start engine and from underside shine light on the new marks. Adjust the distributor until these marks align. Remember, 1 deg. rotation of distributor moves crank alignment mark 2 degrees.
To insert the dipstick fully, I have always had to tilt the stopper a tad to slip past the distributor vacuum line. I think all the oil and gunk around the distributor clamp has kept the distributor from rotating much, plus the dipstick was stopping it from rotating in one direction. While the engine started and ran fine, the plugs tended to be sooty even with one reduction in carb. jet size. Don't know if the initial timing was good or not.
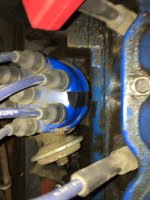
Old schoolers arrived and took over. WIth elevation, the timing needs to be advanced. (Folks on web kind of recommend 1/2 or 1 degree per 1000 feet but I could not find definitive answer.) They slowly advanced the timing and periodically rev-ed the engine until they heard something (not pinging) and then backed it off a bit. They put load on the engine (brakes on, in gear and lightly eased off the clutch) and again listened. Once again they backed off a tad. When done, based on the tape, they advanced the timing nearly 25 deg from where it started - photo. I am up at 7000 feet. They left and I reinstalled the vacuum line. The idle was not perfectly smooth so I backed off a few degrees. They said if starting is an issue back it of a tad more. I am going try the new timing as I can easily return to old setting.
Is there a better way to set the timing and adjust for elevation?