• Please be sure to read the rules and adhere to them. Some banned members have complained that they are not spammers. But they spammed us. Some even tried to redirect our members to other forums. Duh. Be smart. Read the rules and adhere to them and we will all get along just fine. Cheers. :beer: Link to the rules: https://www.forumsforums.com/threads/forum-rules-info.2974/

1953 Tucker Sno Cat 443 Mt Washington WMTW Channel 8 Restoration

Track Addict

Bronze Member
GOLD Site Supporter
Material on the way to replicate the pivot bushings. Going to bush the piston clevis back with steel and use a bronze clevis. Should have done this on the 73 in hindsight and probably will.

Set the pivot in place to figure out what to add back from wear. Need to add 1/16 to the face so that collar was around 1/4" give or take Tucker tolerance.

The pivot was mounted in the frame out 3/4" one side to the other. I checked the measurements front back all over and it's set oem like that. Mounting it back this way by design or eyeball fabrication because it worked. I like to believe this is by design so that is what we will go with.

Hydraulic pump adjuster here to stay. Actually pretty neat design. Will add a sleeve in the tube where the bracket mounts to keep the tube from colapasing and stabilize the frame.

Note the black pipe nipple on the pump suction tube still complete with chop saw slag inside.

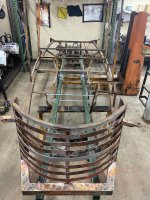
Motor ready to pluck!
4AE6F28C-0737-49FC-A8F8-3011D4F8E5C1.jpeg
7C07D1B9-B804-4D42-8DB6-F566B79F77EB.jpeg
8F6B5104-AFF6-4F97-A2C4-BB9624BCD266.jpeg
2E93BCB0-8889-47AB-8D94-6663607508ED.jpeg
C16D6F5E-609E-44FC-8D6B-B1220BDCF1E9.jpeg
2557F60D-C6D4-421F-92BD-86DA1B5F9123.jpeg
 

Snowy Rivers

Well-known member
Looks great.

Amazing how these old machines get beat so bad over the years.
This Cat gonna be better than new when you're done.

Putting the sleeves through the frame where the pivot mounts is good plan....Once things are stable and all happy....Add a piece of 3/8" key stock on both ends of the bushing block to capture the block and tack weld the key stock.
That will stop any wiggling.
 
Last edited:

Track Addict

Bronze Member
GOLD Site Supporter
Nothing brings out the support group like 90’s temperature humidity and thunderstorms.

New frame is welded up where applicable for this phase. Motor pulled and stored.

Pivot parts in process pivot to piston clevis bushed.

Piston to frame mount needs investigation. Looks like a bolt that is cut/broken but braised? Experts please….
D024512A-B6EE-444B-96CB-D8147B4CB33A.jpeg
8E590D87-A304-4981-9163-637A5A33B540.jpeg
1E119092-12F4-47FA-B687-8230C20476A6.jpeg
12209606-E099-4C87-BFE1-053BEDBF6719.jpeg
72A94496-5290-48D6-80C5-04C24B3FC8BF.jpeg
7F0C2BAA-3B57-4D98-9B2C-CA952E74CB36.jpeg
1DB310E7-7C44-4720-BE00-FDABF7C6E409.jpeg
BB2D4DFB-492C-4280-A767-274014FC4D3E.jpeg
AE1476ED-A387-45CA-89DA-DE0E1719F375.jpeg
7A740C01-6DFD-49B1-B8AA-DAA84ECCE94F.jpeg
 

Snowy Rivers

Well-known member
Quite the crew ya have there.....YOUR TRACTOR IS BIGGER THAN MINE...

Tractors/skidsteer loaders are sure handy when it comes to dealing with lifting engines and such.

Looks like progress is really getting into the scene now.
 

Snowy Rivers

Well-known member
Ahhhhhh I see.


We used to have a B6100 KUBOTA.....It was a 1973 model
We ran it until it would not go any more....Gear box chewed itself to bits.

Bought the Max 22 Mahindra in 2013.....Been a sweet ride.

The high lifts require the Old Scat Trak 1300 skid steer and some home made lifting rigs....

My Kingdom for a shop with an overhead crane......even a 5 ton would be sweet....a 2 ton would gitterdone....

And we always make do....somehow...
 

Snowy Rivers

Well-known member
Is the boring head one of those off ebay....come from across the great pond ????

I bought one of the ones off ebay for less than $100...came in the orange plastic box.

I have used the big $$$$$$$$$$$$$$$$$$$$ Bridgeport boring heads....This ebay goody is giving me just as good of tolerances as the big $$$$ ones ever did.
Likely over the long haul given heavy use it might fall short....?????

For the home "Cat shop"...works sweet.
Having tools make all this stuff possible.

I bought the mill ....9X42 Max mill with DRO off ebay a few years ago.....$500 buy it now.....and then a 2 day trip to LA & back to pick it up......Guy made soap box derby cars/parts.

Nasty ugly divorce forces the sale....

The ways are tight all the way.....No power feed.........

The DRO works sometimes.......Thats OK...When it won't work we do it the old fashioned way.
 
Last edited:

Track Addict

Bronze Member
GOLD Site Supporter
Rear piston frame mount pin pressed out and bracket cleaned up.

Tucker used what appears to be a cast through bolt clevis mount that has the ears cut off and welded the frame. It will be put back the same way.

Very little wear on that side of the piston like seen on other cats. With the little movement the pivot end takes all of the abuse.

Off to the lathe for a bronze pin.
74A76B06-1864-4038-B218-18DD9CBA1017.jpeg
ADD9FBEC-3543-4BBD-BE0A-E952CF56296E.jpeg
 

Track Addict

Bronze Member
GOLD Site Supporter
Last of the drive shafts removed. The front yoke on the diff is cracked. Not sure if the Cleveland splined cross joints exist anymore so this may be an upgrade area.

Cut out below the passengers side seat post that was ripped out to patch. Will replace the cross bar also.
FE5E222F-14D0-43CC-BE65-30F304E2162B.jpeg
9815CCC4-DCE4-4AEF-A040-65568BA8EAD8.jpeg
 

Rock'n BK

Active member
SUPER Site Supporter
THis is amazing keep it going!!!
Radiator is not correct. Wire tied in to factory mount .

Any idea what would have been inhere? Universal should be quick and easy but orig is always nice !
Radiator is not correct. Wire tied in to factory mount .

Any idea what would have been inhere? Universal should be quick and easy but orig is always nice !
Track
Here is a photo of the MoPar stock radiator in my 443. The year is 1958 January

Hope this helps
image.jpg
 

Track Addict

Bronze Member
GOLD Site Supporter
Little summer precipitation brought winter motivation!

Removed and tacked up the steering box mount on the new frame. This is cocked and crooked as oem design. Best to duplicate instead of pontificate.

Rear piston mount located and tacked.
0E95D9CC-B9D6-499B-A015-D254E1CFF9C0.jpeg
02C9CC00-A02D-4AFF-A7D8-21FCB45EF2A9.jpeg
2D538A1B-690C-4C2A-980F-942B8B644B80.jpeg
0E95D9CC-B9D6-499B-A015-D254E1CFF9C0.jpeg
4894D721-27EB-4363-9D4F-88858CA64196.jpeg
1C52940A-43ED-4694-9700-B0153C242F03.jpeg
877ABCA0-6D72-42E3-96BB-B733405C6AE6.jpeg
 

Track Addict

Bronze Member
GOLD Site Supporter
Hurricane summer delay so got some Tucker time.

Frame is stripped down with the exception of the rear upper table and front trunion mount. These are load bearing in the current state.

Next steps for the frame is to add bracing and support to true everything up and prepare for cutting the frame. Don’t want anything to shift.

Have a good plan the hold and allow the adjustment that may be needed to meld to new frame.
90BB93FA-A5BC-4EDD-9146-3A54F4076BBE.jpeg
C54E3A92-397C-4E95-B407-0A28B8E3EFEE.jpeg
B16763CE-FACA-4397-A343-9B4E8AD66027.jpeg
E93F29BC-62D6-4BFC-BE9F-29DB73F3F3C3.jpeg
B5DB8616-1068-4AD4-96C0-6DE282C5F659.jpeg
F3E08650-595E-4B2A-887E-E27AA7C52A16.jpeg
 

Track Addict

Bronze Member
GOLD Site Supporter
The turn tables came apart easily. New bronze bushings and rollers will be made.

The front table pivot bushing appears to be the same as swing arm pivot. Test fitting the table seems right.

The trunion pivot is amazingly tight. It’s has been off before and either was rebuild or didn’t wear. Bonus either way. Rest of the machining and repair needed for these components are in my skill set.
E5982271-36A6-4EFB-B0D4-6C64D91A32D3.jpeg
F5FFD329-9D0F-49CE-B073-648551B46089.jpeg
E79AD70B-3D12-47DF-A9E7-8FFAA313DD0C.jpeg
E5982271-36A6-4EFB-B0D4-6C64D91A32D3.jpeg
F5FFD329-9D0F-49CE-B073-648551B46089.jpeg
E79AD70B-3D12-47DF-A9E7-8FFAA313DD0C.jpeg
80D4622D-8CCA-441F-82C6-D6A00BCDBD52.jpeg
3E840930-794B-45BF-94E8-3AA26EAB329A.jpeg
50BF9764-54E5-4212-A156-227BA2F120EF.jpeg
669E768B-7DD8-4166-B3DC-D8313FF4BC8A.jpeg
9DDA3955-0D76-4EA2-BB8D-E0703463EA60.jpeg
 

Track Addict

Bronze Member
GOLD Site Supporter
Braced the upper frame against any movement when in preparation for removal. Goal is to prevent any shifting once structural members are cut and grafted on to the new lower frame.

The 4 upright tubes the uni strut is attached to will be replaced with new material during the surgery.

The critical measurements are the motor mounts which are all attached to the upper frame and braced accordingly.
Moving along…
48BC075E-5826-4A2E-8E7D-04C3439B23E0.jpeg
31C934A3-4C66-4BF0-AEFC-CF17BB97CF32.jpeg
827BDB0D-6664-483B-B8A1-7694D6AD1E1A.jpeg
A0F4CFB3-FC9F-412A-BFDE-633F31FC49D3.jpeg


Big thanks to the Wednesday night crew and resources!
A7A86C6C-AC3E-4649-904F-BDC3A45F4976.jpeg
 

Attachments

  • 8F0B56CD-4AD6-4D51-B0D4-27E2701178CE.jpeg
    8F0B56CD-4AD6-4D51-B0D4-27E2701178CE.jpeg
    2.2 MB · Views: 102

Track Addict

Bronze Member
GOLD Site Supporter
This cat had a bench seat originally. The front bar was cut off on the driver side and the passenger post was missing along with a piece of the tube it was atrached

Patched the frame and fabricated a new crossbar and upright support for passenger side.

Filled some holes and cleaned up a horrible hinge weld job.


BE28030D-5A43-4EAE-846F-113D8947AC68.jpeg
DA603927-F334-48E0-97ED-EF1EFAECA929.jpeg
E2EBEB38-917A-4A1B-A287-0EBD0A110993.jpeg
 

Track Addict

Bronze Member
GOLD Site Supporter
Rear upper turn table removed. You can see how bad the frame was on this area

Removed the front trunion pivot. Never saw outer frame backers and the frame has bolt guides welded on. Upon closer inspection frame is broken under here and this was a sandwich repair.


807C792E-07A0-4621-B872-F25C7419D831.jpeg
741A2947-BF5A-4EA8-901B-157A98F0DFDE.jpeg
55BFE341-1F64-495B-BD6D-1BDA31A2B484.jpeg

Will use the pivot with the front oem frame as a locator to tie to the new frame.

Next steps is to prepare for the frame cut!


F7A852C6-57F0-4C80-B50D-29256A4AA7E0.jpeg
0C272AE7-95CF-45B6-89AA-6D5027B61777.jpeg
 

Track Addict

Bronze Member
GOLD Site Supporter
Got some nice tall stands donated. Once the upper frame is mounted to the lower frame plan is to flip the frame upside down to repair the bottom rot on the upper tube bottom. Need height to clear the roof frame.

Removed the tires from the axles and repurposed the dollys for some mobility over the winter of the frame.

Shuffled the frames around did some more mock up measuring and checking if the trunion mount.

Slight set back as we compared measurements. Piston mount frame tube was welded in front of the mark instead of behind so we are out 2 inches. I’ll take the blame.

On a positive note I wasn’t in love with reusing the cast piston mount welded on. Will use this take 2 opportunity to fab new mounts 1/2” plate and weld on.
D7DF156F-F9A0-438A-947B-12ACE425B918.jpeg
50C7679C-80D5-4E54-81E3-68E9093041A6.jpeg
64A4437D-E45B-4416-932F-8A87C8E74343.jpeg
82970A16-7D11-4FF6-A060-10BA5CCA9A5A.jpeg
DB21E479-63D5-4C79-A76F-C96AC260FFDB.jpeg
5519B5BA-9662-400B-8C4F-7512DDA3AEE0.jpeg
0473A695-B330-459B-A468-FBE0FF24CB33.jpeg
 
Top