
-
Please be sure to read the rules and adhere to them. Some banned members have complained that they are not spammers. But they spammed us. Some even tried to redirect our members to other forums. Duh. Be smart. Read the rules and adhere to them and we will all get along just fine. Cheers. :beer: Link to the rules: https://www.forumsforums.com/threads/forum-rules-info.2974/
You are using an out of date browser. It may not display this or other websites correctly.
You should upgrade or use an alternative browser.
You should upgrade or use an alternative browser.
442 Refurbishment Project
- Thread starter DAVENET
- Start date
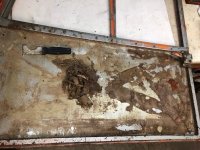
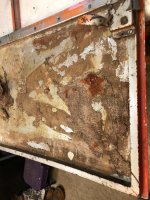
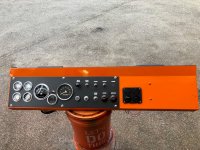
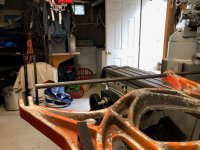
Apprentice mishap? I was bead blasting the dash frame yesterday and came across something interesting under the layers of mouse piss on top by the louvers. In the cabinet it didn't look uniform and thought I was missing spots. Turns out 53 years ago someone cut holes in the wrong spot on both sides. The correct ones got cut and patches were added in to fill the ones in the wrong locations.


LOL
is that the only high quality OOOOPS you have found???
is that the only high quality OOOOPS you have found???
Last edited:
That seems like a much more sincere effort to fix a mistake than I've seen on any Tucker I've worked on.
so, what you are saying, that you have found countless OOOPS, but, this one, surprised you, because the quality of workThe first that surprised me!
Last edited:


Snowy Rivers
Well-known member
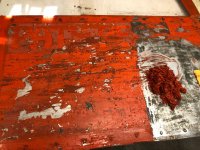
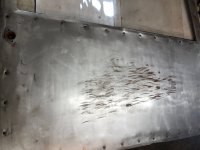
Using a grinder on decals Hmmmm ... sort of like using a Howitzer to kill a mouse ????
The are some very nice bomb can spray on goods to remove decals....
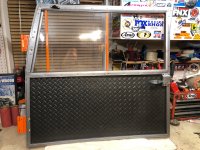
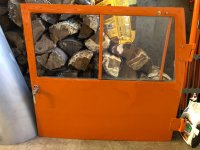
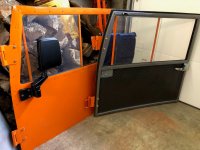
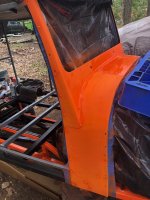
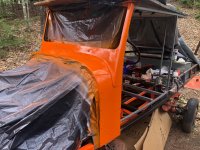
Doors looking very nice.
The are some very nice bomb can spray on goods to remove decals....
Doors looking very nice.
olympicorange
Active member
looking great Dave, ... keep up the good work,...

With all the horse shit that was this past year behind me... I am finally able to catch up a bit here at the all-things-over-the-snow-motivational-training-series.
I always wondered what having the ability to work on one project at a time was like........ !!!!! thanks for sharing. Looking great.
I always wondered what having the ability to work on one project at a time was like........ !!!!! thanks for sharing. Looking great.
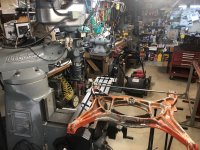
Some front turntable / trundle progress. Slow progress, but beggars can be only semi choosy. It will be interesting to move it around with no clinking, clunking or slop.
Attachments
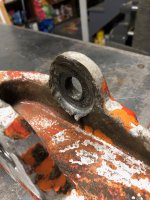
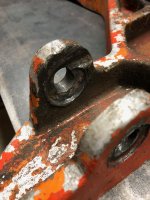

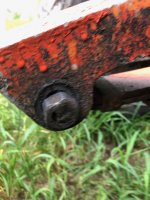
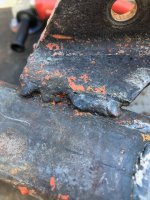
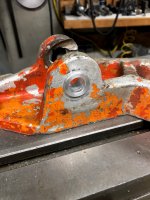
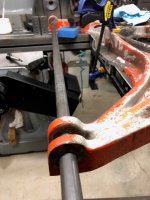
Between springs rubbing and nuts without washers (WTF??) it was pretty ugly. Bored, bushed, filled and welded.
Attachments

Last edited:
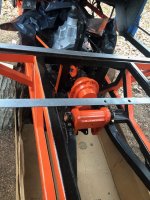
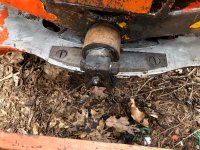
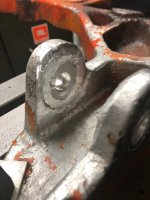
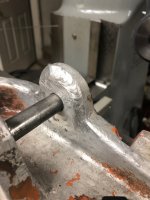
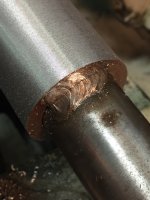
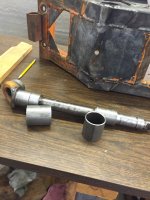
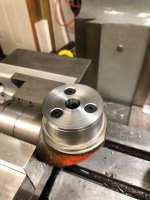
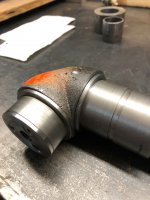
Trunion pin was all out of round and pitted from over greasing . Turned everything down, re-sleeved and turned back to specs. More to come on this as work is still in progress.
. Turned everything down, re-sleeved and turned back to specs. More to come on this as work is still in progress.Attachments


I had thought of that spring contour was by design but this makes more sense. Could figure out how they carved that in.
Nice progress.
Nice progress.
Other side was worse than the first. If possible.I had thought of that spring contour was by design but this makes more sense. Could figure out how they carved that in.
Nice progress.
Attachments
Last edited:
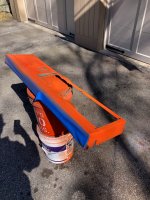
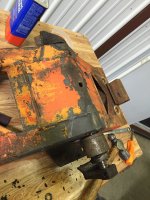
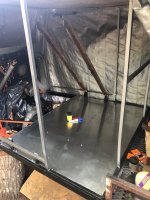
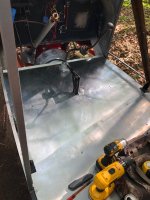
Slow going in the NE with the tropical weather in place for July (unlike the rest of the country). Rain 20 out of 23 days. Already the rainiest July and the 5th wettest month in recorded history. But, floors cut, installed, supported and screwed. Teflon tape applied between frame and sheets to stop galvanic corrosion and deaden any metal to metal contact. The .090 will certainly hold up better than the .063 I pulled out. The old floorboards were completely distorted.
Attachments

carry on tucker warrior
Got some testing hail accumluatik this evening! Not all winter is lost with summer.


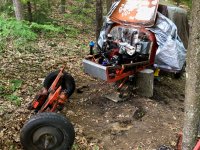
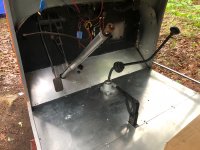
Finishing up work on the front (finally). Had tons of repair work to do to get it back to right. Springs and bolt threads had hammered the spring hanger holes, so everything had to be realigned, straightened, bored, bushed, welded. A complete shit show. Thank goodness I have friends with tools.
Attachments
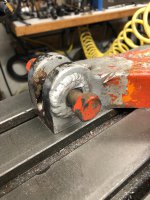
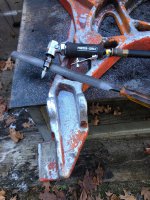
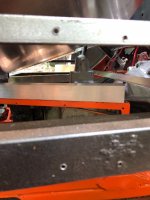
Thanks to TA and Drifter providing their wisdom ahead of time to guide the way (https://www.forumsforums.com/threads/1973-tucker-sno-cat-1443-new-to-me.75566/page-24#post-20679068). The trunnion was only slightly out of round, so it got a light pass to make true again. The pin was a different issue. The only real solution was up in post 168. Take it down, sleeve it, weld it, turn again to specs. The front roller was a mess. It was installed incorrectly at some point which explains why it was farther to the rear than it should have been. As you can see in the first pic, it may have been moved back to potentially increase the angle and keep the trunnion and turntable from making contact. Either way, a 1/16th needed to be added front & rear to keep the two from kissing. And like TA's, there was plenty of slop front to rear (1/8") on it as well. So, the pin taken down so that a .062 top hat sleeve could be pressed on and a flat 'shim' added to the bottom. This will ride in a bronze wear sleeve in the turntable (no pic). Shims added to stop the linear slop as well.
Attachments

davenet,
I am so impressed with your efforts to do things right, you inspire me to keep trying to do better, well done.....
you in good company with the likes of Blackfoot Tucker, 1boring guy, TA, bobcatbob, turbinator, puckle, GMOoSE and I am sure I forgot a couple others, sorry,
great job guys
I am so impressed with your efforts to do things right, you inspire me to keep trying to do better, well done.....
you in good company with the likes of Blackfoot Tucker, 1boring guy, TA, bobcatbob, turbinator, puckle, GMOoSE and I am sure I forgot a couple others, sorry,
great job guys
Last edited:
This thing hitting the local testing grounds this year?
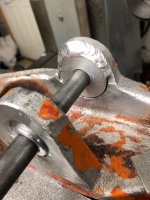
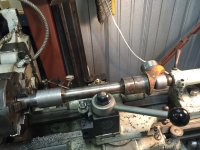
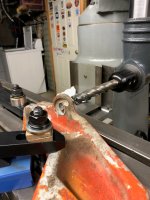
Holy cow! Is that a manual mill you’re doing that on? Rotary chuck underneath? That is SKILL!The next vid is the most unnerving one of unobtainium being turned down knowing that forward is the only way at that point! If you don't have broadband, don't bother. Your computer will melt.
Not me . . . I just watch and grimace. 😬Holy cow! Is that a manual mill you’re doing that on? Rotary chuck underneath? That is SKILL!