• Please be sure to read the rules and adhere to them. Some banned members have complained that they are not spammers. But they spammed us. Some even tried to redirect our members to other forums. Duh. Be smart. Read the rules and adhere to them and we will all get along just fine. Cheers. :beer: Link to the rules: https://www.forumsforums.com/threads/forum-rules-info.2974/

Thiokol Imp 1402 OpenTop # 129 by Nikson

Good for you on taking the next step.. I saw your bed was a little bent and figured you would fix it!! Once you start the work its hard to draw a line on where to stop. Its looking great so far, keep us posted on your progress!!!
 

Nikson

Bronze Member
GOLD Site Supporter
anyone got anything to say to the weight load capacity for these things???

I'm considering building a front & rear cab to carry gear & 4-5 people...

so to think that GROSS is 3300lbs and NET is 1900lbs, so it only gives 1400lbs to play with, am I understanding it right?

So if you consider 4 guys in the cat (200lbs ea.) - that leaves only 600lbs for the rest of the load capacity...

If I was to build up a rear cab with some bench seats, windows, 3/4 in. sq.tubing (thinwall steel) - will that work?
 

muleman

Gone But Not Forgotten
GOLD Site Supporter
With 6 guys and gear that engine will working hard to run on steep grades. I think it will be slow and geared down to get around.
 

Helmsman38

Member Formerly Known As Kristi KT7
GOLD Site Supporter
anyone got anything to say to the weight load capacity for these things???

I'm considering building a front & rear cab to carry gear & 4-5 people...

so to think that GROSS is 3300lbs and NET is 1900lbs, so it only gives 1400lbs to play with, am I understanding it right?

So if you consider 4 guys in the cat (200lbs ea.) - that leaves only 600lbs for the rest of the load capacity...

If I was to build up a rear cab with some bench seats, windows, 3/4 in. sq.tubing (thinwall steel) - will that work?

Yes you have it correct on the math :biggrin:
 

Nikson

Bronze Member
GOLD Site Supporter
Yes you have it correct on the math :biggrin:

LOL

So putting in an actual rear cab, I would be pushing the limits, ha?

I dont plan on climbing much of the steep grades here, mostly pretty gradual uphills, and speed is not going to be an issue...

but having it being about 3300lbs +/-, that would be topping it ha?

in your case, with the soft top & shell - how did you see it work?
 

Nikson

Bronze Member
GOLD Site Supporter
With 6 guys and gear that engine will working hard to run on steep grades. I think it will be slow and geared down to get around.

Well, 6 guys probably wont be an issue, for the most part it will be 4 or so... but we like to bring out gear for ice fishing...

I'm just worried that I'll overload it where it wont be as capable as I would like to see it in the snow (fresh or packed)
 

Helmsman38

Member Formerly Known As Kristi KT7
GOLD Site Supporter
Dont expect to climb any hills for very long with alot of weight . It gets hot really hot and if you havent enough air flow you will over heat . No seep records will be set going up hill .
We had one and it was perfect for us as our road into the cabin is flat . The occasional trip up the hill which was steep was always a concern lighter is better and gearing will be everything .
 

Nikson

Bronze Member
GOLD Site Supporter
Dont expect to climb any hills for very long with alot of weight . It gets hot really hot and if you havent enough air flow you will over heat . No seep records will be set going up hill .
We had one and it was perfect for us as our road into the cabin is flat . The occasional trip up the hill which was steep was always a concern lighter is better and gearing will be everything .

So I guess the OC-4 isnt really the problem, its more of the Wisconsin not really being enough? :)
 

Laurentian

New member
A rear cab shoudn't be too heavy if you make up a tubular frame and use thin guage aluminium sheets. You could even get fancy and get some type of composite sheets. I made some tooling for a compaqny that makes air deflectors for tractor trailers and those boards are indestructible :
[ame="http://www.youtube.com/watch?v=0sL7jGJaurw"]Transtex MFS Skirt promotional video (WIP) - YouTube[/ame]
 

Nikson

Bronze Member
GOLD Site Supporter
A rear cab shoudn't be too heavy if you make up a tubular frame and use thin guage aluminium sheets. You could even get fancy and get some type of composite sheets. I made some tooling for a compaqny that makes air deflectors for tractor trailers and those boards are indestructible :
Transtex MFS Skirt promotional video (WIP) - YouTube

Yeah, so far just trying to figure what would be the simplest / least labor, yet most efficient way to go...

I bet that sheeting isnt cheaper aluminum thou, ha?

p.s. pretty sturdy stuff thou
 

Nikson

Bronze Member
GOLD Site Supporter
Re: Front End / Nose section

After a long time and many different versions in my head... I've decided to start on the front clip of the cat.

I'm not much for drawing/paper layouts, more on hands experience, so I figured just cut off what was damaged, and start welding on and incorporating things that I saw fit necessary.

P1010906.JPG


Winch is probably will not be used much for getting out of trouble, but in my personal off-road experience - winch is something that there like an insurance policy, you never know when you might needed...

Went ahead with a smaller size, nothing like a 8000lbs overkill, since those weight close to 100lbs, and are too much for a 2000-3000lbs cat.

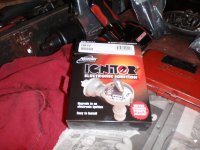
Smittybilt XRC 4.0 - $170 (S&H included off Amazon.com)
its 17lbs, considering a steel cable which will be replaced with synthetic to lighten it up and be a better choice for cold snowy conditions

SMB97204-Smittybilt-Winch.jpg


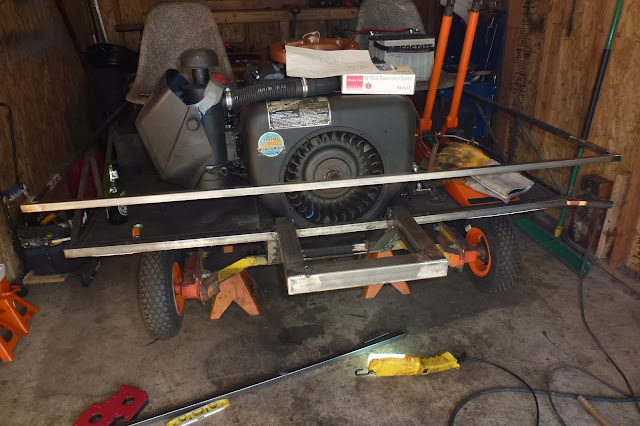
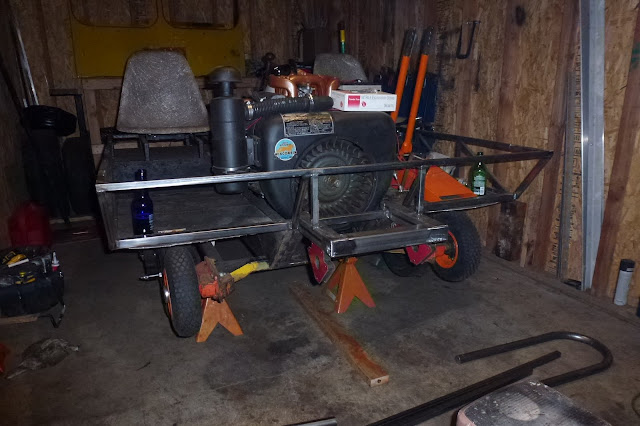
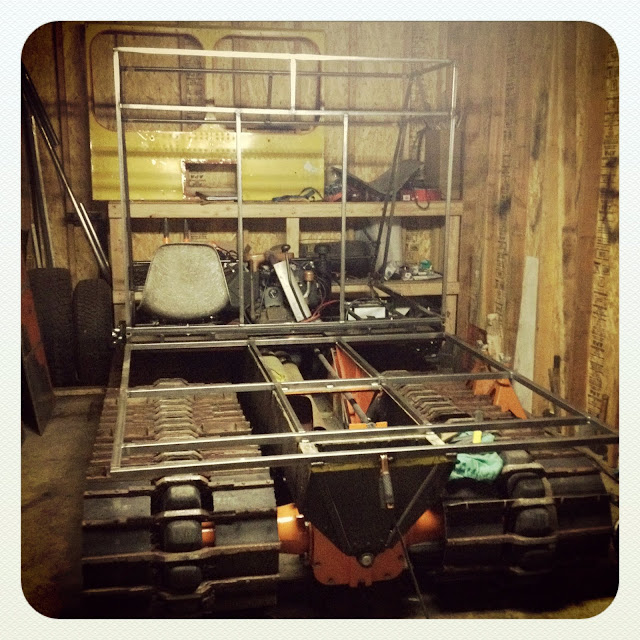
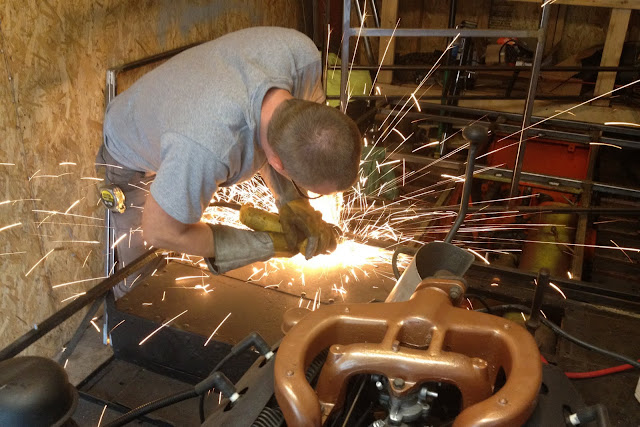
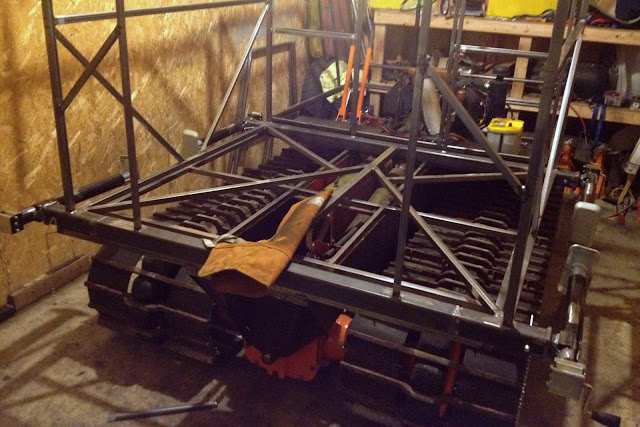
so front clip chopped off ... off we go onto seeing what could be done...

P1010907.JPG


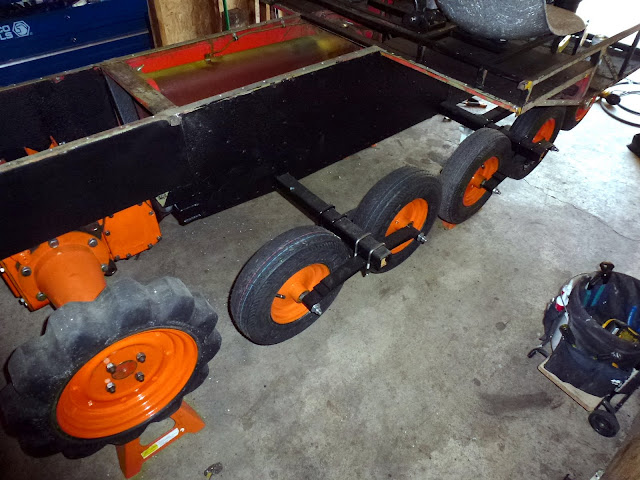
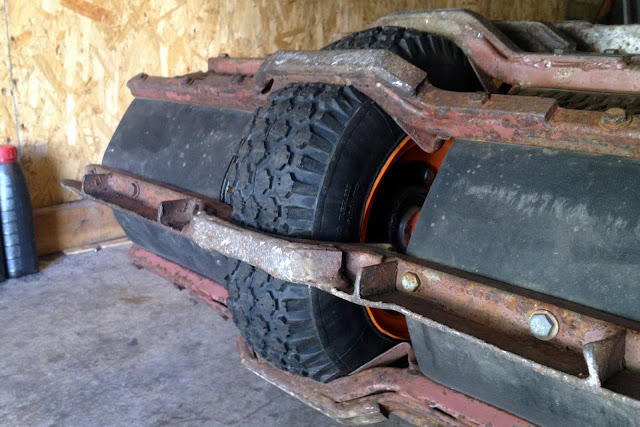
Oh, did I mention that wheel were on...????:wow::brows:
P1010908.JPG


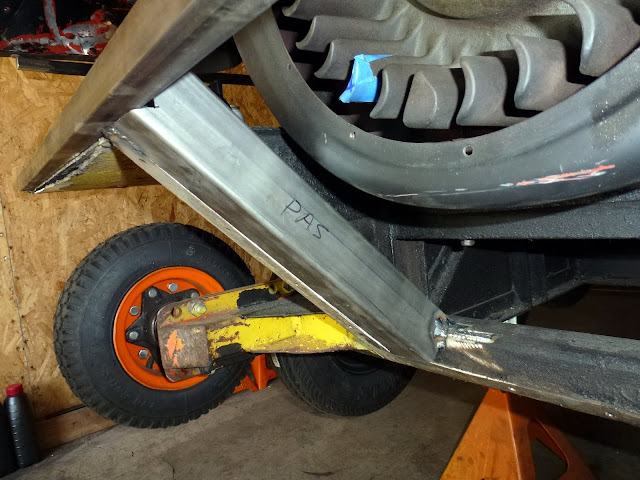
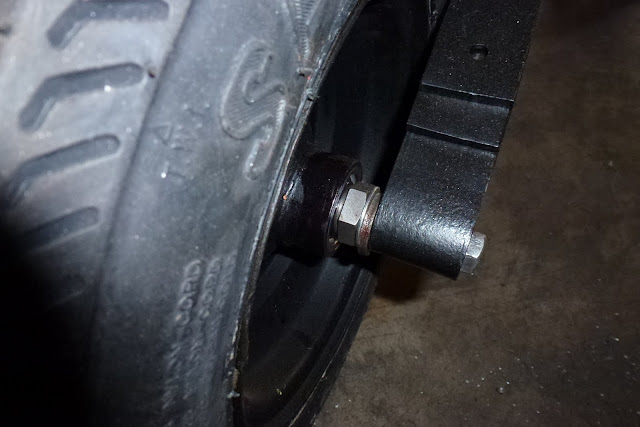
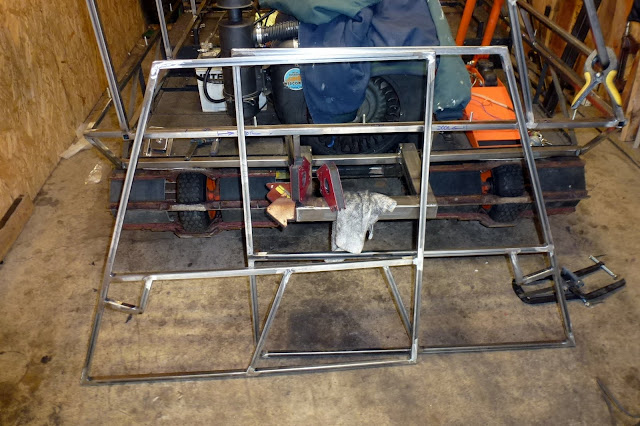
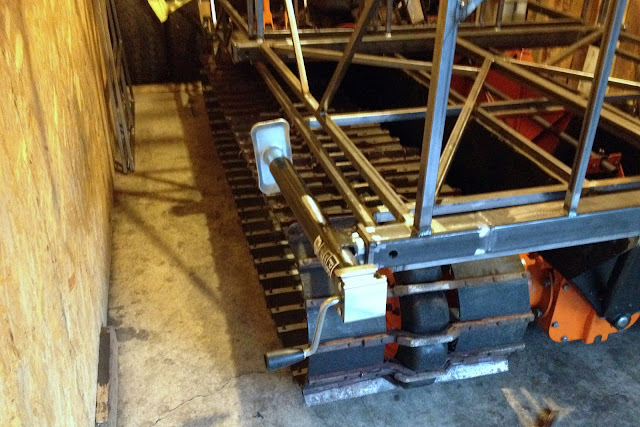
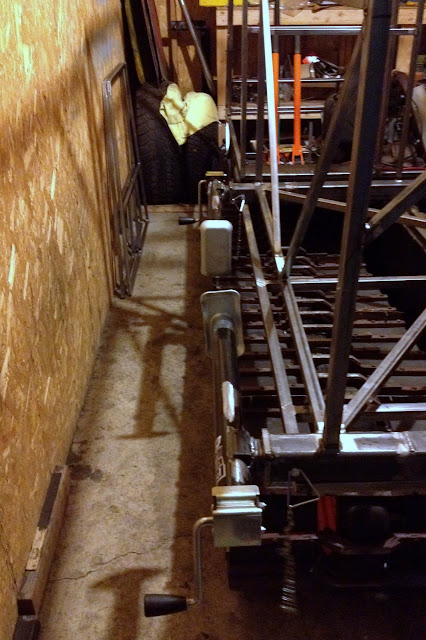
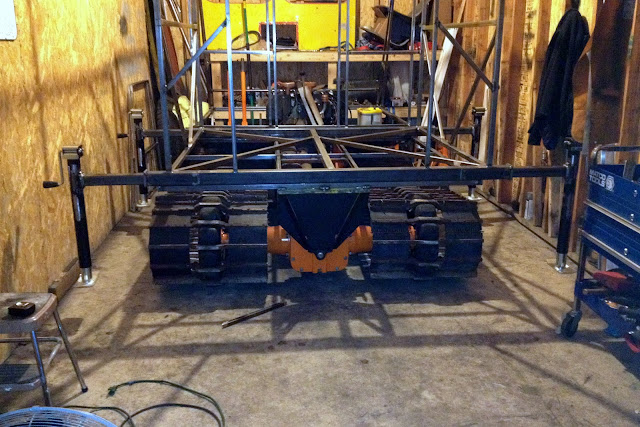
couple of the idler wheels had a wider wheel part, thus although tires were same size, I had to utilize some spacers to get them line up, as well as drill a new hole for the outer leaf pack center bolt.

P1010911.JPG


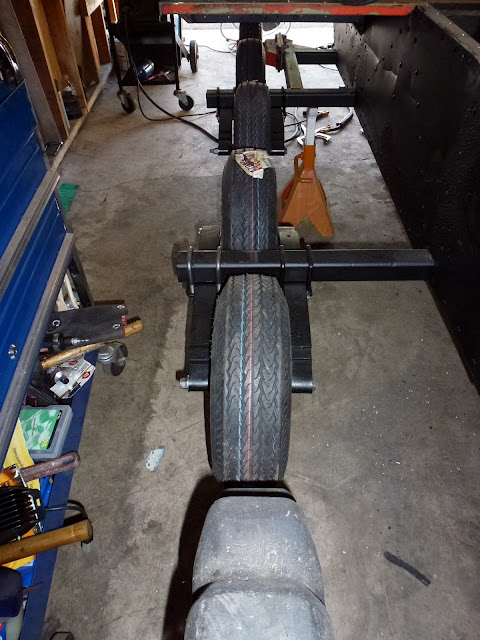
you will probably notice that 2 first ones are WIDER... :)

P1010909.JPG


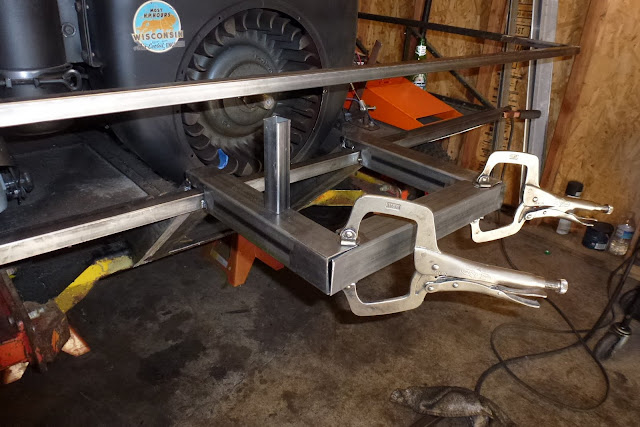
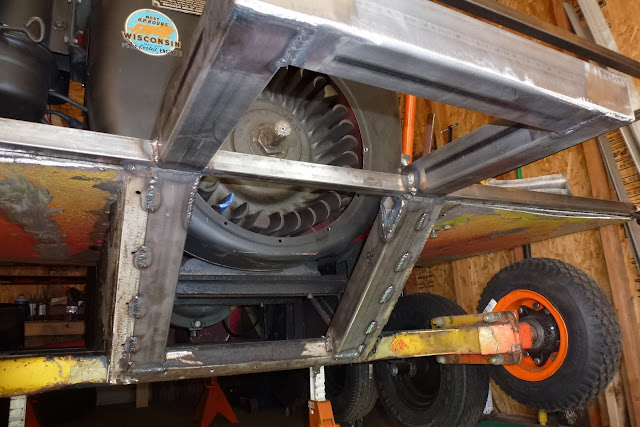
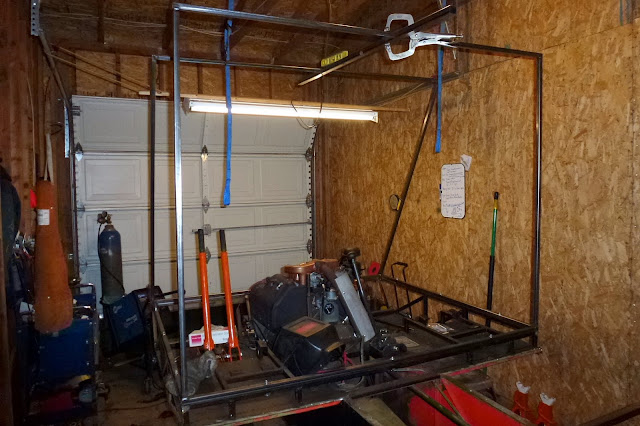
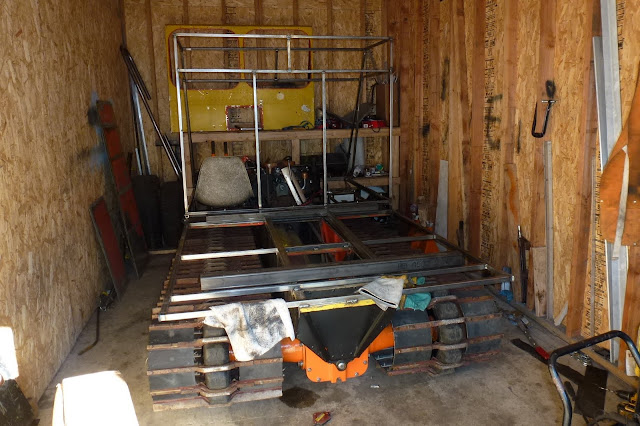
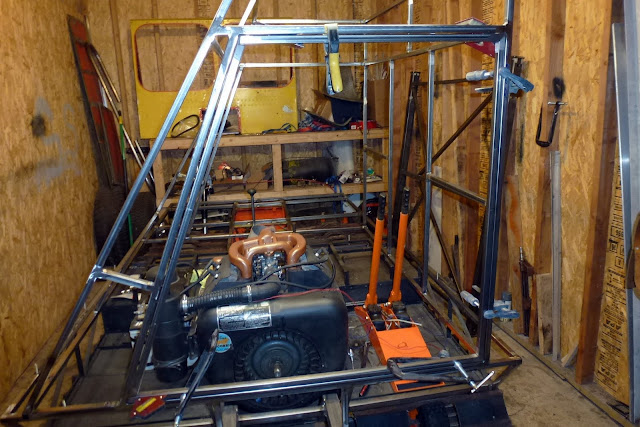
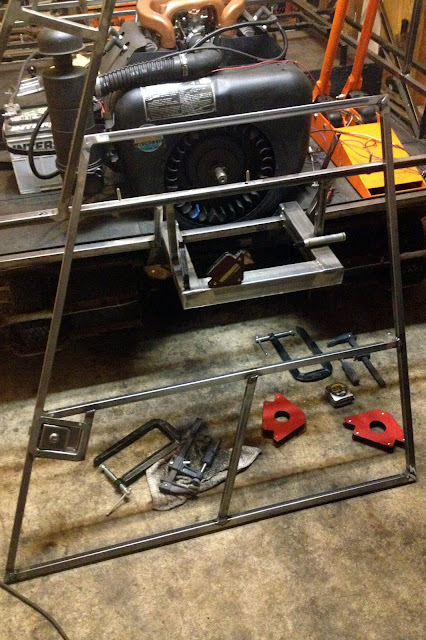
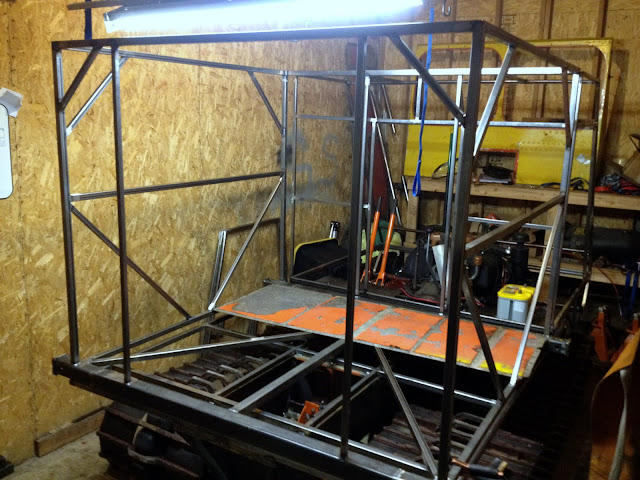
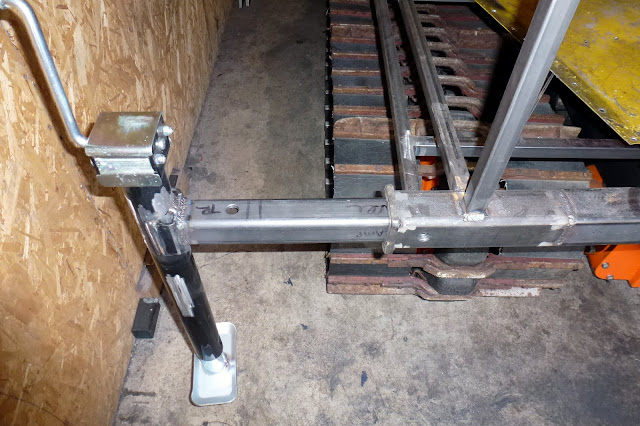
Front clip - prepped...

P1010913.JPG


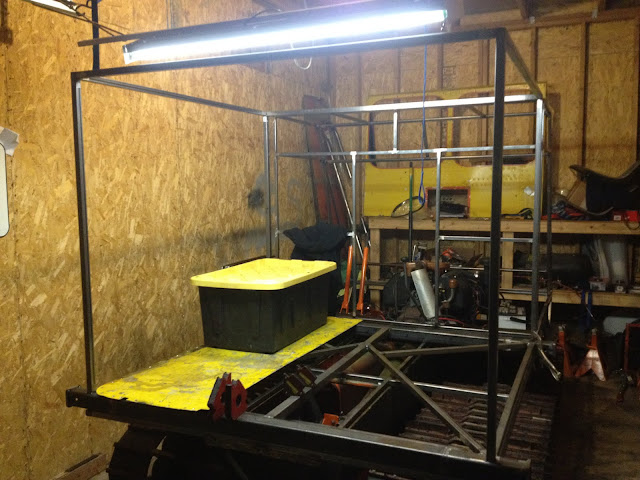
extended the top about 6 inches, making the front a bit $harper...

P1010914.JPG


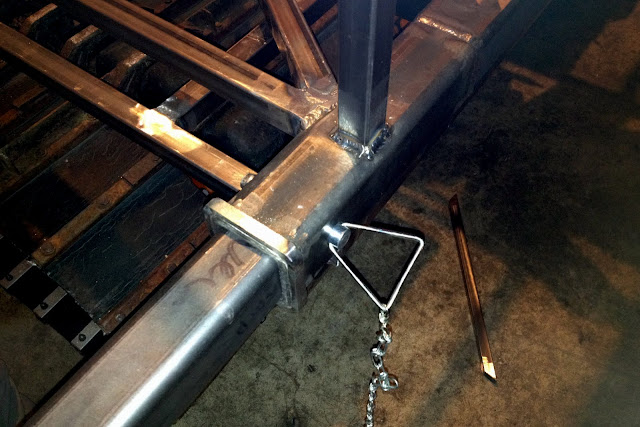
winch will get mounted about HERE... :brows:

P1010920.JPG


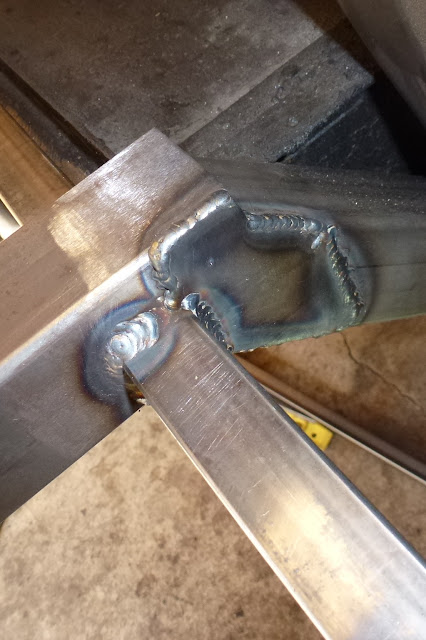
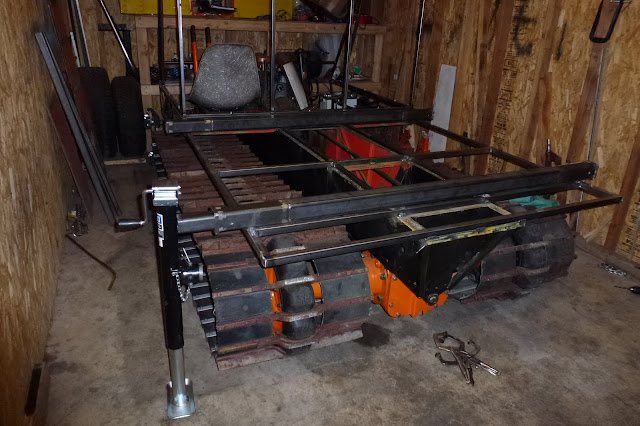
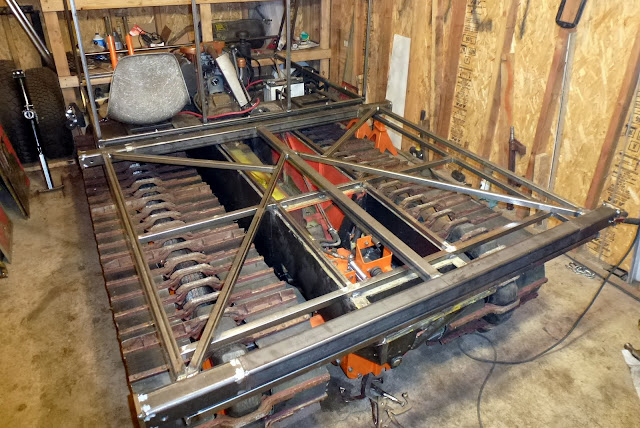
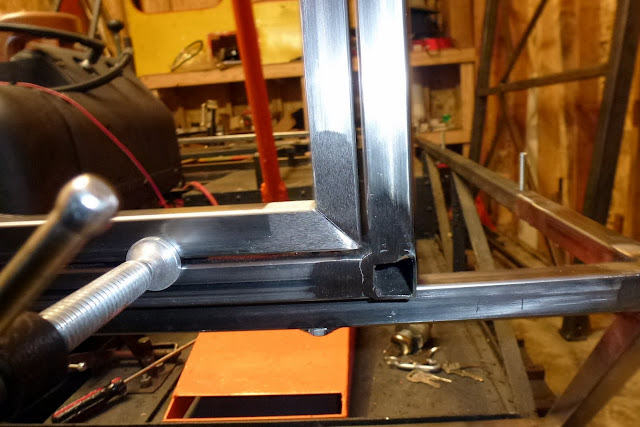
braced the joints...

P1010922.JPG
P1010921.JPG


P1010926.JPG


So far... so good...

P1010923.JPG


Seems like that this should provide plenty of support for winch...

P1010925.JPG


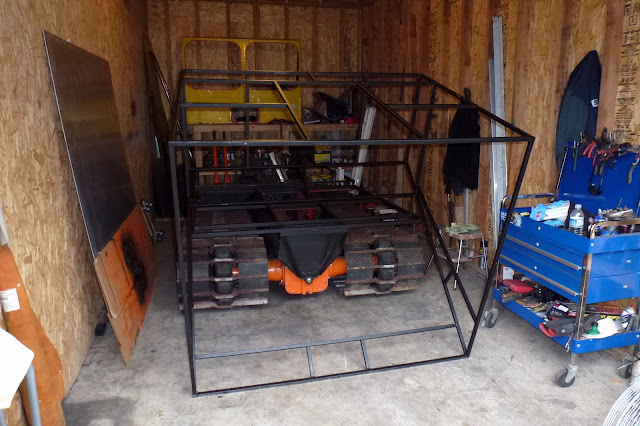
will end up looking something like this... but I guess not much of the 1402 look... :sad:

Efficiency & Cost show that a solid one piece windshield will probably serve the purpose better, plus putting 2 pairs of smaller rectangular windows will provide a better view of whats going on in the front (just as an idea for now).

So anyone looking for the front top part off this 1402?! - let me know...

P1010930.JPG


Got the tube bent for the front brush guard/bull bar, w/e people call it...

will have it attached in the later time, dont want it to get in the way of all the works before hand...

P1010933.JPG


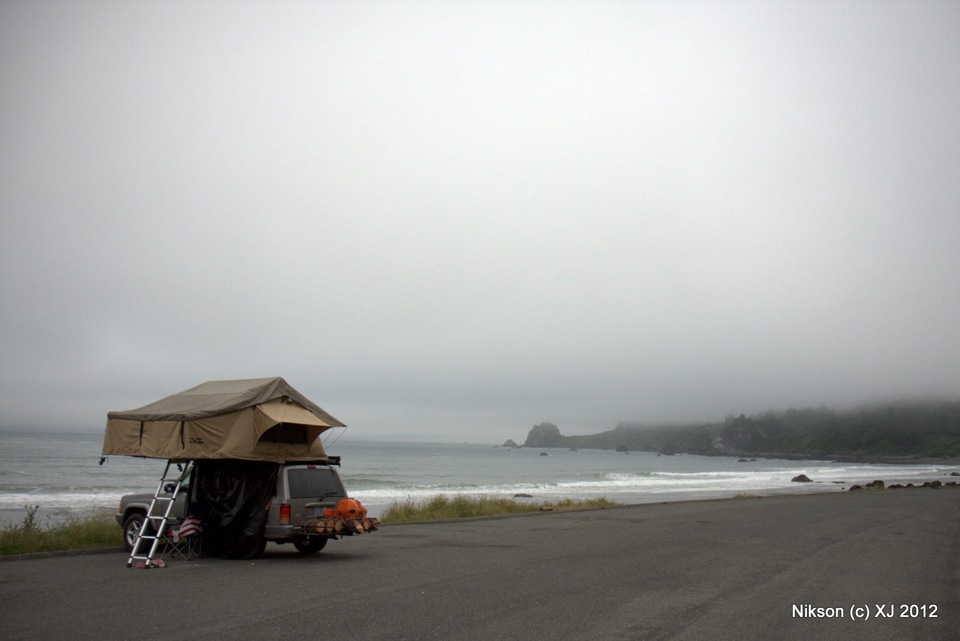
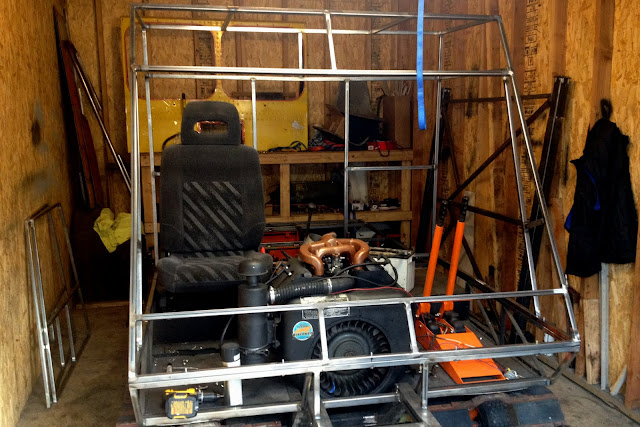
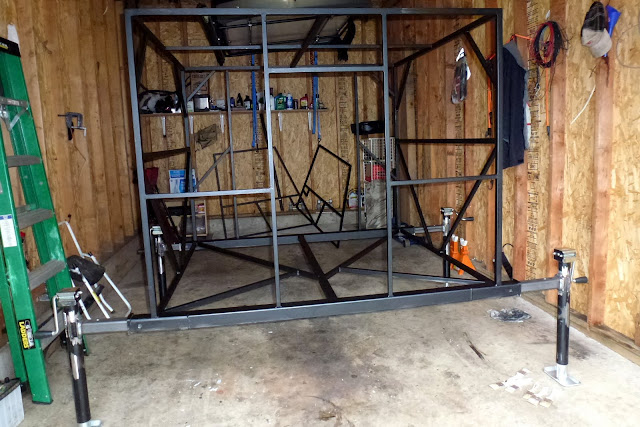
so as of now... I'm considering to stay with a soft top on the 3/4 inch cabin frame, rear soft cargo cab will have seating in it, but will be an easily removable one (detachable) from the main rear bed, since I would like to mount my RoofTopTent, this way just use some jacks to support the cab & tent, making it into a cat camper...

Next - run to an upholstery shop - got to pick out materials for the soft top & all the fasteners... Time to remember good old days of Home Economics & Sewing classes from Junior High... :) :) :)
 

Nikson

Bronze Member
GOLD Site Supporter
Re: Front cab

Front cab in process...

P1010936.JPG


P1010937.JPG


3/4 inch thin wall should do the trick I figured for over all strength of the cab structure, while keeping the weight to the minimum possible (vs aluminum).

Rear cab plans - make it removable (while a regular "stock" flatbed will be underneath), 4 jacks on the corners will lift/support the cab, so it can be removed to remain stationary while out in the boonies winter camping, and being able to mount my RTT (roof top tent) on top of the rear cab.

This what the tent looks like while its mounted to the XJ Cherokee,

thus while the rear cab/tent are stationary up on the jack, people could remain sleeping in the tent, or the rear cab is used as covered kitchen/storage. Cat itself will be free to move about getting firewood, or breaking any other trails.

960.jpg


Whatcha guys think?:unsure:
 

Nikson

Bronze Member
GOLD Site Supporter
Re: tracks

Installed track last night...

took about 60-90 minutes of tinkering around and figuring out the best way.

remembered someone's advice on the forum about doing it from the rear of the cat, which worked out very well, plus I still had the rear bed removed, so had plenty of space for accessing it.

IMG_2617.jpg


IMG_2618.jpg


IMG_2622.jpg


the only concern I had was how the front idler will is getting squeezed from all the pressure of the track tightness...

anyone care to comment on this matter...

pictures show how it bulges out...

IMG_2623.jpg


IMG_2624.jpg


one thing that came up in my mind was that the tracks are probably on the "dry" side, being that they have been sitting around for a while, so havent been stretched out from flexing while in motion.

Any suggestions of what I should consider doing if anything, or not to worry about this at all?
 

Nikson

Bronze Member
GOLD Site Supporter
had to make a video... :)

p.s. seems like the carb needs to be adjusted after being rebuild, engine bogs at higher RPMs

[ame="http://www.youtube.com/watch?v=j8pCBmuBYJo"]Thiokol Imp 1402 snowcat - First run with track - YouTube[/ame]
 

Nikson

Bronze Member
GOLD Site Supporter
Re: cab - continuing

p.s. if anyone is using Instagram - feel free to follow... #budnixon

So... front cab got somewhat put together... started on the rear cargo area...
IMG_2652.jpg
aafter that was completed... put together main cross beams for the removable rear cab...

P1020021.JPG


Cab will be raised up w/four of these hand crank jacks... (2000lb rating for each)

P1020025.JPG


braced the rear cab floor... after all it will have to handle weight of anywhere from 4-6 people, plus few hundred pounds of cargo weight...

P1020032.JPG


doors sort of just came along automatically on their own... after all its all just "cut-n-paste (weld)" :biggrin:

P1020035.JPG


angles I guess are pretty straight... :)

P1020039.JPG


IMG_2688.jpg


finished... up... amazingly they are actually same, and all dims came out perfect on both sides...

P1020041.JPG
 

Nikson

Bronze Member
GOLD Site Supporter
Re: Seats...

Found factory fiberglass seats to be "itchy" if that would be the right word, seems like top surface had been worn out to the point where fibers had started to surface...

Well, we are building a proper machine, right... so why not use a good seat...

IMG_2706.jpg


used Honda CRV seats, seem like they had just the right width and height, as well as just plain flat bottom sliders, which were easy to modify for new brackets to mount.

P1020048.JPG


"I LIKE!!!" (c) Borat :clap:

IMG_2710.jpg
 

Nikson

Bronze Member
GOLD Site Supporter
Re: Rear cab...

IMG_2717.jpg


Seems like it will turn out to have just enough head space to sit inside comfortably. These 4 boxes are usually used when we travel to carry all of the supplies for protection from small critters & moisture/dust.

IMG_2718.jpg


Weekend overall turned out pretty well, was able to finish up lots of little things in the garage, as well as take time head out into Cascades to pick the first chantarelle harvest of this fall.

IMG_2719.jpg


Jeep is just waiting for the time when CAT will take its place...

IMG_2722.jpg


Farewell, I everyone have a good and successful week...
 
Nikson!!!

It looks like you are just cruising through this! Looks really good, I see the jack in one picture are you still planning to put the tent on top?
 

Nikson

Bronze Member
GOLD Site Supporter
Nikson!!!

It looks like you are just cruising through this! Looks really good, I see the jack in one picture are you still planning to put the tent on top?

Trying to get her done before the good snow conditions, I've got 4 jacks in the garage, just one on the picture...

and yes, decided to keep the idea afloat and make the rear cab removable with the tent on top. Been really worried about just overloading with all the weight from cabs & various stuff, but afterall - I think it will turn out just fine.

Having a bit of an issue with the front idler, since track is really tight and its just pinching the heck out of that small front tire, so started looking around for a poly/full rubber wheel type... since this seems to be unreliable.
 

undy

New member
Couldn't you just get the existing tire filled with foam?

Edit: Oh, I forgot to also compliment you on the work and your speed with which you're getting it done!
 

Nikson

Bronze Member
GOLD Site Supporter
Couldn't you just get the existing tire filled with foam?

Well, didnt think of that in the beginning.

The only concern is that front idler is really one of the two wheels (other one is the rear sprocket) that hold the whole tension of the track pretty much.

Roughly its about 13inch diameter fully inflated, thinking that I would go down to a smaller size tire, or completely full rubber type wheel.
 

muleman

Gone But Not Forgotten
GOLD Site Supporter
A smaller tire should allow you to tension properly with the adjuster. The way it is now seems extremely tight.
 

Nikson

Bronze Member
GOLD Site Supporter
A smaller tire should allow you to tension properly with the adjuster. The way it is now seems extremely tight.

I've used the same size replacement tire, so didnt see that as a coming problem.

I've figured that tracks themselves just shrank/dried up over time, so now I'm in process of figuring that out as well...

One of the members mentioned using this on his project.

JPG_2876.jpg


I have been thinking of doing the same thing ever since I've taken my tracks off, considering that with right amount of adjustment, you wouldnt even have to remove pins from the lacing in order to mount/dismount the tracks.

If anyone got any pointer of where to find this on sale, please let me know.
 

Woody_1

Member
Re: various parts

miscellaneous engine updates...
P1010662.JPG


P1010663.JPG


P1010664.JPG


IMG_2417.jpg
Have you thought about upgrading the ingnition? Thought I'd throw this at you. I did this to my 1404. And bought a spare Module to carry. No points!!! k
 

Attachments

  • Igniter.jpg
    Igniter.jpg
    71 KB · Views: 770
  • PC060005 (600 x 450).jpg
    PC060005 (600 x 450).jpg
    84.4 KB · Views: 770

Nikson

Bronze Member
GOLD Site Supporter
Re: various parts

Have you thought about upgrading the ingnition? Thought I'd throw this at you. I did this to my 1404. And bought a spare Module to carry. No points!!! k

I actually have updated my ignition to similar setup, only keep in mind that my engine in 1402 is a Wisconsin vs yours (which I believe would be Ford).

Thanks for the tip thou...
 

Nikson

Bronze Member
GOLD Site Supporter
Catcamper build - thats what I should have called it...

IMG_2731.jpg


rear cab frame came along slowly on its own really, not much here...

Just throw on a main square box & brace some angles on various sides.

Modded the jacks to work with the required height, as well as cut off the stock round mounts that came with jacks from store... needed to attach the square tubing - weld them up at the right angle...

IMG_2740.jpg


IMG_2746.jpg


Basic idea is this...

Position for "traveling"

IMG_2743.jpg


IMG_2753.jpg


IMG_2755.jpg


extend them about 10 inches or so (holes drilled for hitch pin on opposite sides) and have plenty of extra width to base the rear cab on ground while cat is away playing...

IMG_2752.jpg


P1020056.JPG


IMG_2749.jpg


front & rear cabs painted last night, brushed on a bedliner paint, and second coat will be a spray on after all of aluminum has been pre-cut & ready to be fastened to cover the cab up.

P1020058.JPG


Something like...

P1020062.JPG
 
Top