• Please be sure to read the rules and adhere to them. Some banned members have complained that they are not spammers. But they spammed us. Some even tried to redirect our members to other forums. Duh. Be smart. Read the rules and adhere to them and we will all get along just fine. Cheers. :beer: Link to the rules: https://www.forumsforums.com/threads/forum-rules-info.2974/

Imp Restoration

I am starting a new link to try to get the information a little more organized. This Feb. I bought a 1404 from the electrical coop I work for. It was pretty straight but ran really poorly and was rattling. Bought the imp for 800.00 it came with removable rear cab and was overall pretty straight.
bth_phone015.jpg
bth_phone017.jpg
bth_phone020.jpg
bth_4112012020.jpg
 

Snowtrac Nome

member formerly known as dds
GOLD Site Supporter
i'd have given 800 for that one than tried to shoe horn a little 2300 cc pinto motor or even a 2.9 efi bronco motor
 
I took it home and pulled the engine out the next day. The oil pump driveshaft was sheared off. I started talking to our shop mechanic and he told me that one of our lineman had flooded it on a 0 degree day they needed if for some winter storm work. He finally got it firing and mashed it to the floor. Obviously thick oil and high rpms the shaft sheared. They loaded it on the trailer ignoring the oil press guage and when they got where they were going it was rattling pretty badly. The rod and main bearings were sharp as razors when we tore it down and the 1 + 2 cylinders were pretty scored.

bth_4112012035.jpg
 
At this point the quick fix was out so I decided to redo the whole thing. Pulled the cab drilled all of the rivets and stripped it all of the way down. Decided to paint the frame and clean and paint everything else.
bth_snowcat012.jpg
bth_snowcat013.jpg


quite possibly the worst job in the world drilling all of those rivets!:ermm:
 
Parts were hard to come by and real expensive so we did some measuring and chose the 2.3 out of a little mustang to be our new powerplant. The efi is relatively simple, and its compact enough. We found and Automatic trans for it went with the ford A4LD which would have been the factory trans for the engine in the mustang.

When I got the engine here I cut the transaxle shifter out and one brace and gave the engine a test fit.

bth_new005-1.jpg
bth_new004-1.jpg

bth_new003-1.jpg

Every thing cleared the cowl but it was obvious that the factory cowl would not work again...
 
Now that we knew we had some clearance we cut out the factory mounts and made some of out own. The engine sits nice and low in the frame and has good clearance all around. It took a little while but we got it all centered up and welded in the new mounts.

bth_iphone001.jpg

bth_iphone002.jpg
bth_iphone003.jpg
 
Now that the mounts were in I attempted to sand blast the fram with a small shop sand blaster.:glare: Waste of time I will tell you that old undercoating is a real nasty concauction. I finally just called a comercial blaster and for 130 bucks and an hr of dinking around the frame was ready to go.

bth_snowcat2ndhalf001.jpg
bth_snowcat2ndhalf002.jpg


At which point I realized that I had forgotten to make a trans mount so we welded one in.

bth_snowcat2ndhalf033.jpg


Its a pretty heavy box steel, our thinking is that if we ever do run up on a rock it should protect the pan pretty well.
 
I decided to make it a full cab so we welded some gussets made of 1 x 2" box steel to the bed. They line up with the angle of the engine compartment in the front so we shouldnt have any clearance issues.

bth_snowcat2ndhalf038.jpg

We added four to each side but I cant seem to find a pic that shows them all..
 
We did a final mock up of engine trans and made sure they would line up nicely with the rear transaxle. Everything is pretty much dead on with almost no angle through the driveshaft!

bth_snowcat2ndhalf016.jpg
bth_snowcat2ndhalf011.jpg
bth_snowcat2ndhalf012.jpg


Ok so now we are ready to paint the frame. I ordered POR-15 chassis black. Its not the cheapest but its suppose to be very durable and its really pretty easy to use. It is a little thick though!

We got a few runs in it but it has a nice coat on it now and its all the same color so it looks a lot better!
bth_snowcat2ndhalf053.jpg
bth_snowcat2ndhalf049.jpg
 
While all of this is going on I was also getting the engine ready. Rolled mains and rod bearings in. The cylinders looked great but the engine was only suppose to have about 40,000 on it so no real suprise. The bearings looked good but we figured we could get to it easy enough so why not. Cleaned everything up really well and painted the engine.

bth_securedownload.jpg
bth_snowcat2ndhalf035.jpg
bth_snowcat2ndhalf040.jpg
bth_snowcat2ndhalf009.jpg
 

Snowtrac Nome

member formerly known as dds
GOLD Site Supporter
i knew i'd seen a 2.3 in an imp somewhere before good work you should have lots of fun when it's done
 
Thanks dds

Its been a fun project so far. The auto will be nice and the range and less effect on power at elevation will be great. I think we might wide track it but I want to see how it goes on original tracks first. I am a little concerned that its top speed will be a little hairy. Its an O/D trans and all but thats where the oc-4 will be nice.
 

Snowtrac Nome

member formerly known as dds
GOLD Site Supporter
well if you wide track it maybe a good time to upgrade to torsion axles and lift it abit
 
I agree I want to do a torsion axle suspension... I have been thinking about a couple of different ways of doing it. I want to wait a year though and see how the flotation is with the 24" tracks. I am sure I will wide track it but I dont want to get so wide that it starts burning up my hp without a large improvement in floatation.
 
So now we have the engine and trans back in and all bolted up and am really happy with the way everything is going together.

bth_IMAG0042_zpsfee92c1b.jpg
bth_IMAG0043_zps9df5670d.jpg
 
My plan is to polish the aluminum on the tunnel sides and bottom. I dont want to have the paint start coming off due to being drug through snow or a tree branch peeling my paint. I scraped all of the undercoating off the panels which was also a bit of a chore.
bth_cat003.jpg
bth_cat001.jpg
bth_cat006.jpg

I will polish them right before I reattach them. I am planning to cut new pieces for the sides up in the front. The old ones were pretty beat up so i am thinking I will use some diamond plate.
 
I thought I was going to have to relocate my radiator but after we got everything in and mounted I realized that if I mount my radiator on the front side of the supports I have plenty of room. So I did that and then mounted the shroud on the front of the radiator. I bought an electric fan that will work as either a pull type or a push type (can reverse the polarity to change the direction of rotation) and mounted it up.

bth_new002.jpg
bth_new009.jpg
bth_2.jpg

I took these pics before I mounted the shroud on the front side. The last pic is before I cleaned and pressure tested the radiator. Top 2 are after the repaint.
 

AAUTOFAB1

Bronze Member
SUPER Site Supporter
sweet ! i would love a IMP to cat around in.i get to drive a Tucker every winter,but IMP's seem better for cruzeing the trails.
 
Ive ridden in a couple of tuckers and really liked the ride. I have never riden in an imp but hear the can be a little rough. The thing I like about the imp is that they are a little smaller and seems to me like they might be a little better in wooded areas due to their size. Im looking forward to getting it out though I wont likely be done in time for snow this year.:doh:
 
I am looking for some input on a driveshaft brake. We have to build a new shaft anyway so I was thinking about adding a rotor to the shaft and mounting a hydraulic caliper for a parking brake. Please let me know your thoughts...

In the mean time I rebuilt the brake master cylinders this cat had some crappy carpet for floor mats, problem was that the carpet was damp for some time and kept alot of moisture around the master cylinders. The master cylinders were pretty rusty inside. I honed them out and got a Napa kit. Luckily i saw BD PEEKS post on building his brakes so it was no problem coming up with a part number.

bth_snowcat003.jpg
bth_snowcat001.jpg
bth_snowcat009.jpg
bth_snowcat011.jpg
 
A few small things. I haven't been around much and will be doing a lot of work on it in jan. I will post pics then.. I have ordered and gathered up most of the parts I need and will likely have it together with the original rear cab next month.
 
Linkage for original ford shifter was going to be a lot of extra work so I ordered a cable shifter. I went with a B&M rachet shifter. Should be a
good solution.

Also ordered the seats, going to go with a race style bucket..
$(KGrHqR,!joFCfIP)mmoBQ2LNmL2P!~~60_3.JPG
 

Nikson

Bronze Member
GOLD Site Supporter
Cool... moving along...

0.02cents on the seats...

I've been regretting a bit on going with larger bucket seats vs "farm style" out of a lawnmower or a tractor, since they just take up too much useful space...

and cat does not really need to have all that Cadi comfort... :)
 
Nikson,

I thought about that too and agree. The dog house I will have to build will make that decision for me. I ordered one of the plastic race buckets also that have a removable slip cover. If the big ones are cramped I will use these. I will have the terminal blocks and everything mounted under the counsel and the dog house and the computers and relays will be mounted either behind the seat or under it. We are wiring with enough slack to accomodate both.
3308456336954040_1.jpg


Nikson

Bronze Member
GOLD Site Supporter
Nikson,

I thought about that too and agree. The dog house I will have to build will make that decision for me. I ordered one of the plastic race buckets also that have a removable slip cover. If the big ones are cramped I will use these. I will have the terminal blocks and everything mounted under the counsel and the dog house and the computers and relays will be mounted either behind the seat or under it. We are wiring with enough slack to accomodate both.
3308456336954040_1.jpg


Well, only time will show whats better/worse...

Little comfort never hurt anyone I guess... :)
 
Well I made a trip home and we got some of the wiring done... We got all of the wiring figured out and now are waiting on the fuse panels and relays that we ordered. I thought I would post a couple of the pictures of the progress we made. I got a new job close to home so I will be working on the machine a lot more now!!:brows:
142_zps0f0e75f7.jpg

Here is the harness we started with
 
We Stripped it all down and are making one harness out of two. There is not much left after we weeded out all of the unnecessary wires.
124_zps7198f997.jpg
 
125_zpsa10285dc.jpg

Lots of Notes!!!
127_zps3731c4f2.jpg

128_zps500c82ac.jpg

I think I still see diagrams when I close my eyes!!! This could possibly make you go blind after a while.... Or at least crazy:w00t2:
 
bth_130_zpsb03ced91.jpg


Boy it can be a lot of work to get pictures on this website!!! sorry no more big pics they wont post...
bth_132_zpsbccb2b78.jpg

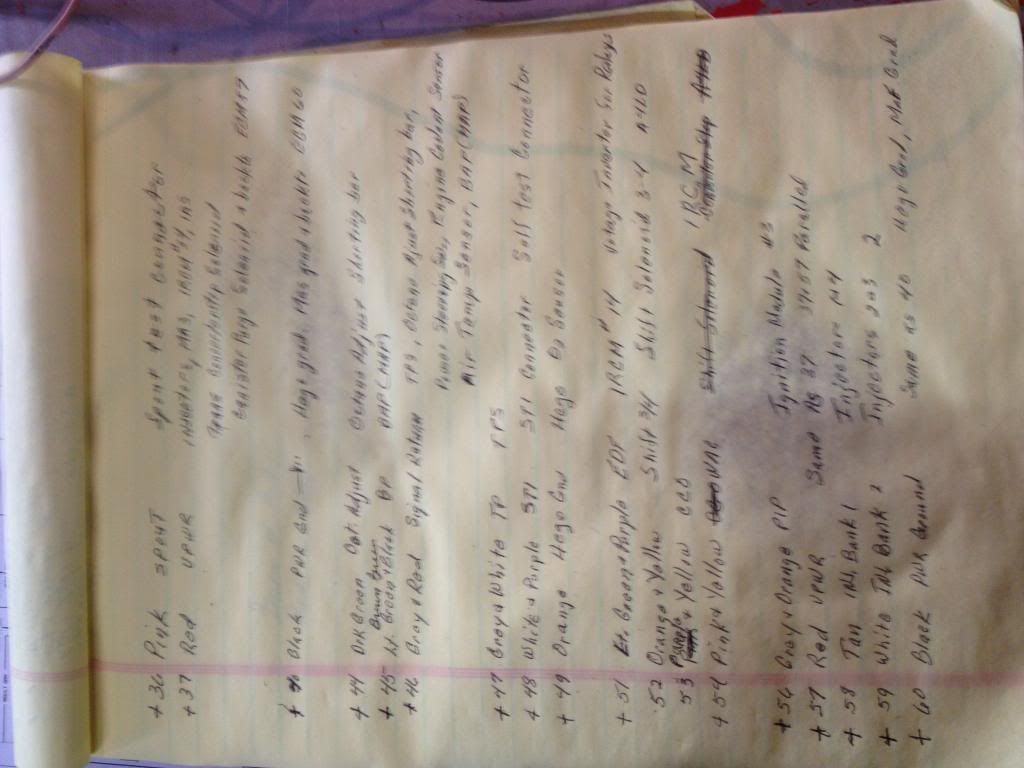
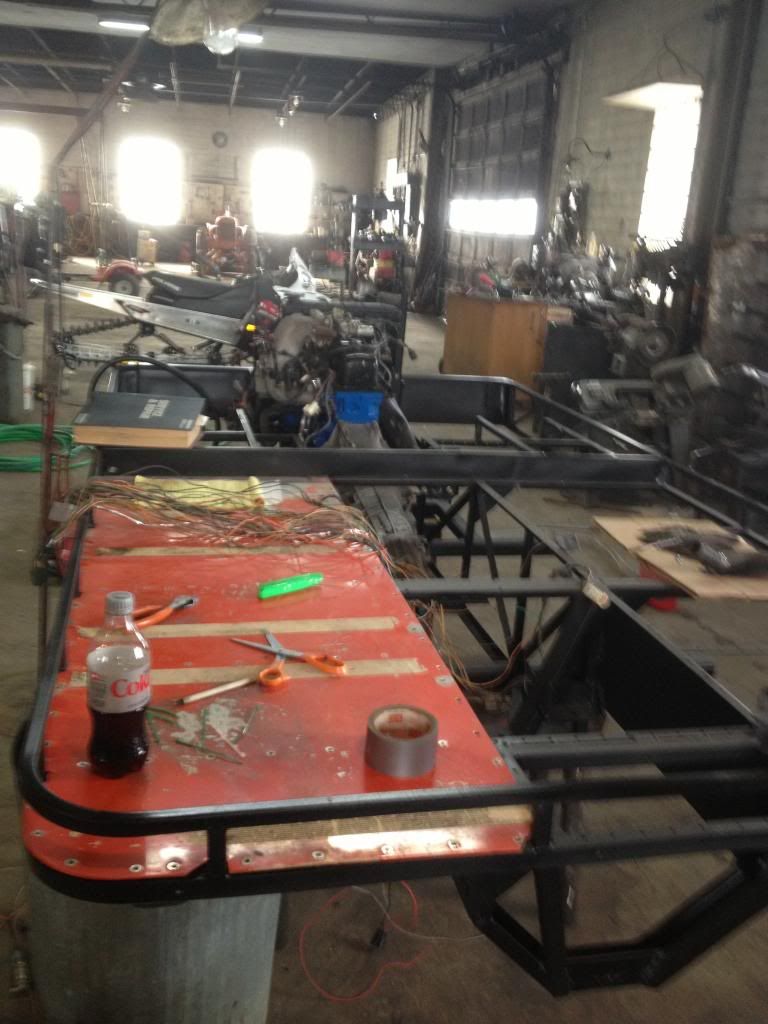
Got the end complete the harness comes out in two place because one will go to the rack of relays under the drivers seat and the other will go to the engine harness and dash..
bth_133_zps45a8244f.jpg

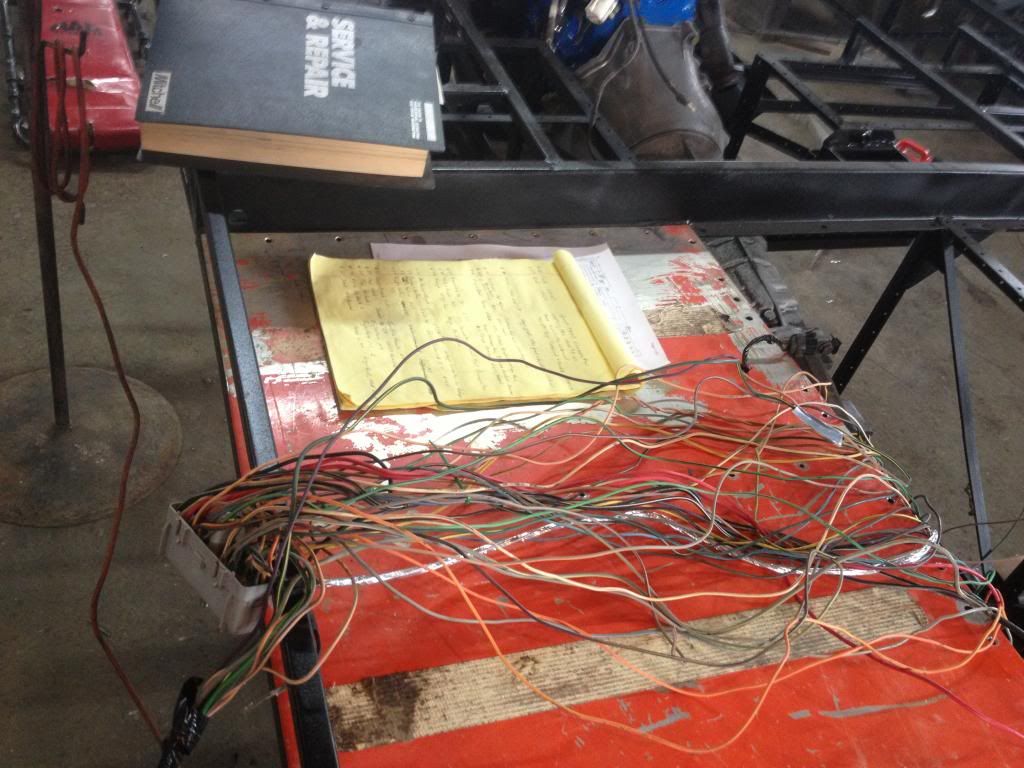
Just beginning to make two harnesses from one. we are staggering the cuts and then shrink tube and soldering the two harnesses together..
bth_134_zps80ded189.jpg

Engine control harness nearly complete.
bth_135_zpsb754cae1.jpg

This is the slowest part of the project with out a question. Progress is slow but sure!! We also have wired the harness for the transmission and have all of the dash instrumention leads ready so we are moving along.
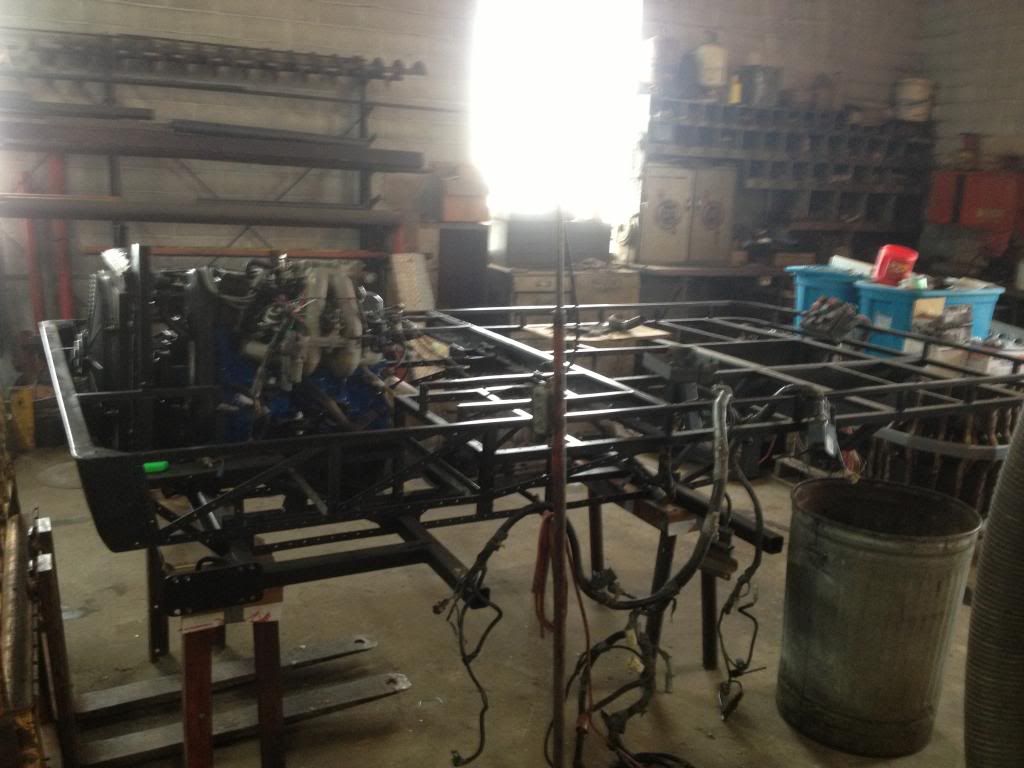
 
Top