-
Please be sure to read the rules and adhere to them. Some banned members have complained that they are not spammers. But they spammed us. Some even tried to redirect our members to other forums. Duh. Be smart. Read the rules and adhere to them and we will all get along just fine. Cheers. :beer: Link to the rules: https://www.forumsforums.com/threads/forum-rules-info.2974/
You are using an out of date browser. It may not display this or other websites correctly.
You should upgrade or use an alternative browser.
You should upgrade or use an alternative browser.
Snow Master Restoration ~ by Snowcat Operations
- Thread starter Snowcat Operations
- Start date

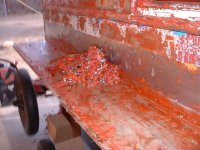
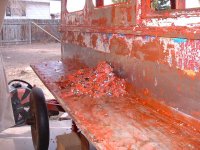
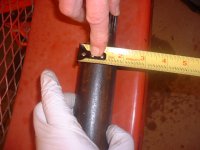
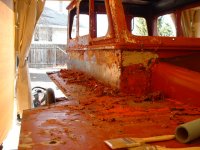
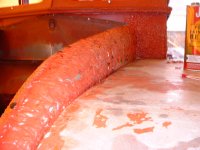
Last ones. 
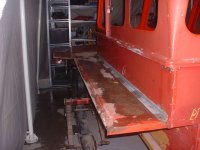
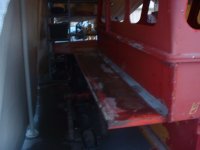
Mike those wide decks are great, but that steel they used was simply wrong. One thing that I would consider if I was you when you put it all back together is to omit the rubber mat over the top of the new deck and have Rhino-Liner or Line-X 2-part epoxy material sprayed onto the deck instead. It will bond to the surface, no water can get under it, it is durable, and it looks good. JMO.
BigAl used it very successfully on his KT7. You might want to consider it. If you have a modest air compressor, you can do spray the liner material on yourself.
BigAl used it very successfully on his KT7. You might want to consider it. If you have a modest air compressor, you can do spray the liner material on yourself.
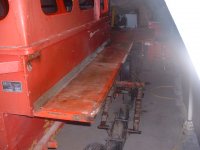
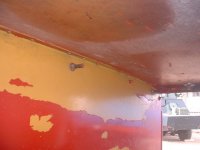
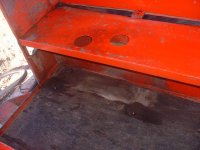
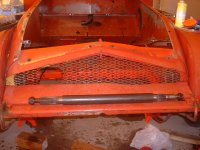
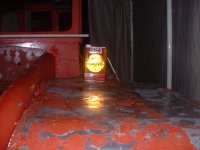
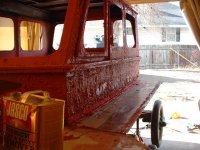
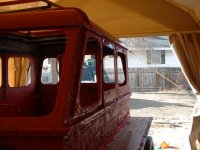
My plan is to go with Rhino liner since its more of a "rubberish" compound than the other guys.. I dont care if its not as durable. I want the rubber effect to help quiet down the vibrations and noise. I will do the same inside my cab as well. Two more pictures. The last picture is showing you how far my rear fenders will over hang.
Attachments
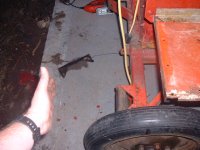
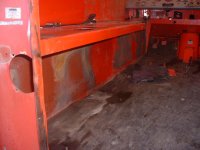
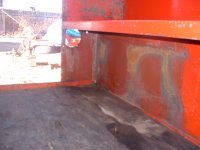
In the morning after it warms up I will go out and wash down my workshop area again. I cant believe how much "Crap" was under the rubber matts! Good thing it was aluminum or else it would have been rust central!
Last edited:
JASCO PAINT STRIPPER!
Sometime Tuesday my "real" paint stripper will arrive! I will be using Jasco epoxy paint remover. This stuff is the real deal. NO MORE of that B.S. Environmentally safe stuff. First off I dont see how using 100 gallons of "Environmentally safe" stripper (that does not work anyway) is safer than using 1 gallon of the good stuff (that does work). Now if it was a two gallon to one gallon rato then I would do it in a heart beat. If it worked I would do it in a heart beat. But that stuff just does not work. I have spent almost $200 bucks on samples plus shipping from all over the US and Canada and none of it works people! SO if you learn anything from this resto I hope its to use the stuff that works and forget the stuff that does not. USE "JASCO". A link is below.
http://www.jasco-help.com/products/prod_rem.htm#0201-4
Last edited:
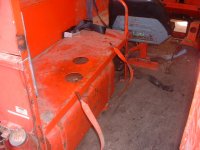
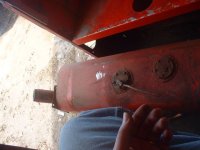
GAS TANK REMOVAL
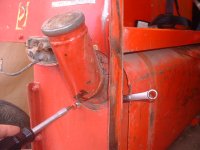
Today I spent my time removing the stock in cab gas tank. Here are the pictures. I also took pictures of all the tools I used.
Today I spent my time removing the stock in cab gas tank. Here are the pictures. I also took pictures of all the tools I used.
1. The first picture is of the two bolts that hold the tank straps. Unbolt these. These are 1/2" nuts.
2. Pull the straps out after they are unbolted. They become twisted when they are originally tightened. Just work them out.
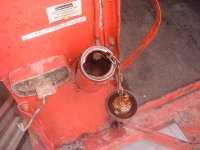
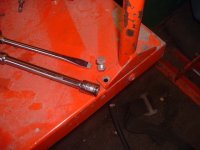
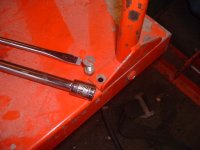
3. Unbolt this nut. Use 1/4" ratchet. I believe it was 1/2" (dont drop your socket and ratchet into the gas tank as I did!)
4. Vent is removed.
2. Pull the straps out after they are unbolted. They become twisted when they are originally tightened. Just work them out.
3. Unbolt this nut. Use 1/4" ratchet. I believe it was 1/2" (dont drop your socket and ratchet into the gas tank as I did!)
4. Vent is removed.
Attachments
Last edited:
1. Remove these bolts next.
2. Remove the passenger seat floor support.
3. Them remove the passenger arm rest / seat support.
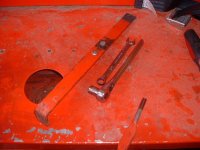
4. Better picture of tools needed.
2. Remove the passenger seat floor support.
3. Them remove the passenger arm rest / seat support.
4. Better picture of tools needed.
Attachments
Mike, instead of removing the floor support, lifting the seat, etc, you could simply remove the some of the door frame bolts, rotate the door frame out of the way and the gas tank slides sideways right out from under the seat.
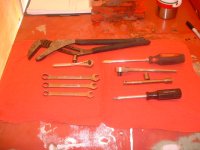
1. with the seat supports removed you can now pul up on the seat and then pull the right corner of the tank toward you.
(Now take some big channel locks and some WD-40. Spray the wood blocks down with the WD-40. Pull the wood blocks out with the channel locks)
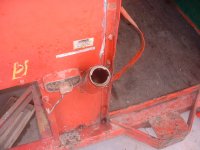
2. With the wood blocks removed you need to tilt the gas tank toward you and pull up on the back. Tank should come out. The filler neck is what you are trying to get through.
3. Bag up and tagged all you nuts bolts ect ect. You will forget where stuff goes as time goes on. This way you know where it belongs.
4. Picture of the tools I used for this project. I was hoping the socket sizes would be visable. Guess not. Also my daily work/check list in background.
(Now take some big channel locks and some WD-40. Spray the wood blocks down with the WD-40. Pull the wood blocks out with the channel locks)
2. With the wood blocks removed you need to tilt the gas tank toward you and pull up on the back. Tank should come out. The filler neck is what you are trying to get through.
3. Bag up and tagged all you nuts bolts ect ect. You will forget where stuff goes as time goes on. This way you know where it belongs.
4. Picture of the tools I used for this project. I was hoping the socket sizes would be visable. Guess not. Also my daily work/check list in background.
Attachments

Yes you could do that as well. I just pulled the supports since I needed to remove them and box them away anyway. But I guess if someone wasnt going to repaint the inside and needed to just repair there tank that would be the way to do it.
B_Skurka said:Mike, instead of removing the floor support, lifting the seat, etc, you could simply remove the some of the door frame bolts, rotate the door frame out of the way and the gas tank slides sideways right out from under the seat.

OK time for a nice hot cup of coffee!
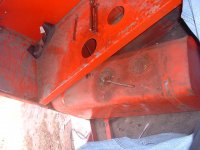
REMOVING THE AXLE SHAFTS
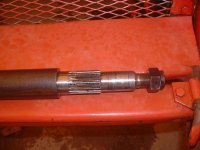
Today I will be removing both my axle shafts. I dont like banging on stuff and gave up after a bit! I came up with an idea and will take it slowly to see how things go. I have sprayed every thinh down with penetrating oil and hooked up my set up to get the axles out. Here are some pictures.
Today I will be removing both my axle shafts. I dont like banging on stuff and gave up after a bit! I came up with an idea and will take it slowly to see how things go. I have sprayed every thinh down with penetrating oil and hooked up my set up to get the axles out. Here are some pictures.
Attachments
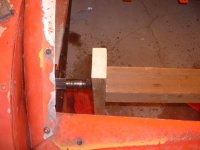
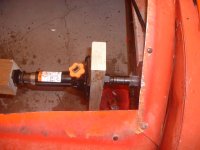
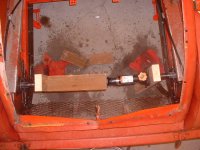
I am expanding the jack a little at a time over the period of hours. I will let it sit overnight.
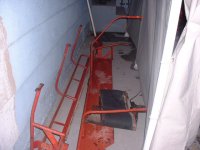
Well today I spent the rest of my time finishing takeing off the rest of the stuff.
Brake Master cylinder
Brake lines
Pedal assembly
Under dash heater duct
Engine compartment heater duct work
rear deck/hood area sheet metal
Windshield wiper arms
windshield wiper motor
linkage
sun visor and rear view miror
Waiting over night to see if I had any luck loosening the axle shafts. If not I guess I will start pounding them out.
I GOT THOSE AXLE SHAFTS OUT!!!!!!


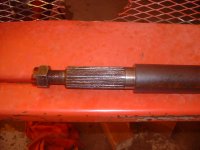

The Jasco is working great! I took all this off in about 10 minutes. I need to come back and treat it one more time. My first coat was a bit to thin. Great product! There is also 4 layers of paint it has to penetrate through.
In the morning I will be outside working once again on the Snow Master. Crappy cold weather has put a few set backs in my plan (like wheeling the cat out onto the back yard area) But I will resume again in the morning weather permitting.
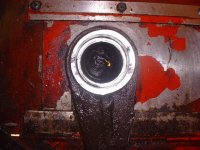
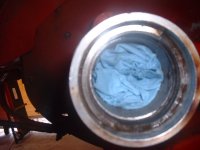
Stripped the hood today. All in all it took me about 30 minutes. In the mean time while waiting between coats of stripper I removed the outer axle bearings. These were completely shot and rusted which built up material between the aluminum tube and bearings. These were really stuck in there. One bearing was broken and you can see it partially still in the axle tube. I will remove it in the morning. I have it soaking in a penetrating lube. Wish I had my Kroil but am all out. There is also none to be found in this little town. I will get a gallon of this stuff when I head off to Las Vegas this weekend.
Attachments


Last edited:
1. Broken axle bearing. The rest is still in the tube to be removed in the morning after soaking all night in penetrating lube.
2. Broken bearing housing close up.
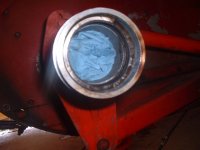
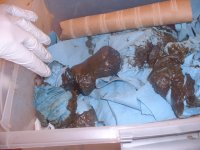
3. Rest of bearing in tube. Getting ready to push all the grease out of the tube into my bucket. This is a messy job.
4. Close up of broken bearing in tube.
Its amazing this snowcat ran just fine even with the broken bearing. No noise. All bearings will be replaced.
2. Broken bearing housing close up.
3. Rest of bearing in tube. Getting ready to push all the grease out of the tube into my bucket. This is a messy job.
4. Close up of broken bearing in tube.
Its amazing this snowcat ran just fine even with the broken bearing. No noise. All bearings will be replaced.
Attachments
Last edited:
1. Big glob of grease pushed out of the axle tube. That was just a small part of grease per axle tube.
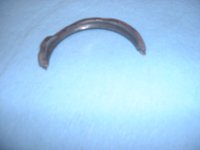
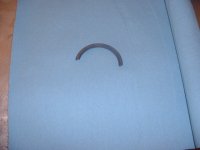
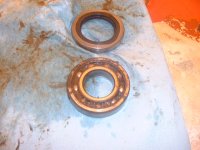
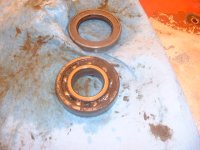
2. The top ring is the outer axle tube seal. The one below it is the actual axle bearing. The dark spots are actually rust.
3. Back of seal. If you look close you can see the rust.
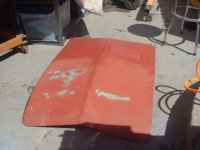
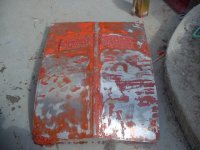
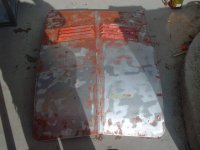
4. Hood is 99% stripped. The rest is very tough primer from the factory. I will lightly sand the rest off. The vents slats I will remove completely and use a wire screen in there place. This will give me a little bit better air flow. Ok so it wont be noticable but it sure will look better!
2. The top ring is the outer axle tube seal. The one below it is the actual axle bearing. The dark spots are actually rust.
3. Back of seal. If you look close you can see the rust.
4. Hood is 99% stripped. The rest is very tough primer from the factory. I will lightly sand the rest off. The vents slats I will remove completely and use a wire screen in there place. This will give me a little bit better air flow. Ok so it wont be noticable but it sure will look better!
Attachments
Last edited:
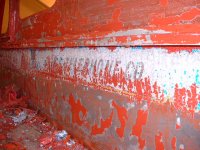
Started stripping the paint off again. It finally warmed up above the minimum temp. required or suggested on the can. Today was a shocker at 70+ degrees. Man there are so many coats of paint its hard to really see how many there trully is. So far I have orange-red (original) then primer, white with a blue stripe. Then someone painted what looks to be a type of reflective white paint over the blue stripe. Then yellow then the final color of redish. Looks to be a definite pattern. I had seen something like this at Bill Gunthries place from a video in Lyndons collection..
Attachments
Last edited:
I will sand the remainder of the paint that will remain or I may just take it down and have the guys hit it real quick with the baking soda blaster. After she is completely stripped I will remove the forward cab area and have it touched up at my local metal fab shop. I have had great success with them doing work for me in the past. The other option is to do all the (steel) welding myself. BUT I cant weld aluminmum so that I know for sure I will farm out.
ENGINE
Well I finally found where I can get a good engine. I have decided to go with a Subaru engine after all. COOPER started me thinking again and I redoubled my efforts to find what I needed. Since the weather was so cold I couldnt strip (paint that is) I spent my time looking for the engine. FOUND. If anyone wants a great source for the Subaru engines please let me know.
Well I finally found where I can get a good engine. I have decided to go with a Subaru engine after all. COOPER started me thinking again and I redoubled my efforts to find what I needed. Since the weather was so cold I couldnt strip (paint that is) I spent my time looking for the engine. FOUND. If anyone wants a great source for the Subaru engines please let me know.