
Maybe this will help someone rebuild a C4. This is my first time working on this particular rear end, using a book for a closely related but not identical piece of equipment. If you find errors feel free to point them out or correct them.
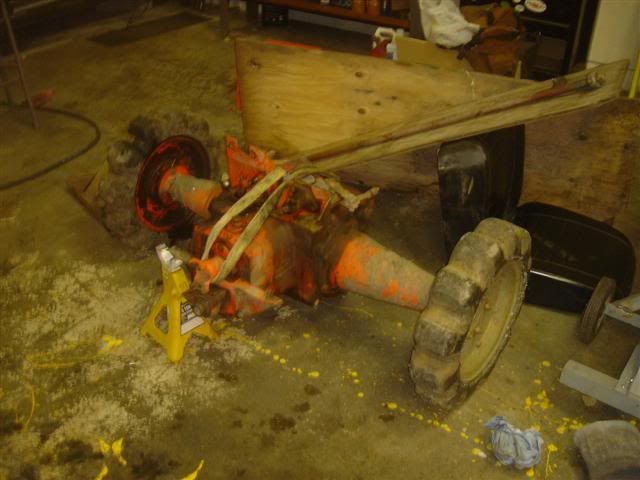
I knew I would have to go thru this rear end as soon as the drain plug was removed and nothing happened. Ramming a wire through the layers of collected silt allowed the oil could drain, not a good sign.
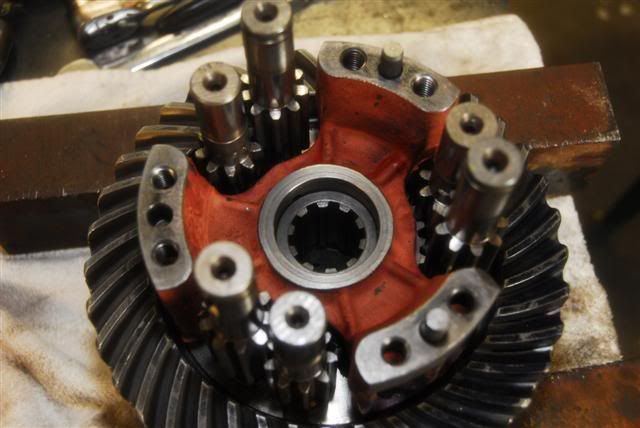
After pulling everything apart and cleaning found the following:
Main shaft bearings had grit and would catch slightly
Pinion shaft bearings were also bad
Fourth gear bushing was scored badly (reverse looked great)
Cross pinion bushings sloppy and egg shaped
Carrier bearings bad
Drain plugs were smashed and threads distorted
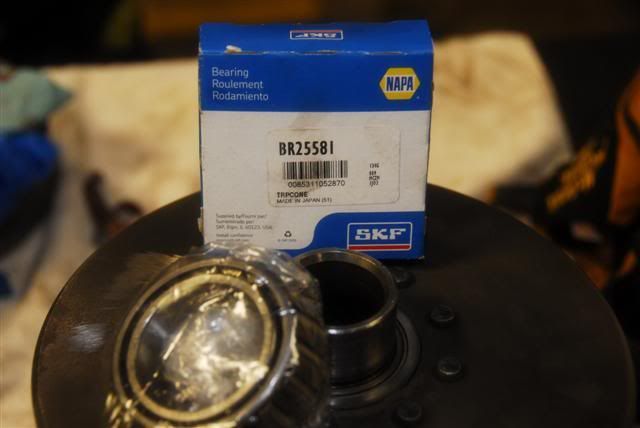
Axle bearings bad (one was broken)
Slave cylinder linkage broken and adjustment bolt stripped
Disassembly is straight forward with the exceptions of:
The brake bands can be a little stubborn but with a little patience they will come out
The carrier bearings require a special tool to remove, if they are bad just cut them off with an angle grinder/cutoff wheel and a cold chisel.
The cross pinion gears are a tight press fit with woodruff keys in the shafts. I pressed the shafts thru the old pinion bushings after removing the retaining clips. This ruins the bushings by dragging the key through them in my case they were already bad. I’m sure there is a better way to do this.
The instructions I was using said a couple of alternating pry bars should pull these gears, not a chance.
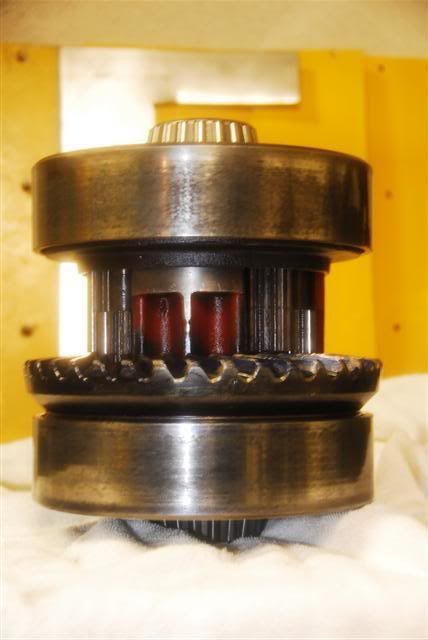
Mark the cross pinion shafts keeping them paired, along with both case halves and the center section. Also mark the cross pinion gears as to which brake drum gear they belong. This keeps mating gears together.
It doesn't much matter which cross pinion gear goes with which shaft as long as the gear mates with the original drum gear. Mark the axle drive gears for side and orientation, as they will go in either way.
An easy way to mark this stuff is to mark everything on the ring gear end of the part. Then during reassembly all the markings should face the ring gear.
The cross pinion shafts, drums, axle gears, and center will fit either side or upside down. The cases and center can be stamped, the cross pinions and gears a paint marker works after cleaning. Don't wash the paint off in the parts washer.
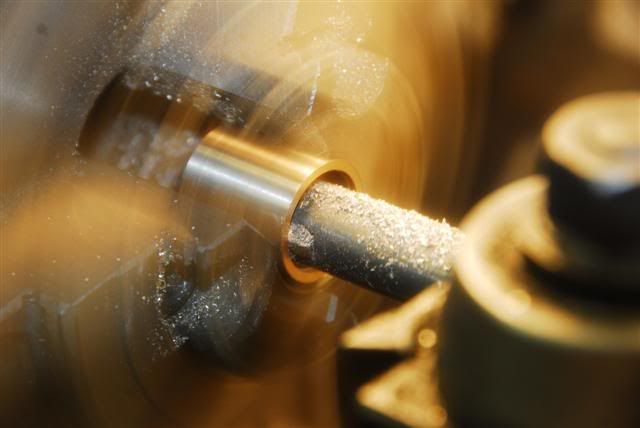
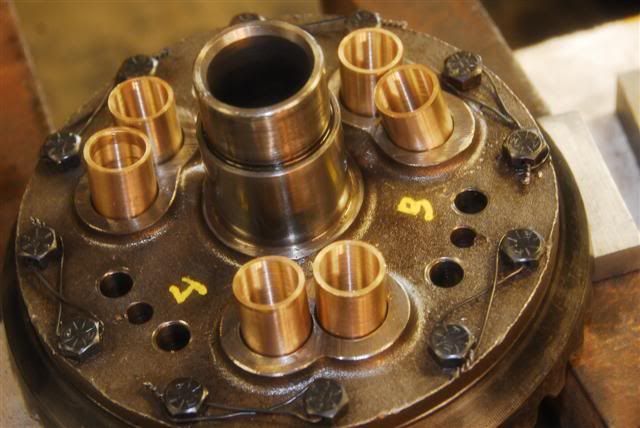
I could not find the correct original bushings so made some out of SAE 660 Bronze stock of the closest nominal size available thru McMaster Carr, and then rough turned them to size.
Turned the OD to a press fit in the case.
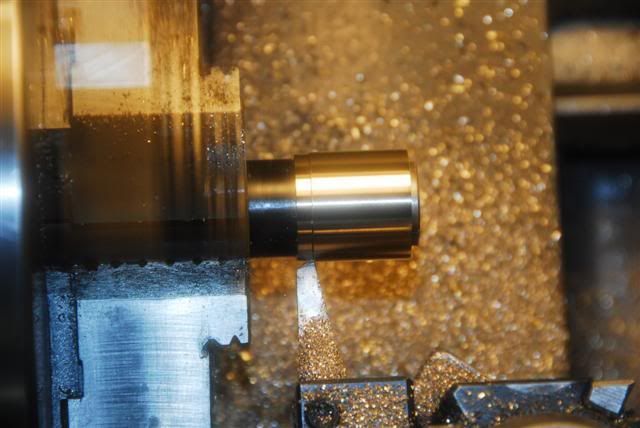
Turned ID slightly under final ID. ID will shrink some when pressed into case.
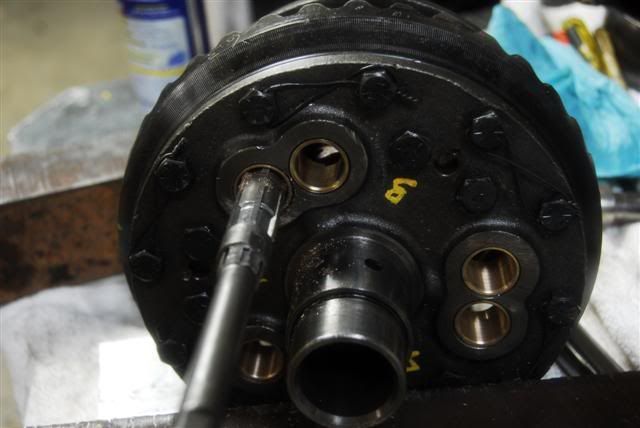
The original bushings, or at least the bushings in this, were a split steel sleeve plated bushing they have two oil grooves and a bunch of dimples for holding oil or in my case silt. The bushings where replaced with solid bronze no oil groves or dimples. I don’t have the equipment to cut the oil grooves which are normally used for pressurized systems anyhow.
Other bushings that did not get replaced were the brake drum bushings which had minimal wear and the axle gear bushings which again showed minimal wear.
After installing the bushings an oil passage needed to be milled as in the original.

Temporarily reassemble the case halves. An adjustable hand reamer with a guide was used to ream both of the bushings inline with each other, reaming one side to size then reaming the other from the opposite side.
Reassemble the halves with the cross pinions and axle gears and check for binding.
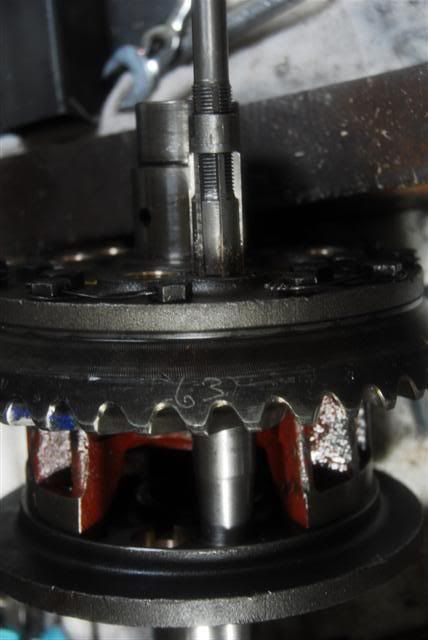
Replace the cross pinion gears, snap rings and safety wire all the case bolts.

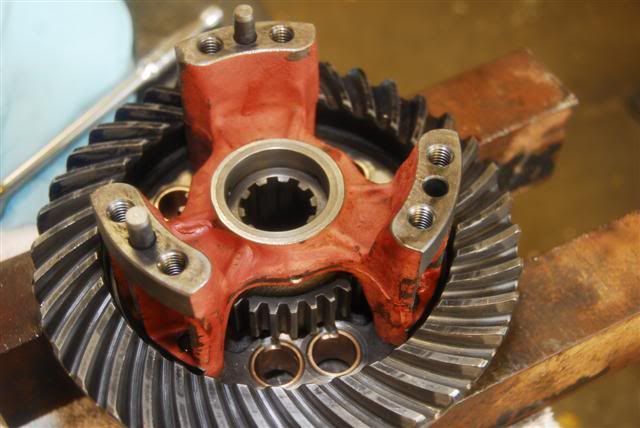
Replace the drums and check it over before pressing on the carrier bearings.
It’s too late to turn back and fix something once the carrier bearings are pressed on.
To be continued.......
(sick of typing )
)
I knew I would have to go thru this rear end as soon as the drain plug was removed and nothing happened. Ramming a wire through the layers of collected silt allowed the oil could drain, not a good sign.
After pulling everything apart and cleaning found the following:
Main shaft bearings had grit and would catch slightly
Pinion shaft bearings were also bad
Fourth gear bushing was scored badly (reverse looked great)
Cross pinion bushings sloppy and egg shaped
Carrier bearings bad
Drain plugs were smashed and threads distorted
Axle bearings bad (one was broken)
Slave cylinder linkage broken and adjustment bolt stripped
Disassembly is straight forward with the exceptions of:
The brake bands can be a little stubborn but with a little patience they will come out
The carrier bearings require a special tool to remove, if they are bad just cut them off with an angle grinder/cutoff wheel and a cold chisel.
The cross pinion gears are a tight press fit with woodruff keys in the shafts. I pressed the shafts thru the old pinion bushings after removing the retaining clips. This ruins the bushings by dragging the key through them in my case they were already bad. I’m sure there is a better way to do this.
The instructions I was using said a couple of alternating pry bars should pull these gears, not a chance.
Mark the cross pinion shafts keeping them paired, along with both case halves and the center section. Also mark the cross pinion gears as to which brake drum gear they belong. This keeps mating gears together.
It doesn't much matter which cross pinion gear goes with which shaft as long as the gear mates with the original drum gear. Mark the axle drive gears for side and orientation, as they will go in either way.
An easy way to mark this stuff is to mark everything on the ring gear end of the part. Then during reassembly all the markings should face the ring gear.
The cross pinion shafts, drums, axle gears, and center will fit either side or upside down. The cases and center can be stamped, the cross pinions and gears a paint marker works after cleaning. Don't wash the paint off in the parts washer.
I could not find the correct original bushings so made some out of SAE 660 Bronze stock of the closest nominal size available thru McMaster Carr, and then rough turned them to size.
Turned the OD to a press fit in the case.
Turned ID slightly under final ID. ID will shrink some when pressed into case.
The original bushings, or at least the bushings in this, were a split steel sleeve plated bushing they have two oil grooves and a bunch of dimples for holding oil or in my case silt.
The bushings where replaced with solid bronze no oil groves or dimples. I don’t have the equipment to cut the oil grooves which are normally used for pressurized systems anyhow.
Other bushings that did not get replaced were the brake drum bushings which had minimal wear and the axle gear bushings which again showed minimal wear.
After installing the bushings an oil passage needed to be milled as in the original.
Temporarily reassemble the case halves. An adjustable hand reamer with a guide was used to ream both of the bushings inline with each other, reaming one side to size then reaming the other from the opposite side.
Reassemble the halves with the cross pinions and axle gears and check for binding.
Replace the cross pinion gears, snap rings and safety wire all the case bolts.
Replace the drums and check it over before pressing on the carrier bearings.
It’s too late to turn back and fix something once the carrier bearings are pressed on.
To be continued.......
(sick of typing
) .
.