corkuck
New member
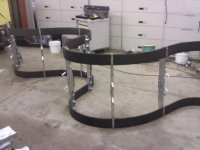
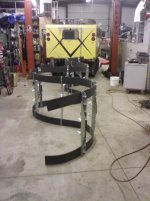
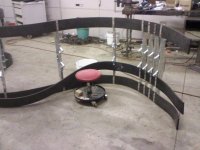
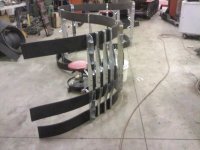
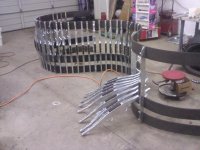
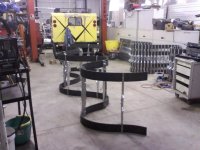
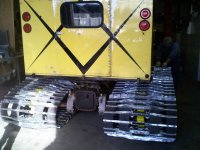
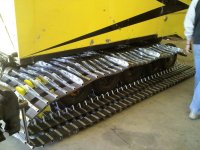
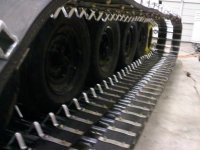
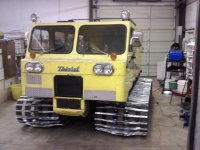
Grouser galvanizing, Rebuilding Thiokol Tracks
1965 Thiokol 1200 36" mostly “A” style Grousers but Three “B” style.
First of all "WHAT A JOB THIS IS"!!!! One thing leads to another.
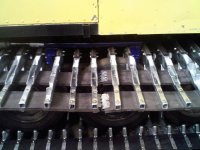
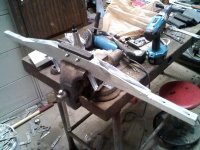
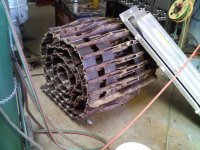
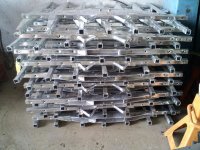
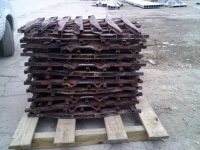
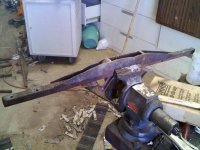
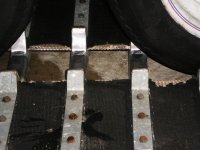
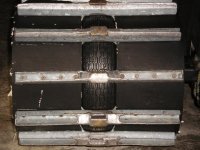
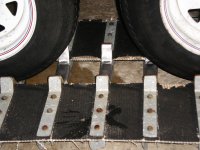
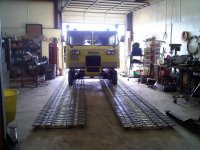
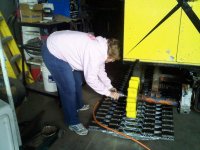
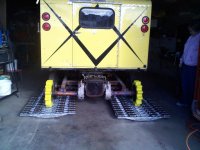
1965 Grouses are pretty worn out. But about 1/3 still had some of the ware top on them but most are gone. So I cut them out and off also. Look at the pictures below to see what I did. Then I inserted two 1/2" thick, 6" long, 2" deep, 4 ply rubber inserts. They can be replaced when needed. If I was to do it over I would go 2 ¼” deep. 2” only gave me ¼” of rubber above the grouser ½” would have been better.
Here is some of the other work I have done thus far.
1. Two new rear snap ringless (spelling?) drive Axles and bearings.
2. OC4 disassembled cleaned, flushed, new bearings, inspected, vented, resealed then filled with Shell Donex Oil SAE 50 TO-4 Transmission Fluid.
3. All new and replaced bogie axles to frame plastic bushings.
4. New bearings, grease packed on both front bogie bull wheels.
5. Checked and re packed all bogie wheel bearings.
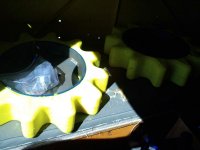
6. New rear track drive sprockets with new studs and nuts.
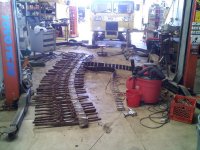
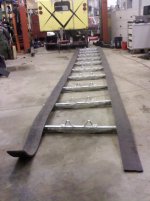
7. New Tracks with galvanized grousers using Grade 8s and Stainless fasteners.
Special Thanks to Nancy at Spryte Improvement, LLC in Wallace Idaho my favorite snowcat person in the world she knows her stuff and so nice to work with.
I’m looking for an aluminum or plastic stock shaped fuel tank for the 1200 if anyone has one or knows of a reasonable priced place to have one built or buy one let me know.
Let’s keep the Thiokols alive.
Long live Thiokol!!!
1965 Thiokol 1200 36" mostly “A” style Grousers but Three “B” style.
First of all "WHAT A JOB THIS IS"!!!! One thing leads to another.
1965 Grouses are pretty worn out. But about 1/3 still had some of the ware top on them but most are gone. So I cut them out and off also. Look at the pictures below to see what I did. Then I inserted two 1/2" thick, 6" long, 2" deep, 4 ply rubber inserts. They can be replaced when needed. If I was to do it over I would go 2 ¼” deep. 2” only gave me ¼” of rubber above the grouser ½” would have been better.
Here is some of the other work I have done thus far.
1. Two new rear snap ringless (spelling?) drive Axles and bearings.
2. OC4 disassembled cleaned, flushed, new bearings, inspected, vented, resealed then filled with Shell Donex Oil SAE 50 TO-4 Transmission Fluid.
3. All new and replaced bogie axles to frame plastic bushings.
4. New bearings, grease packed on both front bogie bull wheels.
5. Checked and re packed all bogie wheel bearings.
6. New rear track drive sprockets with new studs and nuts.
7. New Tracks with galvanized grousers using Grade 8s and Stainless fasteners.
Special Thanks to Nancy at Spryte Improvement, LLC in Wallace Idaho my favorite snowcat person in the world she knows her stuff and so nice to work with.
I’m looking for an aluminum or plastic stock shaped fuel tank for the 1200 if anyone has one or knows of a reasonable priced place to have one built or buy one let me know.
Let’s keep the Thiokols alive.
Long live Thiokol!!!
Attachments
-
 1202001233.jpg75.6 KB · Views: 1,306
 -
 0929001227.jpg87.3 KB · Views: 1,313
 -
 1202001232.jpg67.1 KB · Views: 1,288
 -
 1202001341a.jpg95.2 KB · Views: 1,285
 -
 1119001243.jpg82.7 KB · Views: 1,290
 -
 0929001226a.jpg83.4 KB · Views: 1,308
 -
 0929001225.jpg44.4 KB · Views: 1,275
 -
 0929001223.jpg88.9 KB · Views: 1,292
 -
 0929001227b.jpg84.4 KB · Views: 1,306
 -
 0929001227a.jpg71.9 KB · Views: 1,315
Last edited:


 How tall was your rubber?