• Please be sure to read the rules and adhere to them. Some banned members have complained that they are not spammers. But they spammed us. Some even tried to redirect our members to other forums. Duh. Be smart. Read the rules and adhere to them and we will all get along just fine. Cheers. :beer: Link to the rules: https://www.forumsforums.com/threads/forum-rules-info.2974/

Astro van cat conversion

Snowy Rivers

Well-known member
Had to go to two different bolt companies (Less than 1/2 mile apart) to get the 12 ...5/8"-11 Flat head Allen bolts 2-1/2" long (Full threaded)

Stuck the one cover in the mill and dug up a big azz countersink.

Dropped that bad boy into the inside of the 6 holes that fasten the axle tube on.

Got the holes all ready for the big bolts to thread in.

Gonna wash up the axle tube now (Very grungy with a huge amount of blue silicone on it and nasty goop left from the water oil mix left behind..

Then will come the acid test.....SEE IF IT ALL WORKS.....

Gonna fit the bolts with Nylock nuts and the original washers..

With the flat heads sealed with blue locktite they will not leak oil....


Pictures in a bit....
 

Snowy Rivers

Well-known member
YES INDEED.

Never had one of those rattle loose.....

Well...
To start with...the previous crew was consistent....and this is not a compliment either.

The fools crammed a standard washer under the bolts that held the axle tubes on...
Sadly there is a spot face in the axle tube that will not allow the washer to seat....

RATTLE THE BOLTS DOWN UNTIL THE WASHER FITS....OMG


The threads were tore up in several holes.

One had a fine threaded bolt run in and it was a bitch to get out....

Cleaned up the hole with a tap as best I could.

The threads ended up a tad out of square....but things fit OK.

PIX

Counter sinking the holes.

Holes done.

Locktite added.

Washed the threads with brakekleen to degrease well first..

All done.

Ready to go back together...


The drop boxes did not come off the same cat either.

One had a soft green paint under the black.

The other one does not have the green paint..

A cat of many colors.
 

Attachments

  • Dropboxrepair2.jpg
    Dropboxrepair2.jpg
    334.9 KB · Views: 140
  • Dropboxrepair1.jpg
    Dropboxrepair1.jpg
    182.9 KB · Views: 144
  • Dropboxrepair9.jpg
    Dropboxrepair9.jpg
    467.2 KB · Views: 143
  • Dropboxrepair8.jpg
    Dropboxrepair8.jpg
    380.4 KB · Views: 142
  • Dropboxrepair7.jpg
    Dropboxrepair7.jpg
    388.1 KB · Views: 135
  • Dropboxrepair5.jpg
    Dropboxrepair5.jpg
    165 KB · Views: 133
  • Dropboxrepair3.jpg
    Dropboxrepair3.jpg
    333.4 KB · Views: 139
  • Dropboxrepair4.jpg
    Dropboxrepair4.jpg
    387.3 KB · Views: 141
  • Dropboxrepair6.jpg
    Dropboxrepair6.jpg
    231.8 KB · Views: 140

Snowy Rivers

Well-known member
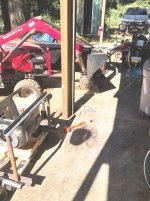
Not a real Gung ho day today.

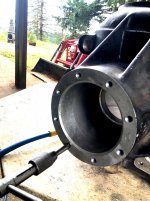
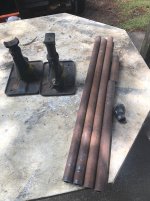
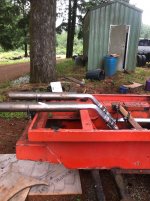
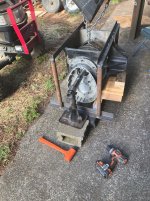
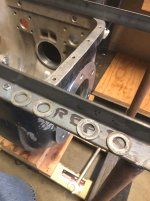
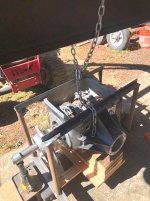
Got the other axle tube cleaned up.

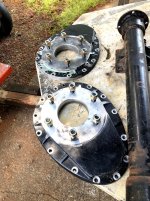
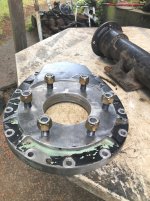
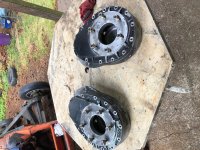
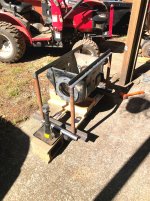
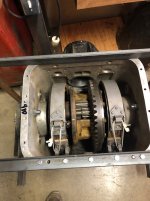
Both drop boxes are all spiffy now too.

Ordered the gaskets from Snowcat Pat....

His lovely wife got things all handled....

THANKS FOLKS....

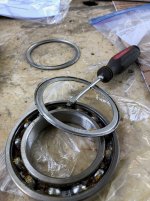
Spent more time on ebay snooping out more 6014 bearings for the drop boxes.

Two coming out of Macedonia.....great price too..
One coming from California
One from New York

Enough so far for one box.....

But the prices are averaging about $20 each.....

When ya gotta have bunches...ya got to shop around.

I am not excited about the Chinese bearings...but several of the big name U S companies are getting their stuff made over seas.

I have found so far

MGM Radak
SKF
PEER
BL
A Chinese made one called "Premium" with just the number on it.
NSK
Link belt

Should have more at the post office tomorrow.

Even the local wholesale bearing houses are pretty spendy on the bearings.

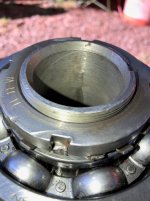
The two pinion bearings cost $80 for the pair...The big roller bearing just behind the pinion is more expensive than the other bearings....and tougher to find
The two main carrier bearings $50 for the two

The 8 bearings for the drop boxes are all over the map.
$19...$15...$27 each (Two out of Europe were $54 for pair)

Still watching a couple sellers.

I want to see what the stuff I bought looks like.

If good..will buy more...

Ratty old boxes is fine as long as the goodies are in good shape...

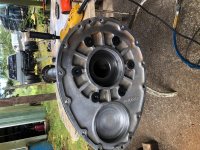
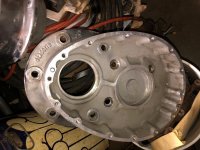
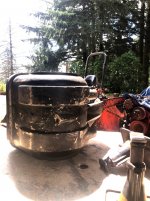
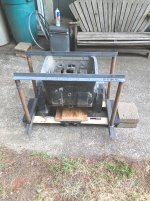
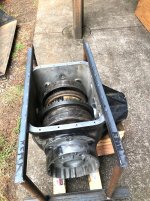
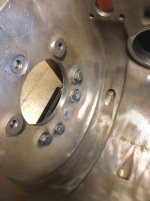
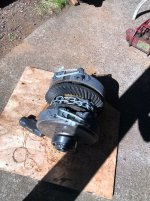
I will be real happy to have the big gear box back together and in the cat...


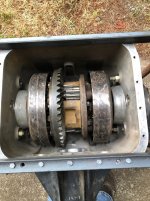
(1) 6309...Pinion at drive yoke
(1) 1310...Pinion at bevel gear
(2) 6311...Carrier
(8) 6014...Drop boxes
(2) 5210...Axle shaft outer end by sprockets

A metric buttload of bearings...

A note to anyone snooping about to find bearings.

Avoid bearings marked "C3" these are a looser fit bearing (Internal clearance)

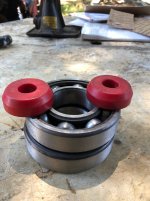
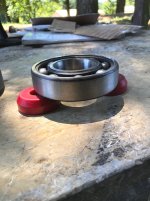
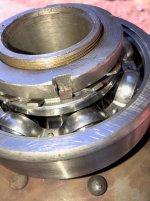
The 1310 roller bearing behind the pinion gear is an odd duck.

This bearing needs to be a caged roller bearing and NOT "Full compliment"
The Full compliment is rated at 3000 RPM MAXIMUM (Drive shaft RPM)
The 1310 is available in many prefixes and suffixes.

The one I got is an MS1310EX...This bearing has a inner race with a flange on one side and a side plate on the other side.

This bearing will work in this application as the side plate will be captured by the center tube on the pinion shaft and this keeps the bearing solidly located.

This bearing is good for 5600 RPM....

The 6014 can be had as
"OPEN" no seals or shields
"ZZ" suffix ...both sides shielded with metal shield
"2RS" both sides sealed with rubber type seals
The shields and or seals can be easily pried out/off and tossed to give an open bearing.

The 6309 is about the same deal

The 6311 is also the same game

The prices on ebay are very good...

Just avoid the C3 designation and you can remove the unwanted seals or shields and toss them.

The Japanese and European bearings are top notch as are the US made stuff.

The Chinese bearings are in many cases made to ISO9001 standards

I have not had much experience with bearings from that side of the pond.

I did put a front wheel bearing cartridge in our 2007 Avalanche 4x4
It was a CCCPP brand.

Been in the rig 2 years now and no issues.

Fit and finish looked great....

Guess I am just a tad cautious on the bearings for the cat.

I think the larger bearings in the sizes needed for the OC12 are just fine from the folks in China.

I will not start a debate on the merits of any particular brands.....

The only bearing that is finicky is the 1310 pinion bearing due to the many configurations that it comes in.....

You can get great deals online...just be sure and pay attention to this bad boy...


Hope all the bearing stuff help someone...

I beat my head on the wall for many hours sorting out all the prefixes and suffixes stuff...

Most of it is not a big deal...but some can be....

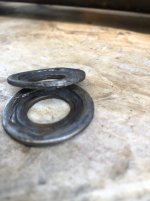
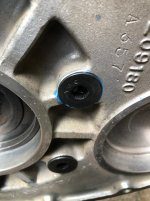
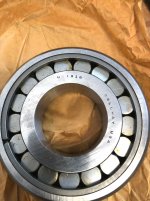
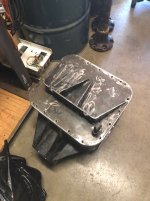
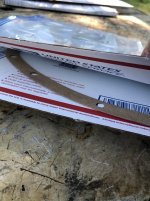
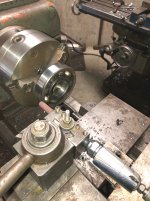
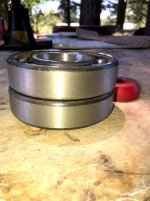
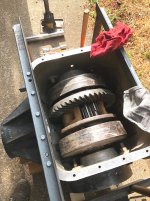
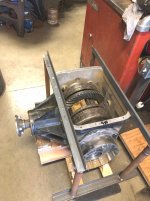
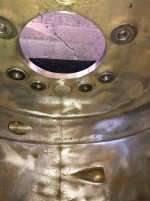
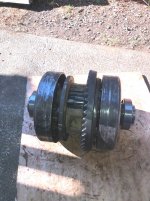
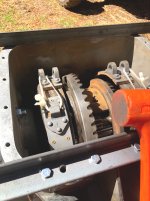
A pix of the one pinion bearing to stay away from.

These are called "FULL COMPLIMENT" type and will carry a bigger load...but the RPM rating is less due to MORE INTERNAL FRICTION

Just an FYI
I ordered the full compliment bearing by the number only...then got to looking at the bearing when it got here...then asked What is the difference and why.

Reading bearing specs books will make you crazy.....and make ya want to chew the tracks off your cat...

All for now....

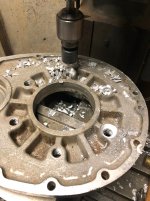
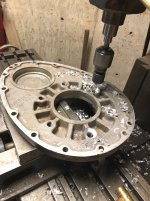
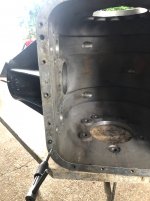
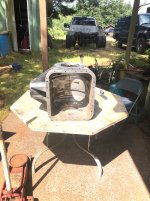
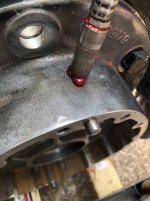
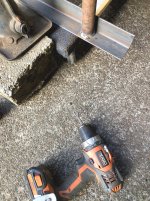
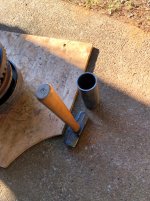
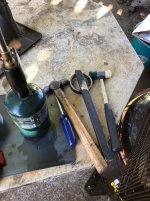
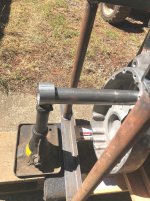
Tomorrow gotta wash out the main diffy case and go get a 9/16" hex tool to get the drop box oil plugs out.

The small 1/8" pipe drain plugs were stuck tighter than a bulls azz in fly time.

The hex striped out..

Drilled them and used an easy out.

Re tapped the threads to clean them up..

Will install new hex head plugs there...

The carnage never ends with this cat....:shitHitFan:
 

Attachments

  • Axles..dropcasesreadytogo1.jpg
    Axles..dropcasesreadytogo1.jpg
    113.2 KB · Views: 160
  • Axles..dropcasesreadytogo3.jpg
    Axles..dropcasesreadytogo3.jpg
    195.9 KB · Views: 169
  • Axlesdropcasesreadytogo2.jpg
    Axlesdropcasesreadytogo2.jpg
    109.9 KB · Views: 167
  • Full compliment bearing.jpg
    Full compliment bearing.jpg
    268.5 KB · Views: 161

Snowy Rivers

Well-known member
OK

The diffy case finally got the washout and clean up.
The case lid was really grungy too.

All spiffy.

While looking for something in the shop I spotted two screw jacks that likely came from the old square body Suburbans.

These will work great to hold the Compensator case in the center of the bores of the main case while the drop boxes are tapped into place.

I picked up some steel angle that can be used to build a pair of holding fixtures.

The rusty pipe in the one piccy will be cut to length and welded to the angle.

The angle bolts to the top rail of the case and this will allow the case to stand free with access to allow the drop boxes to be fit easily.


A pair of tubes (Not shown yet) will slip inside the compensator case and then rest on the jacks.

SPECIAL TOOLS YA KNOW

I picked up another 15/16" box wrench to modify and make an opposite hand wrench to the one I already made..

This is needed to get onto the very bottom bolts in the drop box.....

(Flat head 5/8" bolt)

These two wrenches are a real help....

Pics of the case.
All threaded holes tapped to clean the threads.

Happily all the holes are in good shape...

I WOULD NOT HAVE BET ANY $$$$ ON THIS ONE...CONSIDERING WHAT HAS BEEN THE NORM...

As the jigs and fixtures come together I will post pictures.

I like things easy....especially when the stuff is heavy.....

Keeping the compensator centered will make getting the drop boxes on real easy.....
:hammer::hammer::hammer::hammer: with a soft dead blow hammer.....

No steel hammer on this maneuver ....:thumbup:

At present...the plan is to install Allen set screws in the 5/16" threaded holes in the top of the case, then fasten the top using Nylock nuts.

This will save the threads in the case and make a better overall fastening of the cover.....

I may use blue locktite on the pseudo studs....not sure yet.

Best part is the Allen set screws have a hex in them and can be removed easily...
 

Attachments

  • Caseready1.jpg
    Caseready1.jpg
    278.2 KB · Views: 120
  • Caseready2.jpg
    Caseready2.jpg
    304.5 KB · Views: 117
  • Caseready3.jpg
    Caseready3.jpg
    476.1 KB · Views: 117
  • Caseready4.JPG
    Caseready4.JPG
    370.5 KB · Views: 119
  • Caseready5.jpg
    Caseready5.jpg
    268 KB · Views: 117
  • Caseready6.jpg
    Caseready6.jpg
    349.3 KB · Views: 119

Snowy Rivers

Well-known member
Got my Saturday work done....

The Adapters to hold the compensator all cut to length and machined so they will slip into the center tube on the comp.

Two jacks got a tubular piece welded on to make sure things don't fall off.

Fabricated the set up stand.

All drilled to be able to bolt to the top rail of the main case.


Answered an ad on a 1992 Chevy S10 standard cab yesterday.
Gonna go look at it tomorrow and probably put some $$$$ on it.

Got to get together with my Son in law and hook up the BIG TEX goose neck and go haul the S10 home later this month.

Dirt cheap too.

Guy says BAD STARTER IS ALL.....

I could care less as long as the tin is straight.

The S10 cab is short enough to fit on the 2100 chassis and still be able to use the original cat fuel tank and straps....:thumbup:


May also be able to scare up a shorty S10 bed and mount in the rear over the boom boom exhaust pipes.

We shall see.

1992 S10 does not have the OBD2 electronics or electronic tranny.

This will make the chassis even more adaptable (Easily) to the cat project.


There is also the possibility of using an alternative location for the fuel tank and adapting a shorty bed and canopy with a pass through from the cab...

Maybe a crawl through...will be able to see more when the tin is sitting here in front of me.....

S10 drive shaft....?????? might as well keep it as much Chevy as possible....

The S10 front clip should be a great candidate for a TILT setup.

Fasten the hood on SEMI permanent and add a hinge arrangement....


We shall see
 

Attachments

  • Diffytools2.jpg
    Diffytools2.jpg
    434.1 KB · Views: 104
  • Diffytools3.jpg
    Diffytools3.jpg
    423.4 KB · Views: 109
  • Diffytools1.jpg
    Diffytools1.jpg
    550.1 KB · Views: 108

Snowy Rivers

Well-known member
Today ...the plan is to go check out a 1992 S10 Standard cab.

I have been lamenting about how to get 2 more seats in this Frankencat....

The S10 cab is nice enough....but 2 people only.

I have looked at these "Sleeper cabs" that could be fit readily behind the regular truck cab $$$$$$$$$$$$$$$$$$$$$$$$$$$$$$$$$$$$$

Not in the cards.

Heading down to the barn this morning to grab feed for the horses and am on the tractor driving right by the Original 2100 cab sitting in the side yard.


:idea::idea:

Hmmmm..Ran back to the shop and grabbed a tape measure.

Measured up the cab inside.

2 buckets seats can easily fit in that cab....

Now.....after measuring the S10 cab it looks like the cab will fit fine with the rear of the cab far enough forward to allow the original 2100 fuel tank to fasten in it's original location.....AND the factory 2100 cab (LESS ALL THE CRAP BOLTED TO IT) can fit behind the fuel tank over the BOOM BOOM exhaust pipes......

More measurements of real time variety still need to be done though.

The 2100 cab is 52" long front to back....that will put the cab about 6 inches forward of the current location of the pipes (Not finish welded yet)

This idea is looking very promising :smile::smile:

The 2100 cab has a nice joy ride bar across the front....

I can remove the old instrument panel up top....

I can easily remove a few hundred pounds of crap still bolted to the cab...

The valves for the blade and the groomer, the seat and steering controls, tool box and sundry other junk.....

Mounting the original cab above the exhaust pipes should give the rear occupants a fair view out the original front windshield.

Gonna need to replace the windows....no biggy.

I can use the original windshield for a pattern

The side sliders are junk.....MAYBE scare up some universal windows from canopy usage to be grafted into the holes in the door and RH side.

May need to add a bit of sheet metal to modify the shape of the door and side opening...

Best part....I own the cab and fuel tank......

This is indeed going to be A FRANKENCAT....:clap:


Ahhhhh
I found the original builders plate.

No date...but it is a 2100B

Serial #601
Anyone able to tell me anything about this machine ?????

Thanks
 

Attachments

  • S2100CAB1.jpg
    S2100CAB1.jpg
    279.5 KB · Views: 89
  • 2100CAB2.jpg
    2100CAB2.jpg
    524.9 KB · Views: 91
  • 2100CAB3.jpg
    2100CAB3.jpg
    362.3 KB · Views: 87

Snowy Rivers

Well-known member
Did some Sketching.

Not good scale...but the concept is whats important.

There is enough room to do this.....

The idea of a 2 foot deck behind the cab is cool.

Maybe a wooden deck with stake racks on each side...
I place to toss equipment or ?????

Best part is this uses up stuff that is paid for.....and will result in more usable room for passengers....and equipment.

Big fuel tank too.....
 

Attachments

  • Concept drawing.jpg
    Concept drawing.jpg
    56 KB · Views: 92

loggah

Active member
SUPER Site Supporter
We would call that rear cab a "mother in law cab" !!!!:clap::clap::clap:I think a 1965 ford falcon station wagon body would be just the ticket !!!:thumbup::thumbup::thumbup::thumbup:
 

Snowy Rivers

Well-known member
I LOVED IT GUYS.....

Well...I dropped the hammer on a 1992 S10 standard cab a bit ago.

It is not a really sweety specimen.....but has good potential for a cab for this Franken cat.....


The tin is in fair shape.....but the dimensions I found online were not accurate.

It is 100" from Bumper to back of cab.

THIS WILL WORK.

The cab will end about 2 inches ahead of where the fuel tank originally mounted.

Still plenty of room out back for the 2100 cab to fit above the pipes..

No room for the mid deck idea though....

I like real time measurements...not crap from a book or the internet....

My tape does not lie....:thumbup:

Good bet I can sell off the bed, frame, engine and such and get my cab for zip...

$300 for this wretched little truck....It will get a new lease on life.

Right now it's parked in a lot and the homeless camp has been tossing there trash in it..

GAWD WHAT A STENCH.

Cab is not hurt as it was locked.....

Definitely gonna toss the carpet and replace later....

Bench seat is well loved.

Maybe find a set of buckets for the rear cab and matching color for the bench up front.

Rig has a stick shift....and a 2.8 V6


Fairly decent wheels too.

All good stuff for craigs list/


YESSSSS...AN INTERCOM is on my hit list.....Gotta know wassup back there....

Sooo...the tin issues is solved....

I am thinking that since the 2100 cab was a tilt style...be easy to add an air assist cylinder and make it easy to get at the diffy and such for service....


Too much thinking.....

Thanks for the support troops.

OHHHH JUST AN FYI

Gonna wet sand the cab and do it up in RATTLE CAN Snow camo...White, gray, black (Flat texture)
 

Attachments

  • S10 WRETCH1.JPG
    S10 WRETCH1.JPG
    367.9 KB · Views: 202
  • S10 WRETCH2.JPG.jpg
    S10 WRETCH2.JPG.jpg
    363.1 KB · Views: 195
Last edited:

Snowy Rivers

Well-known member
That's about all I can call it.

The homeless filled the bed with GAWD awful trash that stunk to high heaven...

BEEEEEEES everywhere.....

But it will do fine......

I think that mounting the stock 2100 cab in the rear will look way cool....

Good visibility for the rear end crew....
 

Snowy Rivers

Well-known member
Finished up the "Holding fixture" to allow easy assembly of the OC12 Compensator case fit into the main box and the drop boxes fit onto the carrier bearings....

A couple pics of removing a shield from a bearing.

Many time you may need an open bearing and all you can find are shielded or sealed (ZZ ...Shielded both sides) (RS ... Rubber seal)

These parts can easily be popped out using a screw driver or a pocket knife.

Carefully slip the blade into the joint between the seal/shield at the inner race and pry the seal/shield out..

The Gaskets arrived from Spryte improvement today:clap:....

Top notch gaskets....Extremely well packaged

Thanks to the folks at Spryte improvement....:thumbup::thumbup:
 

Attachments

  • Gaskets for OC12...2.jpg
    Gaskets for OC12...2.jpg
    296.7 KB · Views: 179
  • Gakets for OC121.jpg
    Gakets for OC121.jpg
    287.1 KB · Views: 184
  • Bearingshieldremoval1.jpg
    Bearingshieldremoval1.jpg
    197.2 KB · Views: 180
  • Bearingshieldremoval2.jpg
    Bearingshieldremoval2.jpg
    285.2 KB · Views: 180
  • Diffy holdingfixture2.jpg
    Diffy holdingfixture2.jpg
    256.5 KB · Views: 177
  • Diffy holding fixture1.jpg
    Diffy holding fixture1.jpg
    486.6 KB · Views: 182

vintagebike

Well-known member
And what could you do with this?

I found this in a heavy equipment yard today. I has an interesting history but is borderline NSFW.
5B801D9F-91BE-4C73-960C-C1B0A1F666B8.jpeg

B307B680-60D1-4E2F-A00D-918E3AE23B4E.jpeg

1CE20594-3342-4930-B7BA-1D449F99B1AE.jpeg
 

Snowy Rivers

Well-known member
Hmmmmm....Las Vegas going too far ??????I can't imagine :th_lmao:

Been there twice a few years back to do Shot Show.....My comment on Vegas

"A very conspicuous display of the wild side"

We did Shot two years in a row and that was enough of Vegas for me....

Drove in the first year and did the show....then the following year we shipped our materials to our hotel and flew down.

The short direct flight from PDX to Mccarran beat the hell out of a hard two day drive in the Suburban from the ranch here near Newberg Oregon down I5 and then over Tahachapi Pass and up to Vegas...

Don't like road trips like that with a strict timeline.....

Trip home on the plane sucked as the crowd on the plane were all drunk and returning from a gambling junket.

The dude sitting next to me wanted a "Girl Friend" for the trip home and was being obnoxious as hell......We had words.....The flight attendant was far more polite than I was....

She asked him to behave.....I threatened to toss his Azz off while in flight.....

"The friendly skies thing ya know"

He finally passed out and started to snore....GAWD

There were empty seats Aft...so I helped my self....
The flight attendant casually remarked "Trouble with the boy friend" ...we had a good laugh.....

I do not ever want to fly an MD80 again sitting next to the engines..

Noisy beast.....


Anyway...so much for Vegas....not my cup of tea....

More like "Gone catin" would be much better...:thumbup:
 

Snowy Rivers

Well-known member
Getting ready to start reassembly of the OC12

Given the fact that the previous crew Fubar'd everything they touched....I am nervous about trusting ANYTHING

The new gaskets that go between the main case and the drop boxes are .016" thick out of the package....

The old ones were .010" when they came out at disassembly.....

The backlash on the gear set seemed fine, and the wear pattern on the ring gear was OK (Nothing weird)

I do not have measuring tools LARGE ENOUGH to measure the Outside to outside dim. on the assembly to be sure it is located correctly in the case once the drop boxes are bolted up.

I DO NOT want the assembly too loose (Slopping back and forth) or too tight side to side.....

A large surface plate and a height gauge would be sweet.....FRESH OUTTA THAT STUFF.

If I had a larger height gauge I could do it on the mill table....

My height gauge is too small and the diffy center section is too heavy to lift by hand to the table.


So....PLAN "B"

Going to use the old bearings (Not perfect but not roached either) and OD and ID grind them so they will JUST slip onto the diffy center section, and into the drop box bore without having to get vicious with things...

"Special tools if you will"

Then I can slip things together and check the fit....make any shim adjustments if need be (All original stuff is in it's original sets)

Do I want to trust the other crew...NOT EVEN..../

Royal PITA....But it will work well to get the job done without having to pull bearings and cases apart with force....

Gotta figure out how I am going to grind the old bearings to do this...

Gonna call a couple shops and see wassssssup...Or I may make a little fixture and do it in my lathe.....

I have a rig that allows my air die grinder to fasten to the tool post......we shall see.

I want this assembly correct.....
 

Snowy Rivers

Well-known member
Busy morning...

Called a couple shops that do grinding.....Waaaaaaaaaaaaaaaaay too much $$$$ to get the two old bearings ID & OD ground to make them usable as set up tools.


Sooooo

Headed down to the shop...

****WARNING****
DO NOT TRY THIS AT HOME.......

Grabbed up my air die grinder and sorted through the lathe tools to find the extra quick change tool holder that I had used to hold the die grinder before...

Yessssssssssss

Got the grinder all set up...had to run to town and pick up a couple stones...

The setup is not nearly heavy enough to get a really really smooth finish....BUT good enough to get the bearing OD & ID where they will slip over the carrier and into the drop box upper bearing bore


So after a couple hours of fooling about....these two bad boys are done....


They fit sweet.

Now the carrier can be fitted and the backlash can be checked and the overall bearing position can be set correctly......

With a bit of luck the original shims will be good to go.....But I am not counting on anything with this beast....


A few pix


The red gizmo's are urethane body mounts from something ????? found on the shelf....

Stuck between the bearing race and the chuck allowed good traction to be able to get the inner race to be turned while grabbing the outer race.

Grabbing the inner race I added a piece of rubber sheet between the outer race and step in the chuck jaw to drive the outer race...


WHAT A LASHUP.....

I hope nobody here is a precision machinist.....but ya gotta do what ya gotta do to gitterdone.


Gonna be great to get things stuffed into the box and actually see where we are at on this thing.....


I am definitely gonna put these "Tools" in a box on the shelf JUST IN CASE THERE IS EVER ANOTHER NEED DOWN THE ROAD....


The two bent wrenches, filler button to pull the carrier bearings off, the holding frame and the two modified besarings.

Don't want to make this stuff again.....


Inventions were a blessing for sure.......

All good to go now
 

Attachments

  • Carrier bearing jigs1.jpg
    Carrier bearing jigs1.jpg
    309.4 KB · Views: 161
  • Carrier bearing jigs4.jpg
    Carrier bearing jigs4.jpg
    263.3 KB · Views: 159
  • Carrier bearing jigs3.jpg
    Carrier bearing jigs3.jpg
    293.8 KB · Views: 161
  • Carrier bearing jigs2.jpg
    Carrier bearing jigs2.jpg
    269.6 KB · Views: 158

Snowy Rivers

Well-known member
Started off this morning by getting the cotter pins installed in the compensator .

A total of 6 pins on each end...
The 3 outer pinion nuts and the through case bolt castle nuts.. 12 total...

Did some final checking, and my theory about the one drop box having been replaced is likely true.

Aside from the Strange paint scheme, there is not a dimension stamped into the top edge of the drop box near the flange where is bolts to the main case.

The one has .9060 stamped quite conspicuously on the top...between the main box flange and the edge where the cover bolts on.....

This sure would make me believe that the drop box has been replaced....

Could have been a factory new one at one time....????????????????

The factory stamps all the critical dims. on the case and drop boxes when they are assembled to aid in the process of replacing bearings, gear sets and such and being able to calculate the shims needed....


So.

The modified OLD carrier bearings are all ready to go for the test assembly now.
Gaskets all here.

Still need a few bearings....but there is enough to get the center section in....

Was finally able to worry the Oil plugs on the drop boxes out.

The drain plugs were both Fubar'd (1/8" pipe) hex stripped out....Drilled them suckers and use an easyout...)
The larger plugs on drop boxes were also in bad shape...fought them out too... with a bit of FORCE.

Need to replace all the plugs.....


Getting close to time to get that bad boy back together.
 

Snowy Rivers

Well-known member
Got the old "Modified" carrier bearings back on the compensator case and rolled it outside.

Got the main case on the rollaround gizmo and outside.

Lifted the assembly with the tractor and snaked it into the main case.

Got the modified screw jacks in place and a large cotter pin in my 18 volt drill to operate the jacks...... (Last minute idea)

Got the drop cases in position on the pipe adapter holding tubes.

Jacks working to get the center section up into position to allow bearings to go into the drop box bores.

Stupid Mickey mouse idea worked really well.

Started the drop boxes onto the bearings using my Dead blow hammer and almost immediately I swat the top dowel pin with the club...../and the pin goes in flush with the case lip...../Arrrrrrrrgh !@#$%^

The pins are harder than a whores heart....no drilling them to tap a thread to pull it out....

This sucks......


Soooooooooooooooooo...finish getting the assembly together to check the end to end to be sure the carrier is not gonna slop back and forth.....

That went well..

I still need to measure things and bang on the compensator to be sure it is indeed tight in the case......

Now....What the hell to do about getting the pin out.

Decided to try Hydraulics......

Measured in 1-3/8" from the edge of case flange (By pin head that's flush now) and drilled a suitable hole to try and intersect the pin bore.....

Bingo......intersected the pin hole.

Tapped the drilled hole 1/4"- 28 thrd and screwed in a 1/4 28 zirk fitting..

Grabbed the grease gun and gave it 3 pumps and then the little critter popped back out.

Cleaned up the grease....GONNA LEAVE THE GREASE AND THE ZIRK IN THERE......:thumbup:


I need to go measure things and get the pinion ready to go back in and then check the back lash.....

Once these things are done the carrier needs to come back out, the old modified bearings come off and the new bearings go on....

Put the bands on and secure them with zip ties and drop the unit back in.

This time the assembly is for keeps (I HOPE)

Another day or so the way I work.........After my stroke the energy just ain't there like it used to be to push very long.......


Some pix
 

Attachments

  • Reassembly1.jpg
    Reassembly1.jpg
    283.6 KB · Views: 134
  • Reassembly2.jpg
    Reassembly2.jpg
    500.9 KB · Views: 126
  • Reassembly3.jpg
    Reassembly3.jpg
    520 KB · Views: 124
  • Reassembly4.jpg
    Reassembly4.jpg
    419.6 KB · Views: 125
  • Reassembly5.jpg
    Reassembly5.jpg
    479.4 KB · Views: 128
  • Reassembly7.jpg
    Reassembly7.jpg
    499.5 KB · Views: 126
  • Reassembly8.jpg
    Reassembly8.jpg
    399.5 KB · Views: 128

Snowy Rivers

Well-known member
Put the new pinion bearings on the pinion and snugged up the nut.

Stuffed the assembly in the box and snugged up a couple bolts.

The carrier appears to be just fine from side to side......measured the position with a depth mic and no matter if I bang the carrier one way or the other using a big azz club against my aluminum spud that fits into the carrier end journal the measurement stays the same at .910" off the inside machined pad in the drop box..... (Measured from machined pad to adjusting nut face as a reference point....same spot after banging the carrier either way)

No matter.....the sucker seems fine.

Checked the backlash ..... .007" on the low and .015" on the high

The Mickey mouse ground bearings could be a skosh off and cause the carrier to sit goofy, but I don't think that's the case as they ran true in the lathe.


The factory specs book says that these numbers are acceptable ....so be it.

I am going to tear this bad boy apart and install the new carrier bearings and kick this pig.......

Thinking about adding a bit of silicone to the lower washers inside the case where the drop boxes bolt on....the lower ones are a real !@#$% to get the washers onto the bolts down there.... Stick ALL the washers to the case over night and GOOD TO GO :thumbup:

I can use Gorilla tape on the wrench to keep the nuts in place while sticking the wrench inside.

This time the bands will be on the drums .. :hammer::hammer:

With the new bearings installed and all the bolts torqued up good the backlash might change a bit....?????????

We shall see.....

I will say this....IF this had been a GM 10 bolt, a DANA 44 or even a DANA 60 I would gave chucked this ring and pinion and scarfed up a fresh set.......


But the cost and availability of new OC12 Diffy gears...especially 5.44:1 are off in the ozones.....


All in all...she will live again....probably not be the quietest girl at the dance though....:thumbup:


Pics
 

Attachments

  • Reassemble9.jpg
    Reassemble9.jpg
    332.1 KB · Views: 118
  • Reassemble10.jpg
    Reassemble10.jpg
    317 KB · Views: 118
  • Reasemble11.jpg
    Reasemble11.jpg
    294.8 KB · Views: 115

Snowy Rivers

Well-known member
Last night we stopped by the post office and four more of the 6014 bearings were in a parcel locker for me :clap:

Two still inbound......

The bearings are from all over the world.

USA, Japan, China, Hungary .....Franken parts :thumbup:

Today started off with getting the bolts out of the box holding the drop boxes on for the temporary setup and checks.

Removed the pinion assembly and the unit is now ready to roll outside and the carrier removed.

Going to do a temp with the lower 4 bolts and washers....Going to add a dab of silicone to the washers and fasten them snug to the inside of the case and let them cure overnight.

Those lower bolts are a paint to fetch the washers in place and not be fishing them out from under the unit after ya drop them ...... Arrrrrrgh


Going to get the new bearings on the carrier today and the big N11 nuts tightened up and locked in place....

Then we wait until tomorrow to allow the silicone to GLUE the washers to the case.

Probably go ahead and get the bands wrapped around the drums and secured with tie wraps today as well.

Gonna be glad when this BIG PIG IS HANGING BACK IN THE CHASSIS....:smile:

Still need axle seals, bearings (5210) and I need to finish machining the bearing retainer rings.. (Press/shrink on)


This stuff can actually happen after the diffy is back in the cat.

Them axles are heavy......and just adds unwanted weight while handling the diffy.....
 

Snowy Rivers

Well-known member
Got the diffy back apart now.

Modified bearings pulled off and things are ready for the new bearings to go on.

Wiped the bolt bosses in the case down with a good de-greasing solvent as well as the washers.

Added some silicone to the side of the washer that goes against the case and snugged things up with some bolts and nuts.

By tomorrow these bad boys will be STUCK to the case well.

Then it's just a matter of installing the new bearings onto the carrier and dropping the assembly into the case....the misery of fooling with the loose washers down in the case will hopefully not be an issue.

The top 3 bolts are pretty easy to deal with.....as a hand can reach in there.

The bottom nuts can be inserted into the box wrench and Gorilla tape applied to the outside to hold things until the bolt is threaded in a bit.....


So for this afternoon....Chill time....
 

Snowy Rivers

Well-known member
Hmmmm

I did not put the pix in...

PIX
 

Attachments

  • Diffy finalassembly4.jpg
    Diffy finalassembly4.jpg
    241.8 KB · Views: 100
  • Diffy finalassembly3.jpg
    Diffy finalassembly3.jpg
    300 KB · Views: 98
  • Diffy finalassembly1.jpg
    Diffy finalassembly1.jpg
    179.7 KB · Views: 101
  • Diffy finalassembly2.jpg
    Diffy finalassembly2.jpg
    264 KB · Views: 97

Snowy Rivers

Well-known member
OK TROOPS

Time for truth on this bad boy........

Got out before the sun was beating down on the slab......

Some pics of things.

For anyone who has not done one of these gear boxes before...some things to keep in mind when you work on them.

Mark everything as to where it came from....Positions of shims and such is paramount.

If it is just a re-bearing, band and seal job everything can go right back in without any hastle....just mark it....

Words like....
Gently
With care
Patience
Cleanliness....are all ones to keep in mind.

Rarely will a big azz club be needed.....RARELY.

Installing roller/ball bearings is NOT a job for a big club....

HEAT IS YOUR FRIEND

Warm up bearings until they are hot enough that you do not want to touch them....A propane torch in moderate weather is all that's needed (Likely a minute is plenty) NO BLUE COLOR ON THE BEARINGS....WAAAAAAAY TOO HOT.

Just hot enough that your grubby's will not touch them.

Good leather hand shoes and carefully slip the bearing onto the journal...PLOP

NOW you will notice the 5 pound club and a piece of pipe.

The pipe fits over the journal and hits ONLY the inner race..

In the event things stick.....QUICK....BLAM...GITTERDOWN WHILE ITS HOT..

The size difference between the bearing journal and the ID of the bearing is between .0003" and .0009" (3/10 to 9/10 of a thousandth) Not much...But handling the job wrong can reduce bearing life A LOT......

OK
Bearings on and N11 nuts tightened up well, lock tabs bent over.....

Band ends strapped together with big zip tie......

Chain installed.....
Li'll Red called up to do the lifting.

Carrier in the case.

Centering pipes and the drop boxes in place.

Custom jacks in place and adjusted up close.

The little 2 pound dead blow hammer at the ready. (Harbor freight item)

Tap tap tap "Gently" to get the drop boxes onto the bearings.

As the boxes get well onto the carrier bearings .....insert the box machined hub into the main case and more tap tap....Get one top bolt in to hold the drop box that is partially in the case.....do the other side.

Each jack can be adjusted as needed with a large screw driver to put things spot on......NO NEED FOR BIG BLOCKS OF WOOD AND BAD AZZ HAMMERS...

That stuff breaks chit is all....and then costs $$$$$$$


Boxes installed all the way.....
Careful inspection reveals that the washers are still nice and snug where they need to be


Just and FYI
After the silicone has cured (Overnight) DO NOT TAP THE BOLTS OUT.

Remove the nuts and unscrew the temporary bolts..

Screw in the original bolts GENTLY and then add GORILLA TAPE to the box wrench to hold the nut in place until the bolt is threaded into the nut.

LIFE IS GOOD.

Bottom two bolts first.....then the next two

The three bolts and washers on top can be accessed easily and WITH CARE to get the washers and nuts in place.

Snug things up....then tighten down the entire group of 7 on each side.

So...After the case was assembled...it was getting hotter than BILLY HELL out on the slab and this old critter was soaked with sweat....

Put the stuff inside and came in to relax until Old Sol moves over behind the trees this afternoon.

All in all...took me about 2 hours to get the bearings in place, N11 NUTS TIGHT and the locks set......then the carrier set into the main case with the drop boxes in place and held firm...In there somewhere we had breakfast.....

Man that assembly turns free.....Took a 5 foot bar on the pinion when I got the cat.....:thumbup:


Life is good....

Later I will nurse the bolts back into the drop boxes where they hold things to the main case......
 

Attachments

  • Diffy finalprep7.jpg
    Diffy finalprep7.jpg
    415.1 KB · Views: 80
  • Diffy lasttime3.jpg
    Diffy lasttime3.jpg
    456.6 KB · Views: 80
  • Diffy lasttime2.jpg
    Diffy lasttime2.jpg
    549.4 KB · Views: 74
  • Diffylast time1.jpg
    Diffylast time1.jpg
    464 KB · Views: 82
  • Diffy finalprep6.jpg
    Diffy finalprep6.jpg
    468.6 KB · Views: 82
  • Diffy finalprep5.jpg
    Diffy finalprep5.jpg
    304.4 KB · Views: 73
  • Diffy finalprep4.jpg
    Diffy finalprep4.jpg
    491 KB · Views: 77
  • Diffy finalprep3.jpg
    Diffy finalprep3.jpg
    371.5 KB · Views: 80
  • Diffy finalprep2.jpg
    Diffy finalprep2.jpg
    359.4 KB · Views: 83
  • Diffy final prep1.jpg
    Diffy final prep1.jpg
    272.2 KB · Views: 81
  • Diffy lastime4.jpg
    Diffy lastime4.jpg
    375.5 KB · Views: 82
  • Diffy lasttime5.jpg
    Diffy lasttime5.jpg
    456.2 KB · Views: 80
  • Diffy lasttime6.jpg
    Diffy lasttime6.jpg
    297.3 KB · Views: 79
  • Diffy lastime7.jpg
    Diffy lastime7.jpg
    293.8 KB · Views: 83
  • Diffy lasttime8.jpg
    Diffy lasttime8.jpg
    255.9 KB · Views: 82
Top