• Please be sure to read the rules and adhere to them. Some banned members have complained that they are not spammers. But they spammed us. Some even tried to redirect our members to other forums. Duh. Be smart. Read the rules and adhere to them and we will all get along just fine. Cheers. :beer: Link to the rules: https://www.forumsforums.com/threads/forum-rules-info.2974/

Pontoon help and recommendations for 1962 Tucker 443

Mill666er

Active member
SUPER Site Supporter
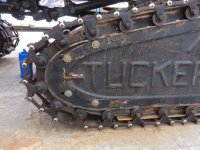
Dave, after going back through your post I have been pulling out a single grouser at a time for straightening because my pins look worse than yours and grouser material is paper thin because of the oblong holes. I bet if you could just replace all of the pins you could shorten the length of the track by a half link easily. The pins on the track I am working on now have .010" wear at the roller and .040" wear at the grouser. .040" x 62 pins is 2.5" that can be taken out. The half link takes up 1.5" of that leaving another 1" of slop. I think I should be able to get that 1" out of correctly radius adjusters.

And now I'm looking at the wear on my 5th wheel plate and the bronze sliders wearing into the aluminum...Thanks Brian.

My guides appear to be 1/4 x 3/4 but I seem to have 2 different sized rollers, 2.130" and 2.180", those are 2 new ones out of the box of spares and confirmed on the track I am working on.
 

Mill666er

Active member
SUPER Site Supporter
Rob's thinking "What have I gotten into???" :doh::yum:


And to think I was putting off punching holes in belting for the tracks on my 542 thinking this was going to be quicker. Took the 542 out last weekend and broke a couple of the front belts and had a hell of a time getting out of the backwoods. Belt broke and the grouser took a dive down between the front ice breaker wheel and the hyfax.... Now I am debating to bring that project into the shop so I can get something back out into the snow by the end of the year.
 

sno-drifter

Bronze Member
GOLD Site Supporter
Keep in mind that the half link's purpose is to reduce the wear on the drive sprocket teeth. Every time it passes the drive sprocket, it shifts the load to the "in between" tooth set.

Tracks get longer/loose from several wear points: rail wear, roller diameter wear, ID grouser wear, and OD link pin wear.
 

Mill666er

Active member
SUPER Site Supporter
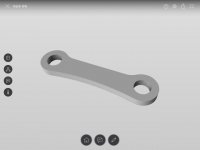
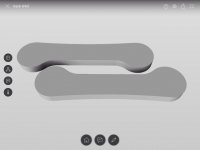
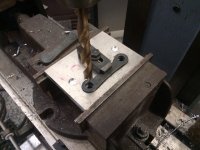
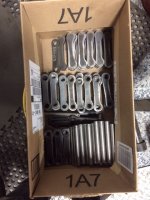
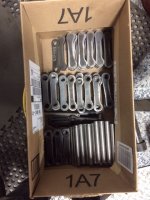
I'm sure this is taught in the pontoon rehab class but I learned that you can't just cut off the old pins and drill out the link plates to reuse them with new pins. I burned up a quality 1/2" Drill bit getting two of them drilled out because they are like glass at the weld, so on to plan B. I drew up a new link plate and started burning new ones out of 1/4" plate on the plasma table. I was hoping to cut the 1/2" holes on the plasma but after a couple I decided it was better to drill them on the mill. I Hope to get 128 new links built this weekend to install on the 2 tracks that won't have the half links. The new pins should shorten the total track length by about 3"

ImageUploadedByTapatalk1451599396.128720.jpg

ImageUploadedByTapatalk1451599377.484539.jpg

Only 100 more to cut, cycle time for a pair is less than a minute.

ImageUploadedByTapatalk1451599489.076616.jpg

Milled out a pocket in the aluminum to self register the plate for the two 1/2" holes

ImageUploadedByTapatalk1451599548.747090.jpg
 

loggah

Active member
SUPER Site Supporter
Its pretty easy to make up a tool to bend the bearing mounts into alignment right on the pontoons. Don
 

Track Addict

Bronze Member
GOLD Site Supporter
Nice job. Looks like you have the production line down pat! Eager to see the final product. What size pin and what are you using for material?
 

Mill666er

Active member
SUPER Site Supporter
Just using mild steel for the plate and 1/2" cold rolled 1018 rod for the pins. I may just see how they wear and upgrade the the pins to 4140 on the second set if that is an issue.
 

Track Addict

Bronze Member
GOLD Site Supporter
Figure out a cost and profit. You might be in a new business selling kits some welding required!

Would think you want the pins softer than grousers so it wears first. Any idea what the grouser material is?
 

Mill666er

Active member
SUPER Site Supporter
Any idea what the grouser material is?


Heat treated cast iron I believe. In 52 years the pins have worn .040-060 and the grouser holes about .015-.020. I thought about making the new links .030 narrower to make up for the grouser wear but decided to reuse the stock removable link plates.
 

MNoutdoors RIP

Gone But Not Forgotten
GOLD Site Supporter
Most likely ductal iron ( looks like cast ) but is weldable and can be heat treated
And will not fracture like cast. We have expermented with this material it holds up very well
 
Last edited:

Greg364

Junior Member
SUPER Site Supporter
I was thinking of doing the same thing on my Plasma cam table, but I have a pretty good laser guy close by. I was thinking of having him laser the holes a bit undersize and then ream to size, thinking that would be less work. If anyone is interested a could get a cost per piece. Do you have a DXF file for these?
 

Mill666er

Active member
SUPER Site Supporter
I made the drawing in Autodesk Fusion 360 which is a free high end CAD and CAM solution. It does not let me export as DXF, only IGES, SAT, SMT, and STEP. I have been watching the Autodesk YouTube tutorials as well as those posted by NYC CNC to learn the basics.

I think a laser cut 1/2" hole is plenty clean enough for the welded link as long as the pins are held in a jig when welded. I would re-use the old removable link plate on the inside.
 

Mill666er

Active member
SUPER Site Supporter
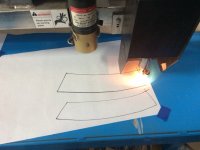
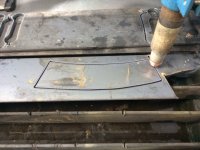
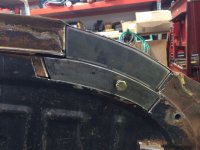
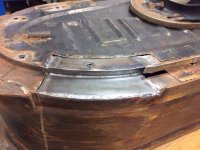
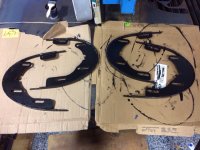
Cleaned up the hole in the pontoon, made a cardboard pattern, traced it onto a piece of white paper with a black sharpie and used the tracer on the plasma table to cut the patches.

ImageUploadedByTapatalk1452230593.878994.jpg

ImageUploadedByTapatalk1452230613.411722.jpg

ImageUploadedByTapatalk1452230635.097218.jpg

ImageUploadedByTapatalk1452230667.182895.jpg
 

DAVENET

Bronze Member
GOLD Site Supporter
I would re-use the old removable link plate on the inside.

How worn are your removable links? That part seems to get as much wear as any other part of the equation since it's not welded and is trying to keep the end of the pins in alignment. Typically no grease either. Every one of mine are race tracks. :doh:
 

Greg364

Junior Member
SUPER Site Supporter
I made the drawing in Autodesk Fusion 360 which is a free high end CAD and CAM solution. It does not let me export as DXF, only IGES, SAT, SMT, and STEP. I have been watching the Autodesk YouTube tutorials as well as those posted by NYC CNC to learn the basics.

I think a laser cut 1/2" hole is plenty clean enough for the welded link as long as the pins are held in a jig when welded. I would re-use the old removable link plate on the inside.

I think so too, problem on my tracks, is they are the older non adjustable and almost all the links on both sides are bent from adjustment and plenty worn. Maybe just shrink up the hole on half and cut the rest to 1/2 and weld in a jig like you said. I have a 423 so at least I only have 2 pontoons at this point, but I have heard Tuckers tend to multiply.lol
 

Track Addict

Bronze Member
GOLD Site Supporter
Are you making new rails as well on the pontoons?

Slowly I am being shamed into track and roller restoration. Been designing a jig in my head to bend and weld the plow steel to the adjusters. Curious as to how easy it will bend. I think 1/4 x 1" for the A models or 1/4 x 3/4" on yours should work. That and some new rollers.
 

Mill666er

Active member
SUPER Site Supporter
How worn are your removable links?


Thanks for bringing that up. I noticed the holes looked round so I didn't bother to check them. Measured a small sample today and found them to be about .025" out of round. If I am going to make new removable links I may as well drill the holes closer together to make up for the wear in the grousers which will get me back to the 3" factory pitch.
 

Mill666er

Active member
SUPER Site Supporter
Are you making new rails as well on the pontoons?


The rails on the pontoons still measure roughly 1/4" x 3/4" and are in good shape. I will be making new adjusters with new rails but haven't found a supplier of 1/4 x 3/4 abrasion resistant flat bar. I am going to make the prototype with some spring steel I have. I will make the adjuster rails long and then trim them once I get the track lengths figured out.
 

Mill666er

Active member
SUPER Site Supporter
1/4 x 1" is the smallest material I have found which is sold as AR (abrasion resistant) wear strip or cutting edge. I will probably buy a 2" strip and cut it in half and use it with the cut edge facing in.
 

sno-drifter

Bronze Member
GOLD Site Supporter
1/4 x 1" is the smallest material I have found which is sold as AR (abrasion resistant) wear strip or cutting edge. I will probably buy a 2" strip and cut it in half and use it with the cut edge facing in.

I have the one inch plow steel water cut to 3/4 for the machines which use it.
 

Mill666er

Active member
SUPER Site Supporter
Yes, I have been told that one field trip to Portland would certainly solve all of my dilemmas. Any thought to setting up a pontoon parts counter at the Snow Cat gatherings to see what aftermarket goodies are already available?
 

Pontoon Princess

Cattitute
GOLD Site Supporter
again, you are more than welcome to visit tuckerville, there are so many secrets to the pontoons to share, happy to help, just not much can be done, if you are one grouser short.
 

Mill666er

Active member
SUPER Site Supporter
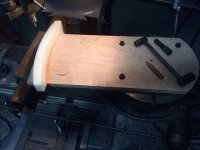
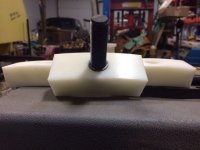
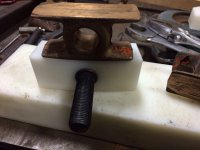
Switched gears and milled up the rear sliders out of UHMW to replaced the worn bronze ones. A delicate setup to get the correct radius on the rotary table but it worked great making light cuts.

ImageUploadedByTapatalk1452529121.725712.jpg

ImageUploadedByTapatalk1452529204.815265.jpg

ImageUploadedByTapatalk1452529233.364947.jpg
 

Track Addict

Bronze Member
GOLD Site Supporter
Nice job matching the curve. Don't think you will have and issue either way. Only a few miles of testing on my UHMW and not a sign of any wear. If you change the setup a bit you can swap the blocks while keeping in service.

My bolts were the same initially. Thread in from the channel side. I switched it so I could thread in from outside and not have to dismantle when and if they wear. Tested a hot swap worked great. Jack and a few minutes.

Took a grade 8 flange bolt same turn table thread. Turned the end threads off width of the block which ended up just under 9/16. Was able to thread it in and self press into the block.

Of course if it never wears out moot point.
 

Attachments

  • UHMW.jpg
    UHMW.jpg
    91.6 KB · Views: 246

Mill666er

Active member
SUPER Site Supporter
The '81 543 uses the UHMW but the blocks have about 4 times the surface area. I tried to put it back together with my larger blocks but ran into interference on the back block and the frame mounting ear, looks like I will need to cut about 1/4" off of that one. Your idea of 'hot swapping' would have eliminated that interference issue since I could slide the block in after the assembly.
 

Mill666er

Active member
SUPER Site Supporter
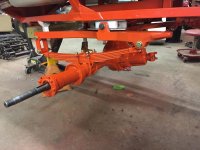
I got the bare minimum done to get it on the road to Leavenworth. I cut out the bad front lower corners on the rear pontoons and made the new adjusters. With the proper radius on the adjusters and 1/2 links installed the tracks tightened up. The front pontoons are in better shape but have been patched several times at the lower front corners. I made up and replaced enough of the links on the front to give me a little adjustment and to shorten them to the same length as the rears with the half links. Guess I forgot to take photos of the repaired pontoons before installing the adjusters.

ImageUploadedByTapatalk1457558661.299149.jpg

ImageUploadedByTapatalk1457558695.745463.jpg

I had the tracks tight after greasing when I left the shop but had to tighten all four after running half way up the hill. I suspect that once the grease got pushed out of the rollers it loosened everything up.

The first washout I crossed broke off the welded ear on one of the grousers, didn't think that was going to work. Have since TIG braised it back on with silicon bronze and tried to break it off in the press, so far so good. I also lost another roller on my long run on the pavement back to the truck as well as a couple bolts out of the front track adjusters. Most all of the lock washers broke when I loosened the bolts to tighten the tracks, replaced all hardware with grade 5 when I got back.

I have some of the parts cut for more links but think I will wait until I get some harder pin material. Running the plasma in the shop without an exhaust fan makes a mess so I will hold off making more until I can move the operation outside.

ImageUploadedByTapatalk1457559471.832127.jpg

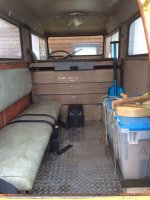
I dropped in a piece of aluminum diamond plate on the floor in the back and installed an auxiliary heater.

ImageUploadedByTapatalk1457560411.035383.jpg

Next will be pulling the transfer case and fix the leaking seals. It looks as though someone just put seals and bands on the shafts but the grease runs out as fast as I can't put it in.
 

Track Addict

Bronze Member
GOLD Site Supporter
Rust prevention system! Nice glad you got some use out of it. 79 degrees today back east!

The grease slack makes sense I experienced a similar phenomenon . Now I know why.

Adjust then grease is what I will do in the future .

Good luck
 

DAVENET

Bronze Member
GOLD Site Supporter
The first washout I crossed broke off the welded ear on one of the grousers, didn't think that was going to work. Have since TIG braised it back on with silicon bronze and tried to break it off in the press, so far so good.

Rob, What do you mean by 'ear'?

Also, this:


:w00t2::clap::w00t2::clap::w00t2::clap:
 

Attachments

  • attachment.jpg
    attachment.jpg
    355.5 KB · Views: 137
Top