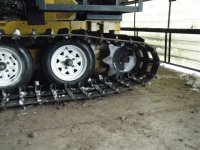
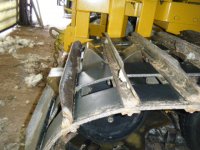
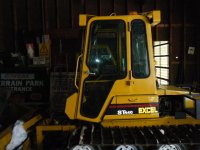
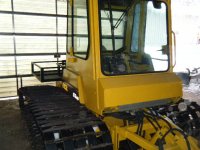
I have a Excell Hustler Snowcat that was in need of new sprockets. I could not find replacements, so I decided to make my own. Just put them on the machine a week ago. So far they are working great. The photos show the process I used. I am happy to provide more information if anyone is interested in making a set.
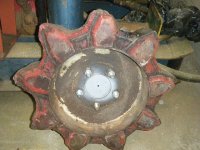
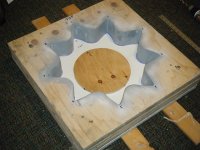
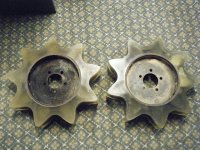
1. Old sprockets. I called Excell and they were nice enough to send me the drawings and specs on the sprockets. I scanned the drawing they sent me and cut a profile of the sprocket in actual size (14") on a sign machine. Then transferred the sprocket pattern to 3/4 inch plywood. Using plywood I built the mold that I would later cast the sprocket in. I used bondo to create a smooth finnish in the molds.
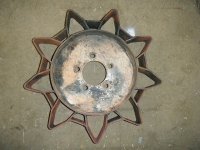
2.I burnt the old plastic off of the cores of the sprockets, then cleaned them up to use in the molds.
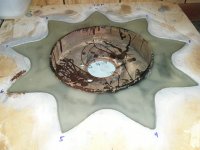
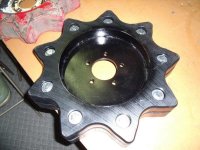
3. The material I used to cast the sprockets with was expensive....around $120 per gallon. I used 5 Gallons for the two sprockets. I purchased it from a chemical company in Chicago. They matched the specs. with the specs I got from Excell. I had to build a small vacuum chamber to de-gas the chemicals before pouring. This removes most of the air bubbles from the pour. The material sets up really fast, so I had to two pour per sprocket.
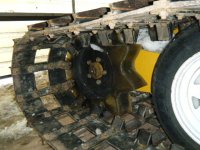
The final sprockets turned out pretty good. I am happy with the results and so far they are working really well. I thought about adding color to the chemical mix, but decided to keep my cost as low as possible. I estimate that I have 60-80 hours in the whole process and around $600 in materials.......
If anyone has question or want more information....just PM me.
1. Old sprockets. I called Excell and they were nice enough to send me the drawings and specs on the sprockets. I scanned the drawing they sent me and cut a profile of the sprocket in actual size (14") on a sign machine. Then transferred the sprocket pattern to 3/4 inch plywood. Using plywood I built the mold that I would later cast the sprocket in. I used bondo to create a smooth finnish in the molds.
2.I burnt the old plastic off of the cores of the sprockets, then cleaned them up to use in the molds.
3. The material I used to cast the sprockets with was expensive....around $120 per gallon. I used 5 Gallons for the two sprockets. I purchased it from a chemical company in Chicago. They matched the specs. with the specs I got from Excell. I had to build a small vacuum chamber to de-gas the chemicals before pouring. This removes most of the air bubbles from the pour. The material sets up really fast, so I had to two pour per sprocket.
The final sprockets turned out pretty good. I am happy with the results and so far they are working really well. I thought about adding color to the chemical mix, but decided to keep my cost as low as possible. I estimate that I have 60-80 hours in the whole process and around $600 in materials.......
If anyone has question or want more information....just PM me.