• Please be sure to read the rules and adhere to them. Some banned members have complained that they are not spammers. But they spammed us. Some even tried to redirect our members to other forums. Duh. Be smart. Read the rules and adhere to them and we will all get along just fine. Cheers. :beer: Link to the rules: https://www.forumsforums.com/threads/forum-rules-info.2974/

ST4 back from the dead

Snowy Rivers

Well-known member
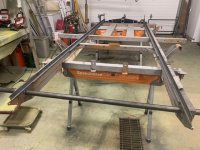
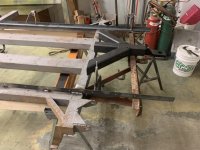
Yes....The belt drives need to be smooth for sure...

How difficult is it to change the belt once things are together ?????
 

Puckle

Well-known member
SUPER Site Supporter
dead simple really, just need to slacken it, but the bottom tensioning nut is difficult to get at - needs a special cranked spanner.
 

Puckle

Well-known member
SUPER Site Supporter
Assembled the variator linkages today, I have liberally coated the pins and bushes with Tef-Gel to prevent future seizure - it is great stuff I have used extensively on my boat, excellent for preventing galvanic corrosion, and galling, with stainless steel, so I have also coated all the s s fasteners securing the engine tin ware.
Most of the pins are secured with new stainless steel split pins but I have used "R" pins for the top arm so it is easier to remove the variator discs if I need access to starter motor etc.


20201117_111807.jpg
 

Puckle

Well-known member
SUPER Site Supporter
Engine back in now and new greasing pipes sorted, also new brake fluid reservoir fitted - the old one was serviceable but I couldn't find a new cap so easier to get complete new one - better really because you can see the level at a glance.
I noticed when re-fitting the variator linkages the right hand arms were not raising level so just pushing on one side of the bearing carrier - it seems the side of the pressure plate ST7016 had broken off at some point and has not been welded on properly - you can see it looks a bit skewed in the photo above so I will need to strip that down again and re-weld it. Also on the setback front, when I came to order another 7 of the T539 tyres they are all out of stock absolutely everywhere and I couldn't get any - I am having to use Trelleborg T991 4.00-4 instead - these are still 6 ply so should be as robust but are a bit bigger - 113 wide x 312 diameter as opposed to the 98x304 of the T539 - hope they don't foul the guides


20201120_091057.jpg
20201120_161007.jpg
 

Cidertom

Chionophile
GOLD Site Supporter
dead simple really, just need to slacken it, but the bottom tensioning nut is difficult to get at - needs a special cranked spanner.
Or if you want to stand on your head, you can use the access door from inside the cab with a normal wrench. What I've found is for simple belt on -off. I don't have to touch the bottom nut. I just use the top. adjusting tension as the belt stretches you have to do both. But, the newer belts stretch much less than the OEM so it's not that common to do. When I rebuilt mine, I used reflective tape on the output gears and a photo tachometer to get the speed even from left to right. The speed is visibly different in the video I did.
 

Puckle

Well-known member
SUPER Site Supporter
Ha Ha, might do a few local shows, but hope to use it as it was meant - may even bring it over to the states as that seems to be one of the few places left where you can - it's getting very difficult in the UK to legally do any off-roading at all, most of the miles of green lanes we have are now closed to vehicles and I hear a lot of places in Europe are going the same way.
 

Puckle

Well-known member
SUPER Site Supporter
Photo comparing the various tyres I am using - left to right is original snow trac, Trelleborg T539, solid fork lift for second bogie position and Trelleborg T991. the T991's fit in the tyre guides ok and are probably better than the T539 in the end as they have extra ribbing on the sidewall which will help resist wear from the guides - I'll see how they all do when I've put a few miles on it.

20201123_130702.jpg
 

Puckle

Well-known member
SUPER Site Supporter
I have also started disc brake conversion - I know most folk think you don't need brakes that much on them anyway, but I am doing this partially to get a better hand brake system which I can use as emergency steering - If you remember at the start of this the Variator spline ST7210 was broken - if this happened out in the wilds you would have no steering and it would be an expensive part to carry around as an emergency spare.
I took the disks and calipers of the rear of a mk4 Volkswagen golf - these have the handbrake system built in and it uses the same pads.
The disc carrier is a top hat section fabricated out of 10mm plate - it bolts on to the chain wheel using the same holes as the old drums were riveted to and the caliper holder is fabricated from thick wall tube - it floats on two 62x30x16 bearings the same as the original brake shoe spider but instead of extending down through the skid pan I will have a torque reaction bar going forward to the bumper - this is a 60x30x3 box section rather than the hollow channel original so should be strong enough.
20201128_095917.jpg
20201128_095930.jpg
20201130_142030.jpg
20201130_142039.jpg
20201130_142102.jpg
20201130_142112.jpg
 

Moosemeat

Member
GOLD Site Supporter
Puckle, I cant figure out if you're an inspiration or a curse! Now I have mine reduced to cutoff nots and bolts with every machine shop in town working on parts. Charge accounts at all the steel shops and back to practicing on the Mig and Tig machines. I'll have to go with Inspiration. You've done an amazing job sir.
 

Puckle

Well-known member
SUPER Site Supporter
Thanks Moosemeat, good luck with your resto, hope you find it as rewarding as I do.
 

Puckle

Well-known member
SUPER Site Supporter
Been a bit slow over Christmas but managed to get a few things done. Finished the drag link for the brakes, sorted the wiring (see circuit diag attached), made up some 60mm heater connection tubes, converted heater to cable operation and added some louvers to the undertray - these were crudely bent with pliers but worked well enough for an undertray.
I included a new fuse box at the battery, as some of the original wires were not protected at all, and did most of the re-wiring in multi-core cable that I already had in the shop as it worked out neater than trying to bundle a load of single wires together.
20201211_120252.jpg
20201215_085002.jpg
20201215_085042.jpg
20201221_151931.jpg
20201231_121708.jpg
20201231_122901.jpg
20201231_120442.jpg
20210102_175011.jpg
 

Attachments

  • Wiring Diagram Model (1).pdf
    108.6 KB · Views: 156

Moosemeat

Member
GOLD Site Supporter
Can I ask if you installed an extra brace in front of the original to handle any torque issues with the disc brakes? My drive splines are worn out and I will have to go to discs and build a new drive spline without the brake drum. I really like the drag links. Thanks,
 

Puckle

Well-known member
SUPER Site Supporter
Hi Moosemeat, yes, the drag link handles the torque from the brakes rather than an extension of the brake shoe holder poking through the undertray as original - mine had inboard drums for brakes, but the old style outboard drum with splines is still there with no shoes fitted - one of them has had a new splined center fitted that could be what you need to do. Difficult to see in the photo's below but that steel spider is riveted to the old drum behind it (the square head is the old brake adjustment access) and has a new splined center welded to it - the center of the old drum has been machined out. This was all done before I had the machine so not sure if the spline was taken from production item or made to order.
20210102_220556.jpg
20210102_220624.jpg
 

Moosemeat

Member
GOLD Site Supporter
I can find the right size spline and was thinking I would weld it to a flat plate. Then weld the attachments for the drive sprockets. that would leave me with no brakes. So next comes the interest in Disc brakes like yours. I was thinking an extra cross member in front of the engine mount but I like your fix better. As you can see, I can go any direction at this stage. Thanks for the pictures.
 

Attachments

  • 27117AC1-4CAB-44F5-9081-516D52F4FA21.jpeg
    27117AC1-4CAB-44F5-9081-516D52F4FA21.jpeg
    117 KB · Views: 137
  • 135833D4-919B-4E78-8AC2-2B662BAA1CE2.jpeg
    135833D4-919B-4E78-8AC2-2B662BAA1CE2.jpeg
    113.1 KB · Views: 136

Puckle

Well-known member
SUPER Site Supporter
Very pleased with how mine turned out - work really well and the 60x40 box section bumper seems to handle the torque reaction no problem.
 

Puckle

Well-known member
SUPER Site Supporter
That's the outside pretty much complete, thought I'd take advantage of a bit of winter sunshine to take a few pics. been round the field a few times and it drives great - much better with the 16t sprocket - only problem now is at high speed (a dizzy 24mph) the tracks are hitting the bottom of the bolts under the front wing (tracks are tensioned correctly) so I think I will add a nylon runner under there just to stop them catching.
DSC_3964.JPG
20210122_100725.jpg
DSC_3961.JPG
20210122_101642.jpg
20210122_101505.jpg
20210122_100742.jpg
 

Moosemeat

Member
GOLD Site Supporter
I don't see any Phillips Head screws on your project. After chiseling, drilling, cutting and grinding every Phillips head screw off my machine, I am following in your foot steps! We have a beautiful apartment above the shop here in Homer if you miss working on a Snow Trac.
 

Puckle

Well-known member
SUPER Site Supporter
Ha Ha yes, pain in the neck all those screws, the socket screws are much better. It is snowing here at the moment but were not likely to get much - plenty up in Scotland though if we ever get out of lockdown.
 

Puckle

Well-known member
SUPER Site Supporter
Further to my observation that the tracks were hitting the underside of the wings, I notice that early machines have the idler wheel on the back of the cross member but later machines have them forward - anyone know if this was an improvement on the earlier design and worth retro fitting or if it was to do with fitting the larger front wheel? It would not be easy to do on my machine as it has a bracing strut on the front side of the cross member.
 

Moosemeat

Member
GOLD Site Supporter
Hi Puckle, All I have to offer are questions. So, I installed new rails on top of the frame that the body bolts too. I'm 1/16th off. The right side is ahead of the left. I marked the frame before I tacked them on and was pretty sure I got them in the original place. The holes in the body are hogged out and I cant tell if the body will be racked forward on one side or if thats the way it was originally put together. I was pleased to find the rails were obviously gang drilled together so I was able to use the right as a template for the left etc. The holes are correctly spaced. What was your experience when putting the body back on after all the re-building and new metal? Kinda driving me crazy as I want it to be as perfect as I can. I almost feel like I should try the fit before I finish welding the rails? Awe, I think I know the answer.
 
Top