Looks awesome. I'll be following this. Always loved the look of a snowtrac.

-
Please be sure to read the rules and adhere to them. Some banned members have complained that they are not spammers. But they spammed us. Some even tried to redirect our members to other forums. Duh. Be smart. Read the rules and adhere to them and we will all get along just fine. Cheers. :beer: Link to the rules: https://www.forumsforums.com/threads/forum-rules-info.2974/
You are using an out of date browser. It may not display this or other websites correctly.
You should upgrade or use an alternative browser.
You should upgrade or use an alternative browser.
ST4 back from the dead
- Thread starter Puckle
- Start date
Thanks for the kind words guys, glad you like it.
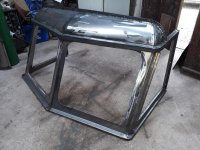
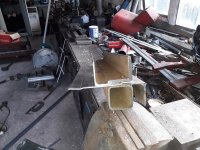
A bit more progress today, I have made the side windows and the angle iron frames for the top of the windscreen - I bent the radius around a suitable sized pulley using lots of heat.
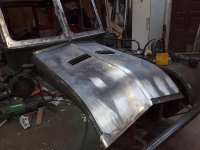
I have also started on the most difficult panel, the front roof section - this has compound curves to be fabricated, again I've found hammering it around the domed head of a nitrogen gas bottle seems to be about the right profile.
A bit more progress today, I have made the side windows and the angle iron frames for the top of the windscreen - I bent the radius around a suitable sized pulley using lots of heat.
I have also started on the most difficult panel, the front roof section - this has compound curves to be fabricated, again I've found hammering it around the domed head of a nitrogen gas bottle seems to be about the right profile.
Attachments

Snowy Rivers
Well-known member
Great fabrication......
Kitty will be better than new when you are done...
Love the great pix
Kitty will be better than new when you are done...
Love the great pix

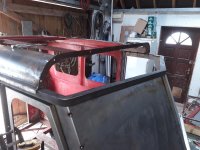
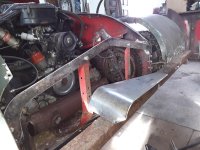
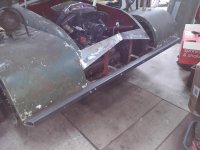
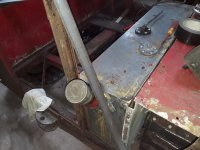
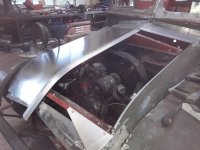
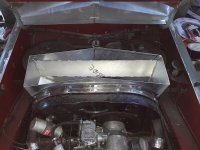
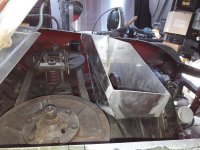
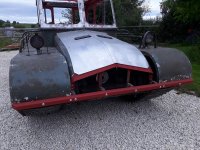
Finished the slam plate, had to straighten the bumper brackets and make new bumper to ensure everything lined up correctly first.
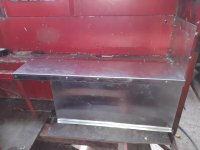
Also been making new fuel tank - I know many people don't like it inside the cabin so I will cut the floor round it and make a partition wall so it is sealed in - any leaks would then be to outside. I have had to make it narrower to be able to do that but it is taller and longer so still holds about 10 gallons which should be enough.
Also been making new fuel tank - I know many people don't like it inside the cabin so I will cut the floor round it and make a partition wall so it is sealed in - any leaks would then be to outside. I have had to make it narrower to be able to do that but it is taller and longer so still holds about 10 gallons which should be enough.
Attachments

Snowy Rivers
Well-known member
You are really getting this little cat into shape.
Be all ready for next winter....?????
Be all ready for next winter....?????
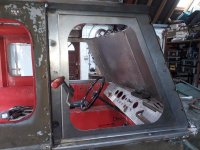
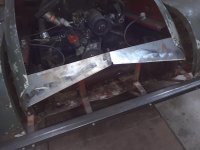
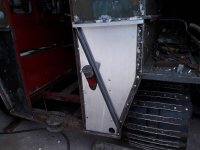
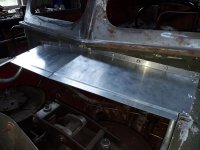
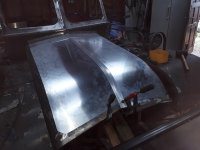
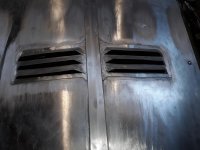
I have got the fuel tank sealed off now and the new rear panel is in, time to start the bodywork at the front. I made a joggling jig for the press brake and used it to do the step down on the new scuttle panel, I'm now sorting new bonnet panels - not sure what to do about the louver's - it always distorts the panel when you try and press them into a flat sheet so I may cut out the old ones and rivet them in.
Attachments


Snowy Rivers
Well-known member
Saving the old louvers and riveting them in will work fine.
If you can, do it so it looks like it was supposed to be that way
Looking good.

If you can, do it so it looks like it was supposed to be that way
Looking good.
Snowy Rivers
Well-known member
Fantastic job of fitting the louvers into the hood.
Great work...
Great work...
They are glued with JB weld and flush riveted - should blend in ok once painted.
Fantastic job of fitting the louvers into the hood.
Great work...


vintagebike
Well-known member
Flush head river screws
We will be using a bunch of these stainless rivet screws to attach new aluminum skin to our 1949 ‘Sophie’ Tucker

We will be using a bunch of these stainless rivet screws to attach new aluminum skin to our 1949 ‘Sophie’ Tucker
not seen those, presumably they have a nut on the back and there is enough grip from the serrations under the flange to nip them up. I used soft aluminium countersunk rivets which only need a couple of taps with a small hammer to secure them and the heads can easily be filed/sanded flush.
I do a lot of sailing and have always been a bit wary of stainless and aluminium - I use chromate paste to isolate any contact between the two or you get loads of corrosion but perhaps on dry land it is not so much of an issue?
I do a lot of sailing and have always been a bit wary of stainless and aluminium - I use chromate paste to isolate any contact between the two or you get loads of corrosion but perhaps on dry land it is not so much of an issue?
vintagebike
Well-known member
Yep, rubber tape between the alu and the steel frame, chromate paste and paint are in the plan. Idaho treating the roads with calcium chloride is a real problem.
Snowy Rivers
Well-known member
Teach the children how to drive on the slick chit and NOT DUMP THE CAL CLOR ALL OVER THE ROADS.
Between that crap and the Salt....not sure which is worse.....
Between that crap and the Salt....not sure which is worse.....
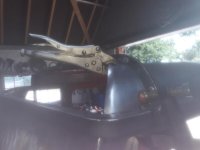
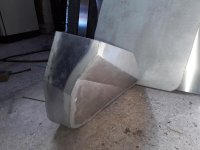
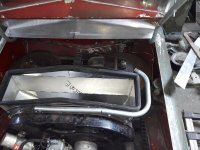
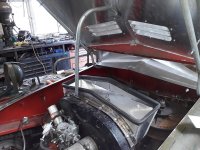
New aluminium air horn fabb'd up today - trickier than I would have thought to get all the angles right - cardboard templates helped.
Attachments


vintagebike
Well-known member
Taking orders for air horns? 
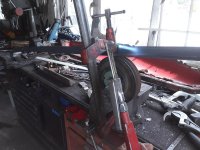
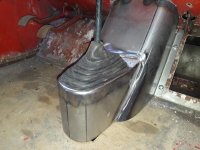
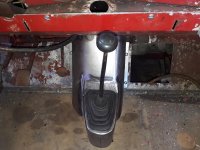
Bonnet stay and gearbox cover today - I've modified the gearbox cover so that it will take a VW Golf gear stick boot - look a lot better than the standard bug one.
Attachments

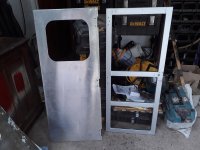
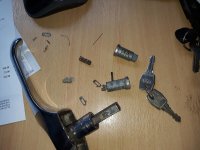
Slow progress now were on to shot blasting and painting, so far only managed back door frame and new slam plate and bumper bar. Also made new door skin and fixed the handle lock - its a vintage ford pop handle for some reason but I managed to find a new barrel on e-bay for a ford Anglia that was similar and re-built my old lock with the new tumblers and springs so it would fit the new keys.
Attachments
Snowy Rivers
Well-known member
Looking great....
Those door locks can really be a pain.....
Those door locks can really be a pain.....